How to Record High-quality Audio on iPhone
98% accurate, real-time transcription in just a few clicks. 58 languages and multiple platforms supported.
So, you’re looking for the best guide to recording audio on your iPhone? Congratulations, you’ve found it!
Whether you’re recording an important meeting, a lecture, a conversation with friends or a lightning bolt idea, this article will get you up and running quickly.
In this article, we’ll cover:
How to use Voice Memos to record and share audio.
The Five best third-party audio recording apps for iPhone.
How to record audio with the Notta.
How to merge and share audio in Notta.
Some common FAQs.
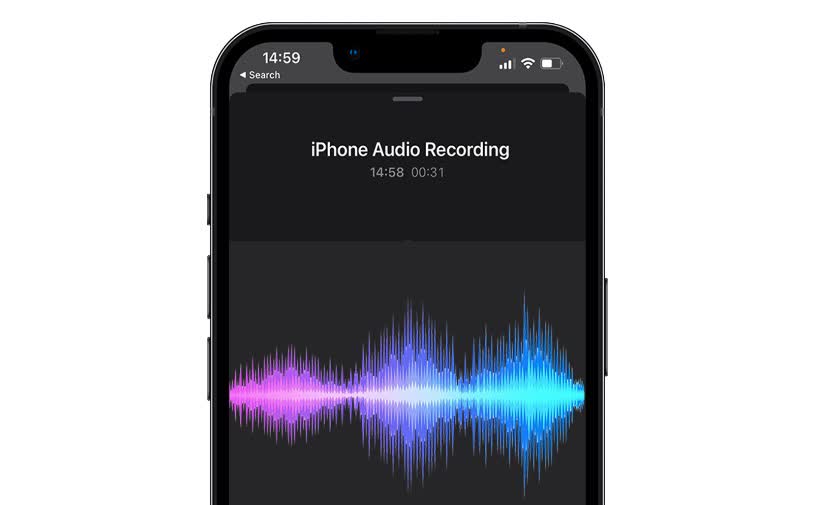
How to record audio on iPhone with the Voice Memos app
Open the app on your device.
To begin recording, press the red ‘Record’ button.
Press the ‘Stop’ or ‘Pause’ button to stop recording.

While the audio is recording, drag the small handle in the middle of the record box to maximise the screen size.
Tap ‘New Recording’ and type a new name to rename the file.
Select the audio in the ‘All Recordings Menu.’ Tap the 3 Elipses circle icon to enter the ‘Edit Recording’ menu.

Editing in Voice Memos
Drag with one finger inside the waveform to scroll through it.
Pinch to Zoom with two fingers to magnify the waveform view.
Select an inset point by tapping inside the waveform and using the ‘Replace’ button to insert new audio.
Tap the ‘Trim’ tool to enter Trim mode. Drag the ‘Yellow Handles’ to select the audio region you want to keep or delete.

Enhance, skip silence & export
Use ‘Skip Silence’ to reduce any background noise or room hum.
Use ‘Enhance’ to remove any passages of quiet or silence from the recording.
Drag the slider between the tortoise and rabbit icons to change the audio playback speed.
Share your recording by tapping the 3 Elipses circle icon and selecting ‘Share.’

How to organize your recordings
Voice Memos lets you organise your recordings into folders and add ‘Favourites’, which make it easier to find them:
To mark a recording as a Favourite:
Go to ‘All Recordings’ and tap the audio file you want to favourite.
Tap the 3 Elipses circle icon and select ‘Favourite’ from the pop-up menu.
Select ‘Favourite’ from the pop-up menu.

To navigate to the Favourites folder, tap the left arrow icon (<) on the top left of the ‘All Recordings’ screen.
Organize your recordings into folders
Tap ‘Edit’ on the ‘All Recordings’ tab.
Select one or more recordings, then tap the ‘Share’ icon on the bottom left.
Select ‘Move to Folder.’ Tap the folder icon on the bottom right of the next screen.
Name it or select it from a folder you previously created.

Additional Voice Memos tips & tricks
Enable lossless recording:
To ensure that Voice Memos records at the maximum resolution of 24-bit/48 kHz.
Head into Settings—>Music—>Audio Quality—>Lossless Audio. Add Voice Memos to Control Centre.
Tap Settings—>Control Centre—> and add it from the More Controls section. Voice Memos will be available in ‘Control Centre’ simply by swiping down from the top right of your screen or (if you have an older iPhone) up from the bottom.
Delete a Voice Memo:
Tap ‘Edit’ on the ‘All Recordings’, select the file, and tap the ‘Trash icon at the bottom right of the screen.
You can recover deleted files in Voice Memos by heading to the ‘Recently Deleted’ folder. Visit the ‘All Recordings’ page. Tap the arrow in the top left corner to arrive at the Voice Memos home screen.

Notta can convert your spoken interviews and conversations into text with 98.86% accuracy in minutes. Focus on conversations, not manual note-taking.
Tips to record conversation on iPhone
Use the built-in microphone on Apple’s EarPods. The EarPods mic is pretty good and will help eliminate much of the background room hum and echo.
Make sure you know where the mic is located on the phone. On iPhone, the mics are at the bottom of the device.
Get close to the sound source, keeping at least a couple of inches away and minimising environmental or background noise.
Consider investing in an external mic to produce professional quality work.
5 Best third-party apps to record audio on iPhone

In addition to Apple’s Voice Memo apps, hundreds of third-party apps will let you record audio on your iPhone. So, whether you want to record a conversation, a meeting, your music ideas or anything else, there’s an app perfectly suited for you.
So here are five of the best to get you started!
1. Voice Record Pro
Best For - Musicians and those looking for FX and lots of export options.

This free recording app is one of the best ways to record audio on your iPhone. With a classic valve amp look, a vast range of input and output options, bookmarks, 15 effects and advanced waveform editing, this is an excellent choice if you’re looking for something with more features than Voice Memos.
Download: Link
2. Hindenburg - Field Recorder
Best For - Journalists and professionals who need a straightforward mobile audio workhorse.

This app is designed with radio journalism in mind, but Hindenburg Field Recorder is perfect for almost any audio recording. Easy to use, with clear metering, built-in compression and straightforward editing, this is an excellent alternative to Voice Memos.
It’s one of the more expensive mobile audio recording apps. But, if you’re looking to record a conversation on the iPhone, it’s a top-notch tool for the job.
Download: Link
3. Voice Recorder & Audio Editor
Best For - Minimalists who want a simple, clean audio & call recorder.

With a distinctly retro feel, this app is super simple to use and carries just enough features to be valuable. Record for as long as you have device storage space and
upload to the cloud. Call recording is well integrated (with a subscription) and allows recording incoming and outgoing calls. The ability to secure recording with a passcode is an excellent security bonus.
Download: Link
4. Evernote
Best For - Office workers, productivity enthusiasts & busy information gatherers.

Evernote is a swiss-army knife for document and media file management. Flexible features, powerful search, sharing, clipping and tagging make it a valuable
work and productivity space. Record audio directly into your documents. Connect it to your text, photos, schedules, links and calendars. It’s free, powerful, and incredibly useful.
Download: Link
5. Notta
Best For - Professionals, seeking high-quality transcription, & recording

Notta uses AI to remove the pain of manual transcription. Letting you create a voice to text transcription of any conversation. You can upload audio or video files and have them turned into full-text transcriptions within minutes.
Timestamps and search allow you to find the essential parts. The app can also translate text into 42 different languages.
You can record Skype and Zoom and share the results immediately. The app also syncs your recordings, transcripts and Google Calendar events across your devices, creating an effective and versatile audio productivity tool.
Download: Link
Notta makes it easy to record, transcribe and save any call, including phone and video conferencing.
How to record audio on iPhone with Notta
Using Notta to turn an audio recording into text could not be easier:

Tap the ‘+’ button to enter the recording mode.
Tap ‘Record Now’ to begin the recording. Notta will now record the conversation while transcribing it in real-time.
Tap ‘Pause’ ( ||) to pause the recording and ‘Stop’ (■) to end it.
Additional tips
While recording, you can add an image in real-time to add context or to illustrate a relevant point:
Tap ‘Image’ and add a photo via the iPhone camera or your photo library. The image will then be inserted into the text at the point at which you uploaded it or clicked the camera shutter.
To listen to any single moment or portion of the recording:
Tap the relevant text in the timeline and the audio will begin playing from that point.
How to Merge audio sections in Notta

Tap and hold on any portion of the text until it turns blue.
Select as many portions of the transcript as your wish to merge.
Next, Tap ‘Merge’ to bring those pieces together.
Sharing clips with Notta on iPhone

Another incredibly innovative aspect of Notta is the ability to share specific sections of an audio transcript with other users:
After completing a ‘Merge’ of a transcript section, tap ‘Share’ to bring up the pop-up for sharing options.
The app generates a link to the specific section of audio that you merged. Now. tap the blue ‘Share’ button to select how you would like to share the audio.
The person receiving the link can now listen to the selected audio on the Notta website!
FAQs
How long can I record audio on my iPhone?
As a rule of thumb, 101 minutes of uncompressed stereo audio recorded at a standard of 44.1KHZ requires around 1GB of storage space. So the more storage space you have available on your device, the longer you can record.
Using a compressed format will result in the audio taking up less space on your device, but this will also mean the audio is of lower quality. If you’re low on storage, following the tips in this guide will help.
How do I record internal audio on my iPhone?
Open Control Center by swiping down from the top of your screen.
If you're using an iPhone with a Home button, you'll need to swipe up from the bottom of the screen until ‘Control Center’ appears.
To record internal audio, tap on the grey ‘Record’ icon; to ensure that any audio playing on the device is captured.
How do I record external audio on my iPhone?
Tap the ‘Microphone’ button in ‘Control Center’ to add an external source.
To include the sounds playing on the phone, ensure the device is in ‘Ring Mode’ by confirming that the switch on the top right side of the device is not set to off (red).
Place the iPhone in silent mode and turn the media volume to zero to record only external audio.
Conclusion
All of the apps featured in this article fit their particular audience exceptionally well.
If you’re looking for the simplest (and cheapest) way to get into recording audio on your iPhone, we recommend Voice Memos.
Evernote, Voice Record Pro, Voice Recorder & Audio Editor and Hindenburg Field Recorder all have a lot to offer.
You simply can’t do better than Notta’s AI powerhouse if you’re searching for audio recording with transcription and translation.
So, there you have it! The best way to record high-quality audio on your iPhone in 2022. Thanks for reading, and if you enjoyed this article, please feel free to give it a share!

