How to Transcribe Audio to Text in Google Docs for Free
Saving time and effort with Notta, starting from today!
There are lots of ways to transcribe audio to text, but most of them are expensive and don't work properly with Google Docs. Fortunately, Google has a simple solution: Google Docs voice typing.
Voice typing converts speech to text directly in Google Docs. It's easy to set up and use, so you can start transcribing right away.
This guide will show you how to use Google Docs to transcribe audio files, complete with step-by-step instructions and helpful tips.
If Google Docs voice typing isn't good enough, I’ll also introduce you to Notta - an advanced AI tool that transcribes with 98% accuracy.
How to use Google Docs to transcribe audio
Google Docs voice typing uses your microphone to convert speech to text right in your document. You can even use voice commands to add punctuation and navigate the document.
Note: Google Docs voice typing only works with the newest versions of Chrome, Edge, or Safari.
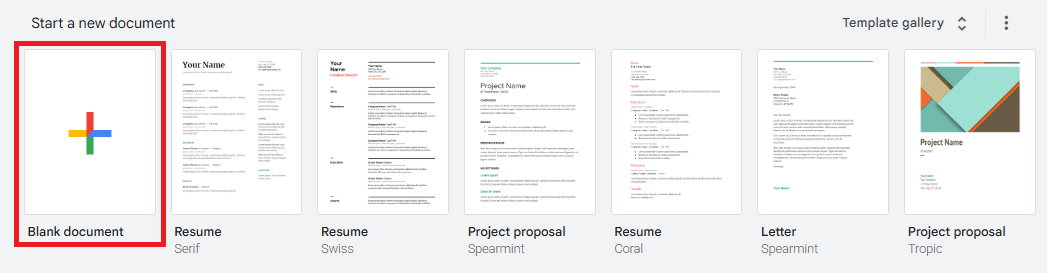
Step 1: Open Google Docs and create a new page
Open Google Docs and click 'Blank document' on the home page to start a new document. 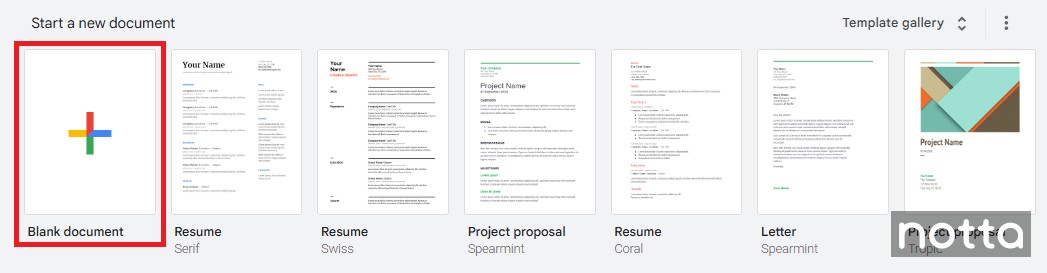
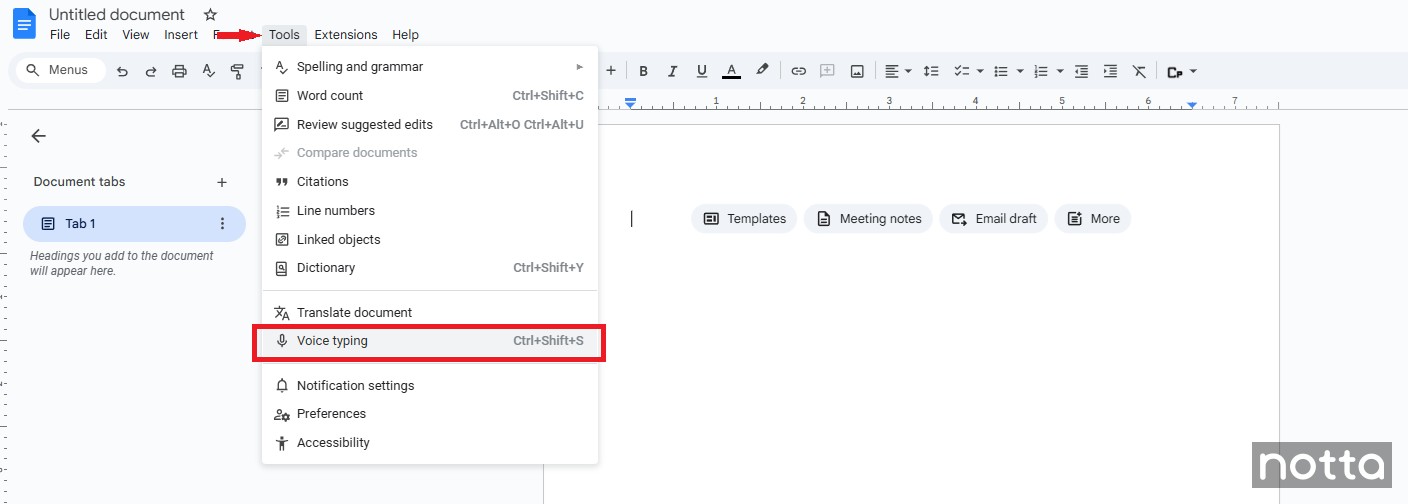
Step 2: Enable Google Docs Voice Typing
To convert audio to text, open the 'Tools' menu and click 'Voice typing'. A small pop-up window with a microphone icon will appear on your screen. You can also use the keyboard shortcut 'Control + Shift + S' (for Windows) or 'Command + Shift + S' (for Mac) to start voice typing.
Step 3: Set up your microphone
Before you start speaking, connect your microphone to your device and test that it works correctly. For best results, try to be in a quiet area with low background noise.
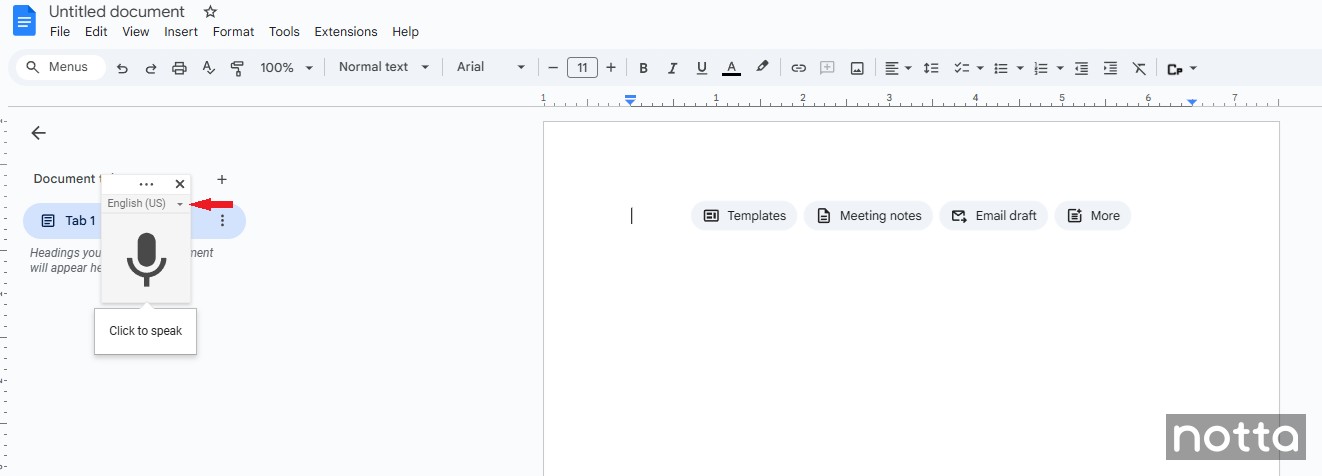
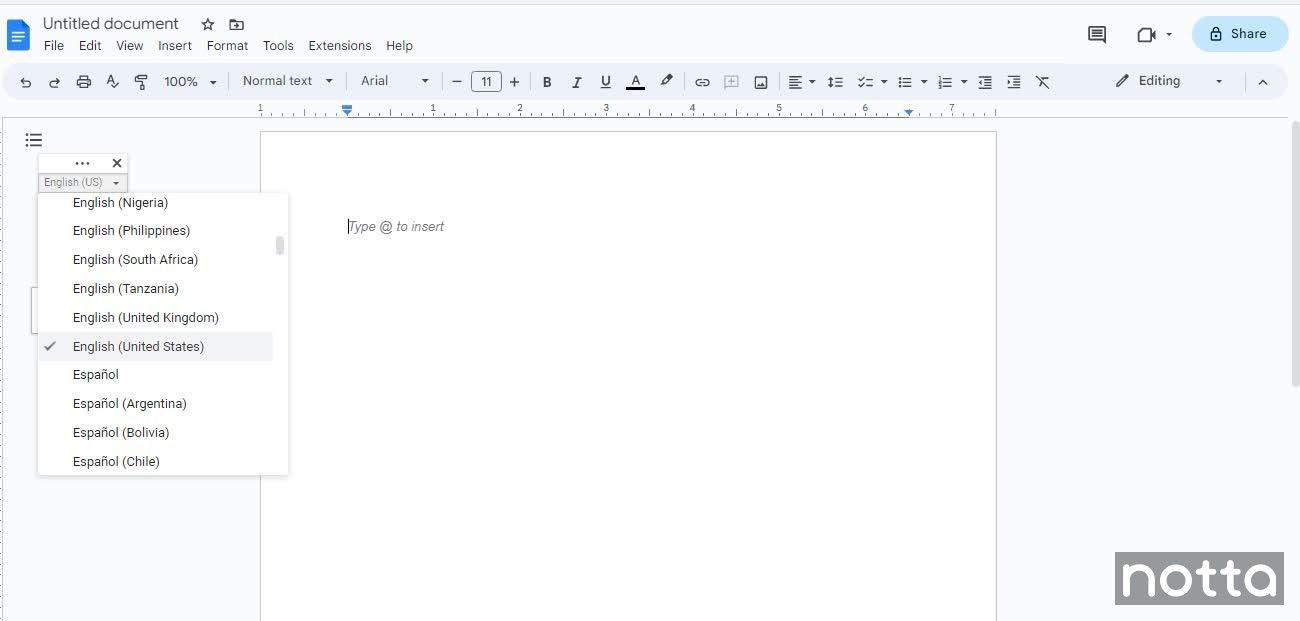
Step 4: Choose your language
The Google Docs audio-to-text converter supports over 100 languages. In the voice typing pop-up window, open the dropdown menu and select the language you will speak.
Step 5: Start transcribing
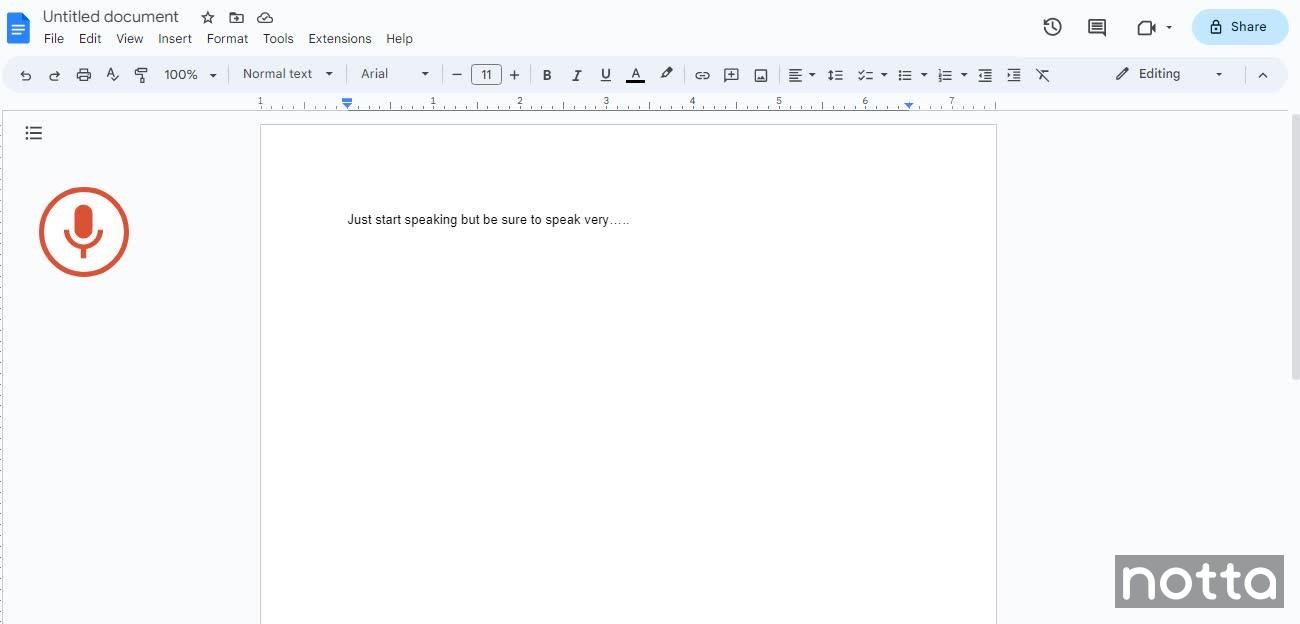
Once you have set up your microphone and chosen your language, you're ready to transcribe your spoken words into written text.
Click on the microphone icon to activate the voice typing feature and begin speaking into your microphone. Your speech will appear in the document in real-time as you talk.
Step 6: Use voice commands
Google Docs voice typing includes voice commands to help format your transcript. For example, you can use the "period" and "comma" commands to insert punctuation. You can also use voice commands to delete or replace text.
Unfortunately, voice commands only work when the input language is set to English.
Step 7: Edit and proofread your transcript
Once you're finished transcribing, take some time to proofread and edit your transcription for accuracy and clarity. You can use Google Docs' standard editing tools to format your transcript and correct transcription mistakes. If you prefer, you can also download it to Microsoft Word and edit it there.
Benefits of using Google Docs for audio transcription
Using Google Docs voice typing for audio transcription has a number of benefits:
Saves time: Most people speak between 110 and 150 words per minute, much faster than most of us can type.
Easy to use: It's simple and user-friendly, so it's accessible to people of all skill levels. All you need is an internet connection.
Free: Google Docs' audio-to-text feature is a free service with every Google Docs account, making it an affordable solution for basic audio transcription.
Google Docs's audio-to-text converter is free, fast, and easy to use, but it isn't always accurate. You must speak slowly and clearly with proper grammar to get good results with the Google Docs audio-to-text converter. If the transcript has any errors, you'll have to fix them yourself by editing the document.
For more reliable results, use a special transcription tool like Notta.
Tips for transcribing audio with Google Docs
Voice typing is the fastest way to transcribe a document using Google Docs. But there are a lot of ways this audio-to-text converter can get it wrong. Poor audio quality, noisy environments, and unclear speech can lead to errors.
Here are some tips to improve your transcription speed and accuracy:
Make sure you are speaking in a quiet room.
Don't keep the microphone too far or too close to your mouth.
Speak slowly and clearly in a natural tone, without pausing between words. Only pause in between commands.
The microphone has a bubble icon that shows the text it is transcribing. It allows you to verify if the Docs heard the correct command. If it makes a mistake, you can use the "Undo" command.
How to transcribe audio to text with Notta
For a more professional and accurate solution for audio transcription, use Notta. Its 98% transcription accuracy rate means that you spend less time correcting mistakes and editing.
Unlike Google Docs, you can upload pre-recorded audio or video files. Plus, if there’s more than one person in your recording, Notta’s speaker recognition identifies and tags them automatically.
Here's a step-by-step guide to transcribing audio with Notta.
Step 1: Create an account with Notta
There are two ways you can get started with Notta:
Use the Notta Web App: To begin using Notta to convert audio to text, visit the Notta Web app in Chrome, Edge, or Safari and create an account. You can sign up with your email or a Google, Microsoft, or Apple account, and then use your Notta account on any device.
Use the Notta mobile app: The Notta app is available for iOS and Android devices from the Apple App Store or Google Play. After installing, log in with your email and password, or use a Google, Microsoft, or Apple account.
Once your account is set up and logged in, you're ready to transcribe audio to text with Notta.
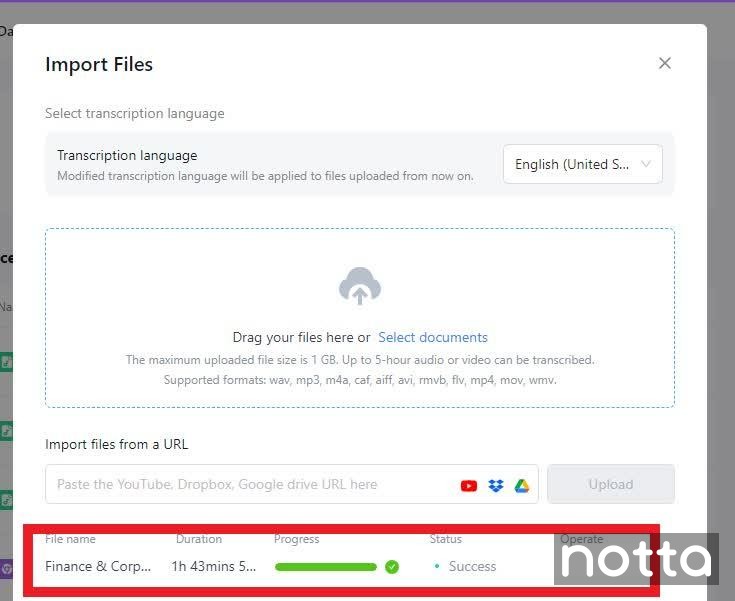
Step 2: Upload your audio file
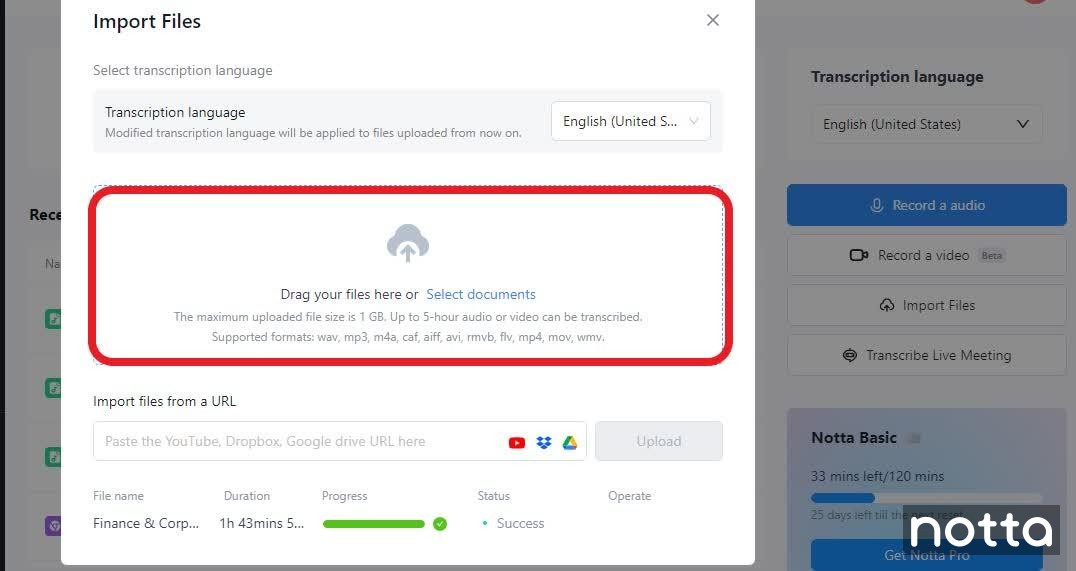
Log in to your Notta account and upload any audio/video files you want to transcribe. Notta supports most standard audio and video formats, including MP3, WAV, M4A, MP4, MOV, and more.
On the web app, click the 'Upload & transcribe' button on your dashboard.
On the mobile app, tap the blue '+' icon, and then tap 'Import Files'.
Follow the on-screen instructions to upload your file. Don't forget to set your transcription language!
If you don't have an audio recording, Notta can also create real-time, accurate transcripts using your device's microphone. This is a great feature for live events such as conferences, lectures, or meetings, or important speeches.
Step 3: Wait for the transcription
Once your upload is complete, Notta will begin transcribing your audio file.
You can watch the transcription progress in real-time. Notta can transcribe an hour of audio in just five minutes, so you won't have to wait long.
Step 4: Review and edit your transcript
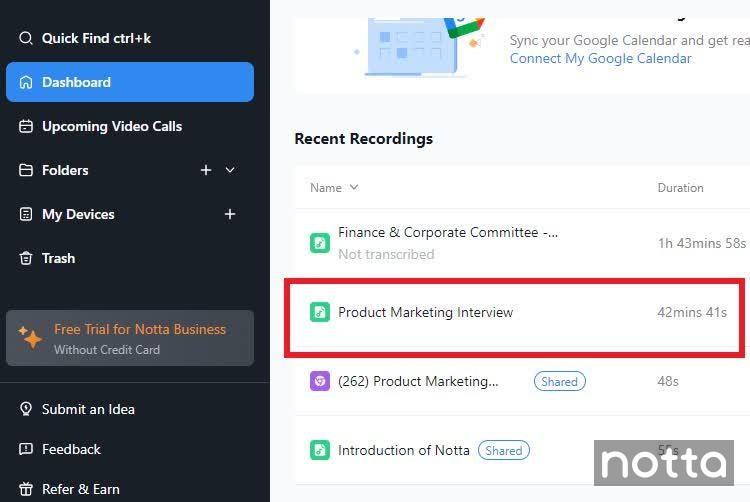
Once the transcript file is complete, it will appear on your Notta dashboard. You can review and edit the transcript for accuracy and clarity. As you review the text, Notta will sync your audio playback to the highlighted section of your transcript for easy comparison.
Step 5: Export your transcript
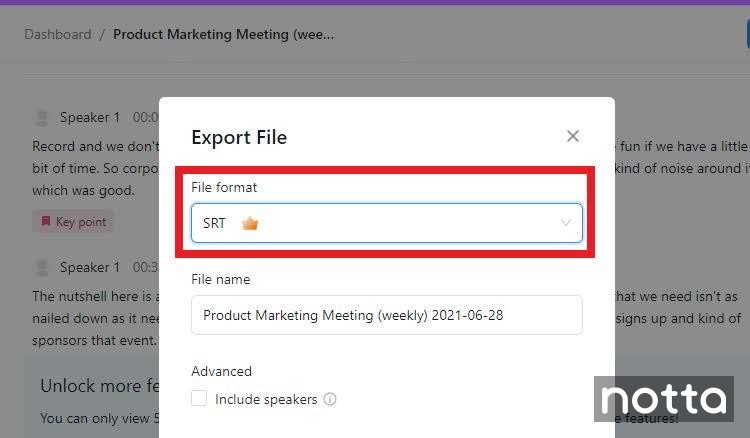
After reviewing and editing your transcript, you can export it in multiple formats, including TXT, DOCX, XLSX, and PDF.
Click the 'Download' icon, and select the file format you want. This will save a copy of the transcript to your device so you can access it anytime, even if you're offline.
Step 6: Share the transcript
You can also share the transcript with others using a link.
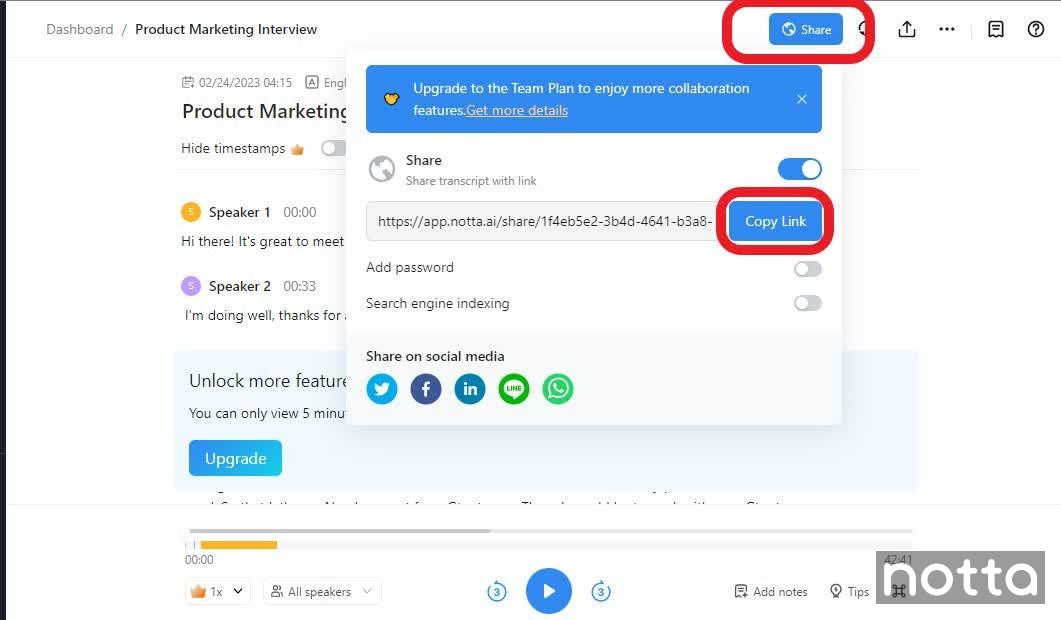
Click the 'Share' button, and enable the 'Share' option. Click the 'Copy Link' button to copy it to your clipboard, or share it using one of the social media buttons.
You can add a password to your transcript to limit access to private documents.
Benefits of using Notta
Notta is more than just an audio-to-text converter. You can use it to quickly and accurately turn long business meetings, news stories, and lectures into short, insightful summaries. It keeps your data secure, it’s intuitive, and the best part is you can try it out for free.
Fast transcription
Notta provides users with high-speed transcription to process audio and video files quickly and accurately. The manual transcription process can take hours, but Notta can automatically transcribe long audio recordings in just a few minutes.
This is especially helpful for journalists, legal professionals, recruiters, and anyone else who needs to transcribe lots of audio content quickly.
Accurate
Notta provides highly accurate transcripts that are as close to the original audio as possible. The platform uses the latest AI technology to identify and interpret speech with an accuracy rate of up to 98%.
This is essential in fields where accuracy is critical, such as legal or medical transcription.
Support for various types of audio content
Notta can transcribe almost any audio content in a wide variety of formats.
Notta's transcription service supports audio transcription,meeting transcription (including platforms like Google Meet), dictation transcription, and screen recording transcription.
Notta makes it easy to convert audio to text, whether you want to create new content or upload prerecorded files.
Easy to use
Notta's interface is easy to navigate, even if you have no experience in audio transcription. You can easily find all the tools on the main dashboard, and the drag-and-drop feature makes the transcription process feel smooth.
Once you upload the audio file, Notta will transcribe speech to text automatically.
You can quickly access the finished transcript, and the editing page is simple and intuitive.
Secure
Notta prioritizes data security and keeps all information confidential. No one can access your transcripts without your approval. If you’re using the platform for sensitive transcriptions like doctor-patient records, legal consultations, or confidential business meetings, you know the importance of data safety.
Notta secures all your data with 256-bit AES encryption and follows the ISO 27001 standard. It is also compliant with major data regulations, such as the General Data Protection Regulation (GDPR) and California Consumer Privacy Act (CCPA).
You can rest easy knowing your data is safe and protected in transit and at rest. Notta encrypts all data sent between the platform and your browser, as well as any data you store on its servers.
FAQs
Are there limitations on the number of files I can transcribe?
Yes, most Notta plans limit the number of files you can upload monthly. Free plans can upload 50 files per month, Pro plans can upload 100 files per month, and Business plans can upload 200 files per month. To get unlimited audio file uploads, speak to our Sales team about an Enterprise plan.
How can I share the transcription with online links?
You can share your transcript online with a link using the Share feature. You can share links through email, social media, or other online platforms. Anyone accessing the link can view the transcript without logging in or creating an account. To make any edits, they will need their own Notta account.
Is the audio transcription service available in multiple languages?
Yes, Notta's audio transcription service supports multiple languages. You can automatically transcribe video and audio files in over 50 languages, including English, Spanish, French, German, and more. You can select the desired language when uploading files, and the transcript will use that language.
What audio formats does Notta support for transcription?
Notta supports multiple audio formats, including MP3, WAV, M4A, AAC, and more. You can also transcribe audio to text from a wide range of popular video file formats, including YouTube videos.
Can I edit the transcription after generating it?
Yes, you can edit a transcription after generating it. Once the audio-to-text converter is complete, Notta saves the transcript on your dashboard. You can edit the text using the built-in editor or download the transcript as a text file to edit on your computer.
Conclusion
Google Docs and Notta are two excellent options for transcribing audio to text. While Google Docs' audio-to-text feature is free and easy to use, it often has accuracy problems. Notta provides higher accuracy, a more user-friendly interface, and support for more audio sources.
If you need a basic tool for simple tasks and don’t transcribe often, use Docs. But if you want quicker results with higher accuracy, choose Notta. It’s superior in every way.
With its advanced AI speech recognition and editing tools, Notta can help you create a highly polished transcript with less time and effort.

