How to Use Timestamps in Transcription Cleverly
98% accurate, real-time transcription in just a few clicks. 58 languages and multiple platforms supported.
Transcription has witnessed numerous transformations over the years, as it keeps getting refined to add more value and quality to benefit readers and clients alike. Among the major improvements in transcription is the addition of timestamps.
While the term timestamp might sound common, it has specific transcription usage.
In this detailed guide, I will walk you through everything you need to know about timestamps in transcription and how to use them correctly.
What is time-stamping?
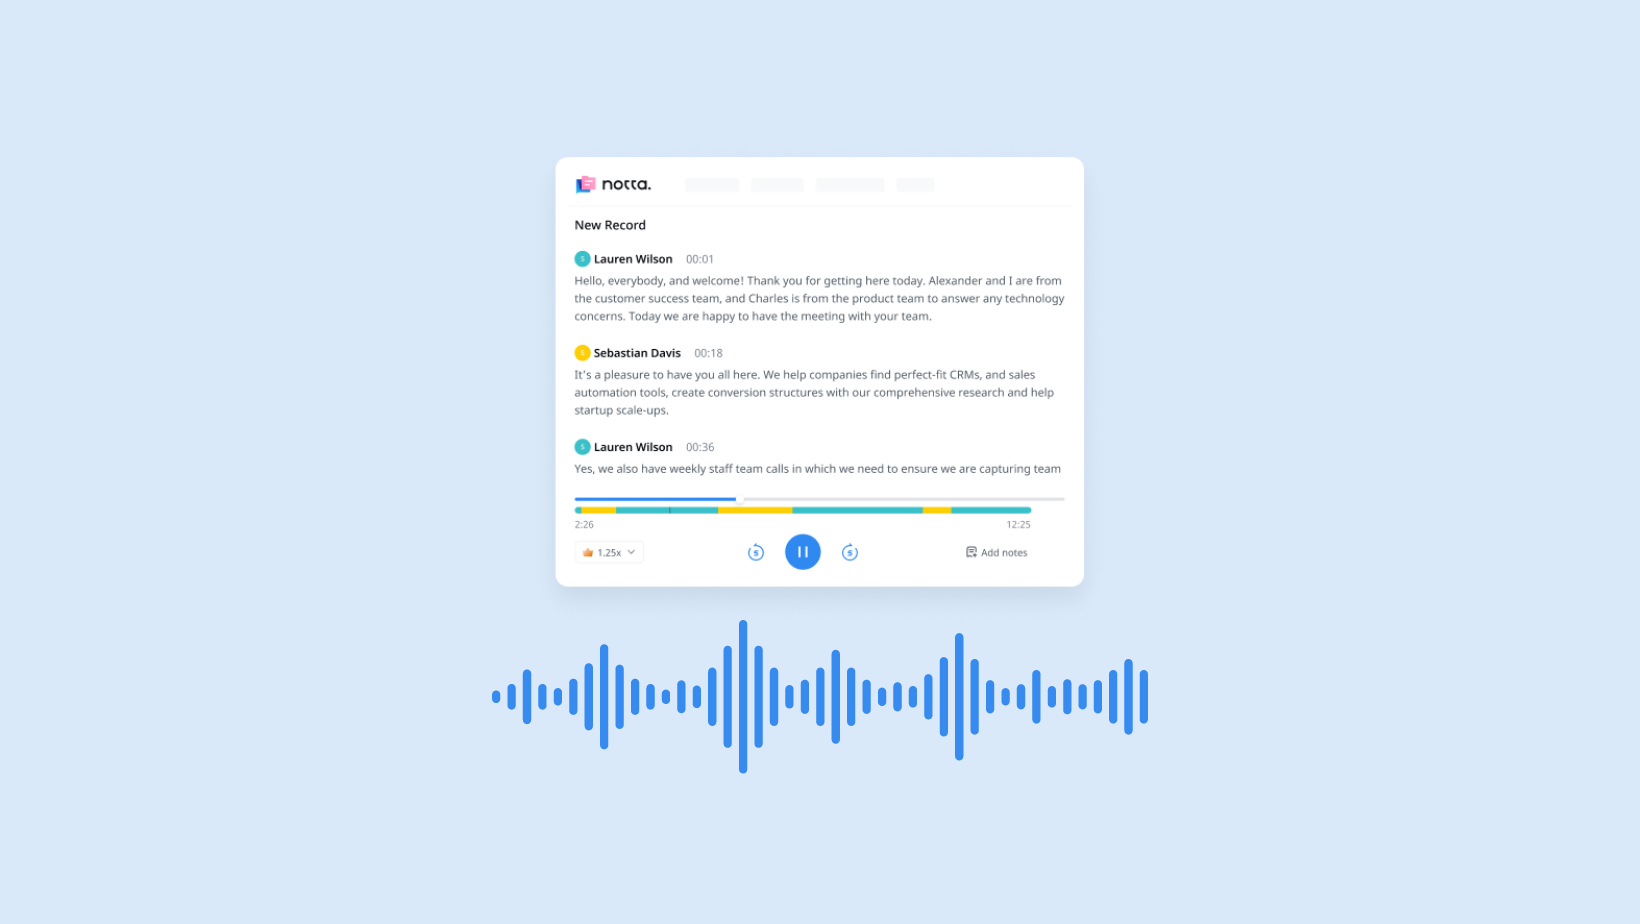
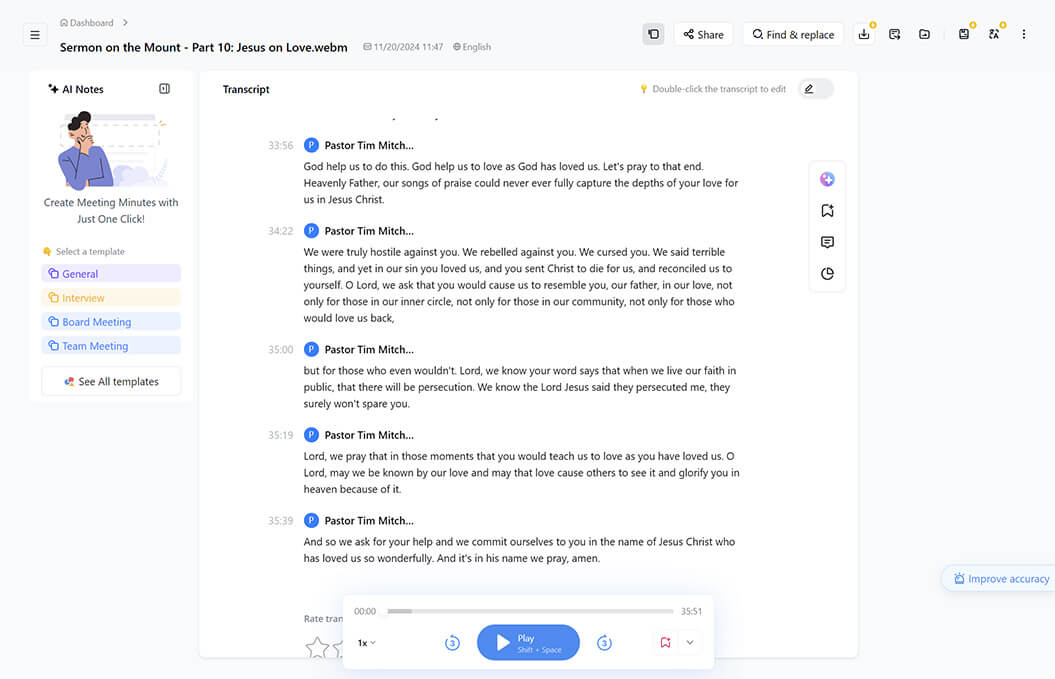
In audio transcription, time stamping refers to the process of adding timecodes to a text transcript to show when the words were spoken in an audio.
The standard format of timestamps is HH:MM:SS (Hours:Minutes:Seconds).
Timestamps add a little more organization to your transcripts. They are also used when you want to emphasize or make references to some sections of a transcript.
Furthermore, a transcript with timestamps comes in handy during legal proceedings, as it makes it easy to get blocks of evidence from the text. This can also help when creating short clips as evidence.
Different types of transcription timestamps
There are various ways of adding timestamps in transcription. The ideal method will depend on individual needs and readability requirements.
Start - End
This time stamping method involves appending time markers to the beginning and end of the important part of a transcript. This is especially useful if the main points of an interview, dialogue, or discussion do not start from the beginning of a recording or last till the end. Below is an example of a start/end transcription timestamping method:
Podcaster: [00:10:07] Hi, Mr Jones, it's nice having you on the show. How are you doing?
Podcaster: Thank you for your time, sir. We look forward to having you again soon. [01:01:52]
Periodic
Periodic time stamping involves adding timestamps after a given interval. This interval might be 30 seconds, 1 minute, 5 minutes, or any time requested by the clients.
Here, the timestamp will be added before the word spoken at that time. Below is an example of periodic time stamping using 30-second intervals:
Speaker: Good day, everyone. I am using this medium to thank you for coming today despite your tight schedule. I will [00:00:30] try to be concise and fast without leaving out the… important talking points. [00:01:00] So, let's get started.
Speaker change
This is one of the most used transcript time stamping methods. It involves adding timestamps at the start of a conversation anytime the speaker changes. Below is a good example:
Journalist: [00:34:51] Mr Chairman, can you talk us through the strides your company made in the last quarter of 2023?
Chairman: [00:36:18] We increased our production to almost double what we had in the first and second quarters due to increased demand.
Journalist: [00:40:02] Thank you for that quick insight.
Sentence
In this method of transcription timestamping, timecodes will be added at the start of every sentence. This is one of the lesser-used methods because it is usually too apparent and intrusive. You can find an example of this below:
Presenter: [00:01:02] Good evening everyone. [00:01:20] I am glad to welcome you all to this edition of our lovely show, where we will have a special guest today. [00:02:08] I know you are excited to receive our guest, but we will go on a short commercial break before he joins us.
Inaudible
These timestamps are added to the transcription to indicate there is an unclear or missing section of speech in the audio recording.
Below is a quick example:
Speaker: I am sorry for arriving late. I ran into a heavy [inaudible 00:00:08] that lasted about an hour. Fortunately, I could maneuver [Inaudible 00:01: 10] around the city.
Best ways to transcribe audio with timestamps
While you can manually add timestamps to recording, there are definitely better ways. This is because the manual method is not only stressful but time-wasting. Also, it is virtually impossible to add timestamps to live meetings while it is on.
Fortunately, you can do all this by employing a professional transcription tool — Notta. This superb tool uses Artificial Intelligence to convert speech to text with timestamps and differentiated speakers automatically.
What’s more, it supports 58 transcription languages, giving you numerous options to choose from when you have speakers from different locations. Add its ability to summarize your copy in minutes and you know you have an all-rounder that can transform your transcription.
Below are some of the other features of Notta:
Ability to generate action items from transcripts.
Can schedule meetings on notable platforms like Zoom, Google Meet, and Teams.
Transcription with timestamps from different sources, including live meetings and recorded files.
Effortless sharing and editing of transcripts with team members.
Convert audio to time-stamped text with Notta
Below are the steps to follow to add timestamps to your transcription:
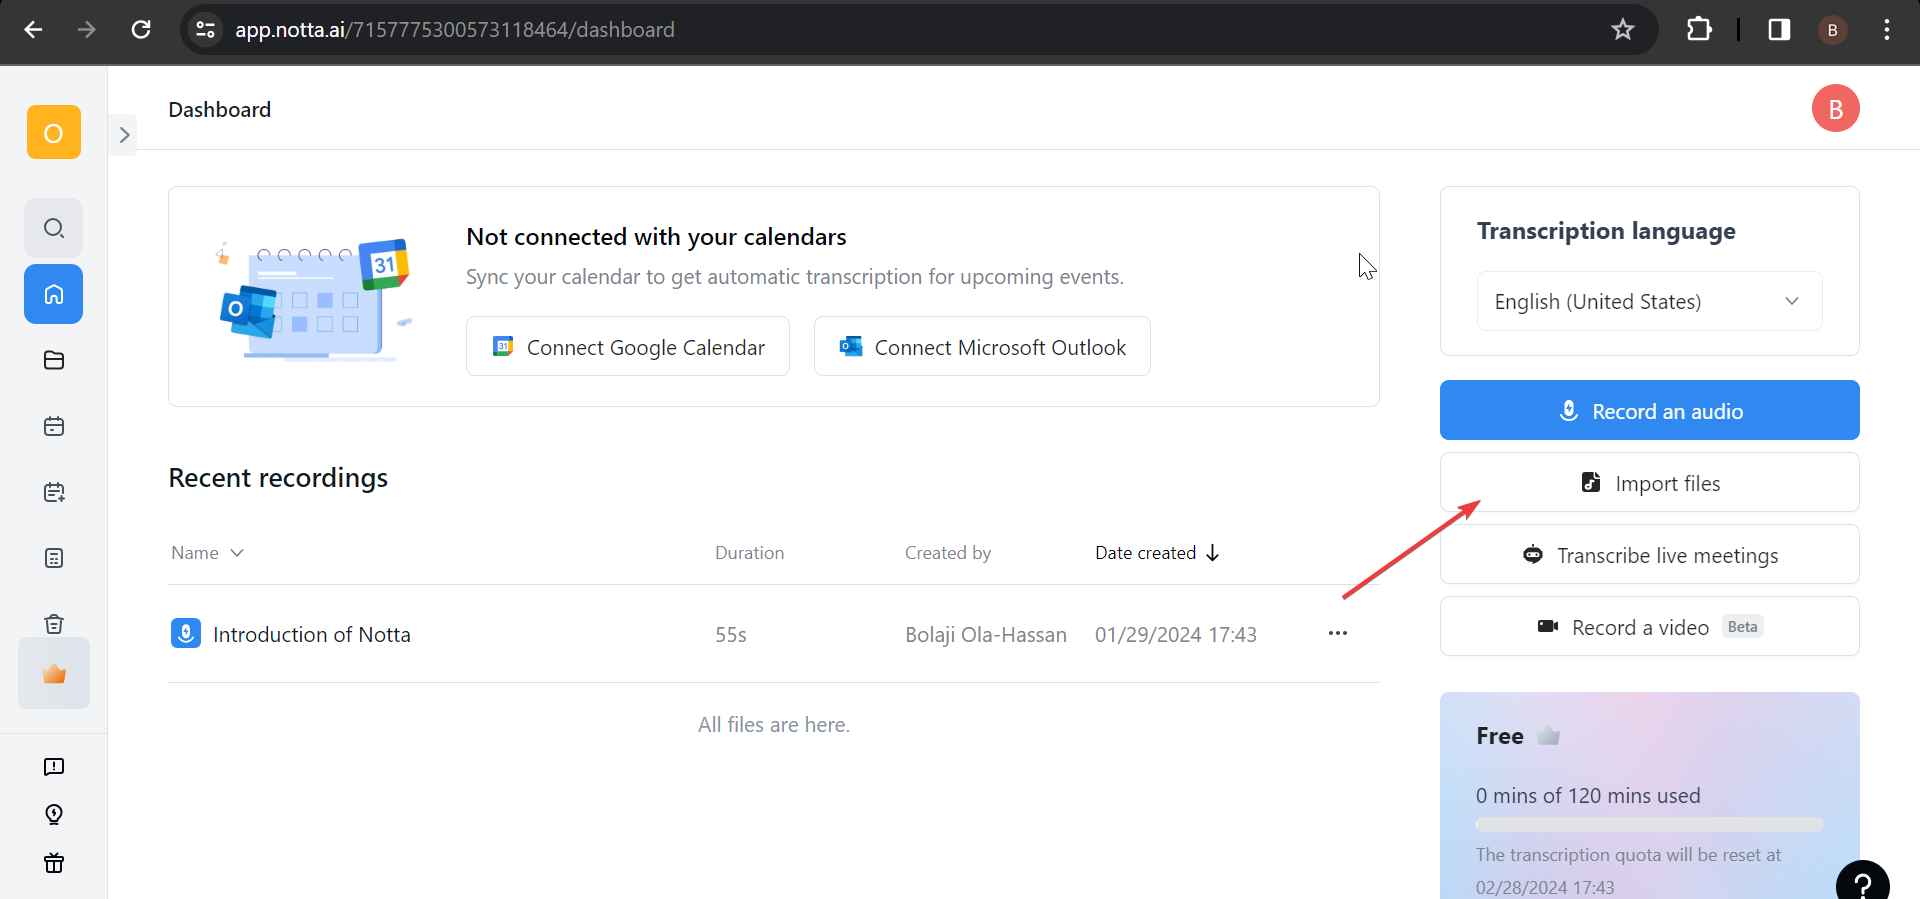
Sign in to your Notta account to enter your dashboard.
Click the ‘Import files’ option in the right pane.

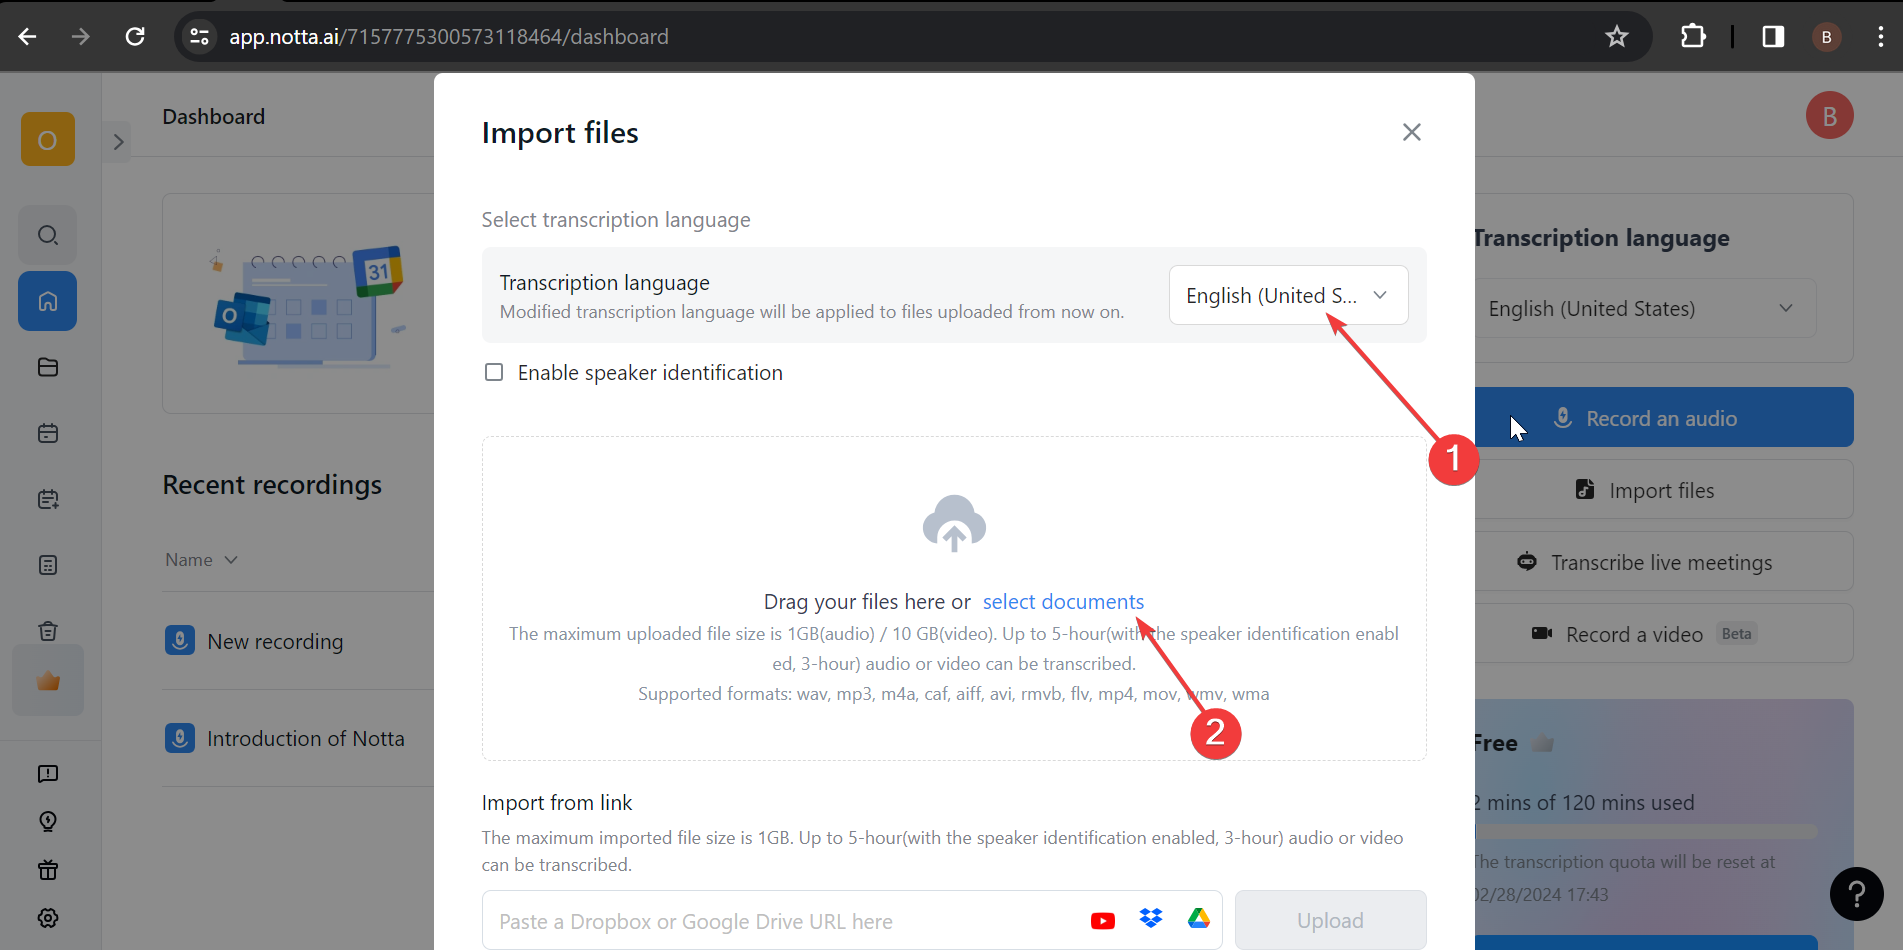
Next, click the Transcription language dropdown and select the audio language you want to transcribe.
Click the ‘select documents’ option to choose a file from your PC.

5. You can also drag and drop the file or add a link from one of the supported websites.
6. Finally, wait for the upload to be complete, and the transcription will start automatically.

Notta can convert your spoken interviews and conversations into text with 98.86% accuracy in minutes. Focus on conversations, not manual note-taking.
Conclusion
Timestamps in transcription add more value to a transcript and make it easy to track the important points in the original audio. To help you incorporate this into your transcripts, we have listed and explained the various types of time stamping in transcription.
I have also shown that while you can add timestamps manually, using Notta is better. This is because the tool automates the addition of timecodes to your transcripts and does so with incredible speed and accuracy.