Smart AI Notetaker for Zoom
Transcribe every Zoom meeting in real time with Notta. Get instant AI summaries, organize the content, and turn insights into action.
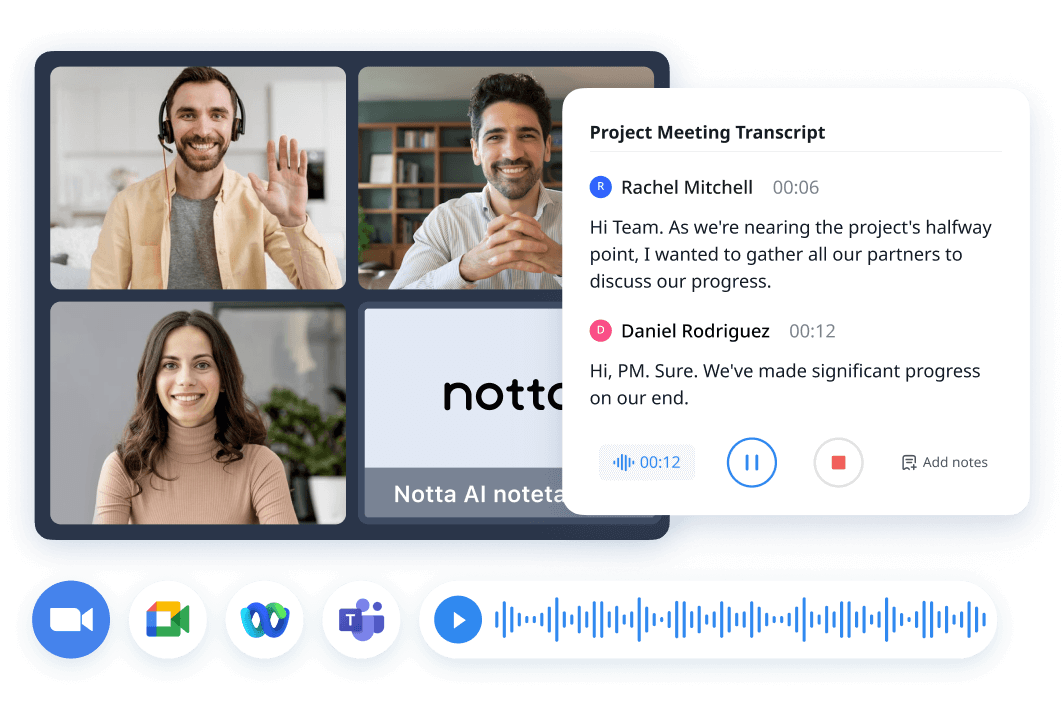
Free your hands and focus on your Zoom meetings
With Notta, you’ll never have to be the note‑taker again. Notta captures every word in real time and creates an AI‑powered meeting summary so you can stay focused on what matters.
How to take notes in Zoom with Notta
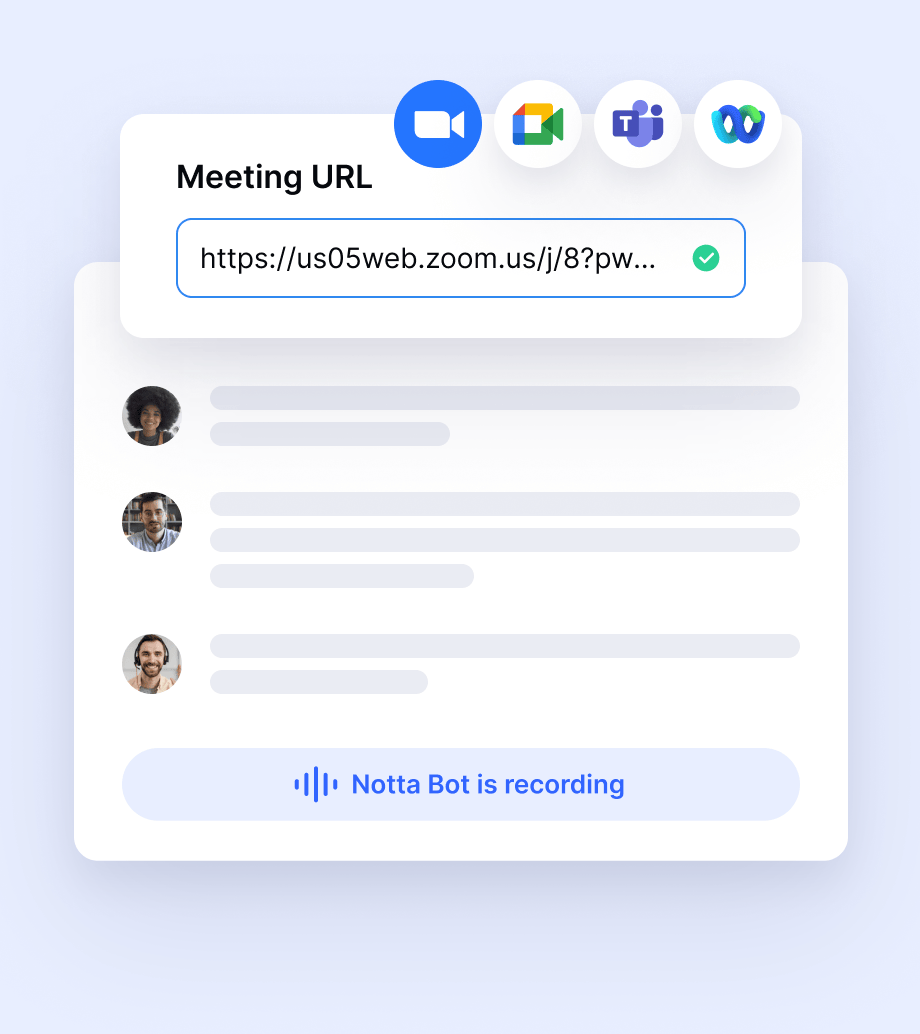
Option 1: Paste your Zoom link → Notta Bot joins & transcribes
Log in to Notta Web and click "Record online meeting", paste your Zoom link into Notta then click "Transcribe Now", Notta Bot joins the meeting and starts live transcription
Option 2: Sync your Google or Outlook Calendar → Notta Bot auto‑joins & transcribes
When your Zoom meeting starts, Notta Bot automatically joins and begins live transcription. Even if you're late or can't make it, you'll still get a perfect record of the conversation.
Option 3: Don’t want Bot in the meeting? Use Notta’s screen/audio recording
No bot ever joins the call. Yet you get a full, accurate transcript with complete control without disrupting your meeting flow.
Why choose Notta as your Zoom AI Notetaker?
Live Zoom Transcription with 99% Accuracy
Stop juggling note-taking with active participation. Our AI Note Taker for Zoom provides a smarter way to capture every conversation with unparalleled precision.
Transcribe 1-Hour Meetings in Just 5 Minutes
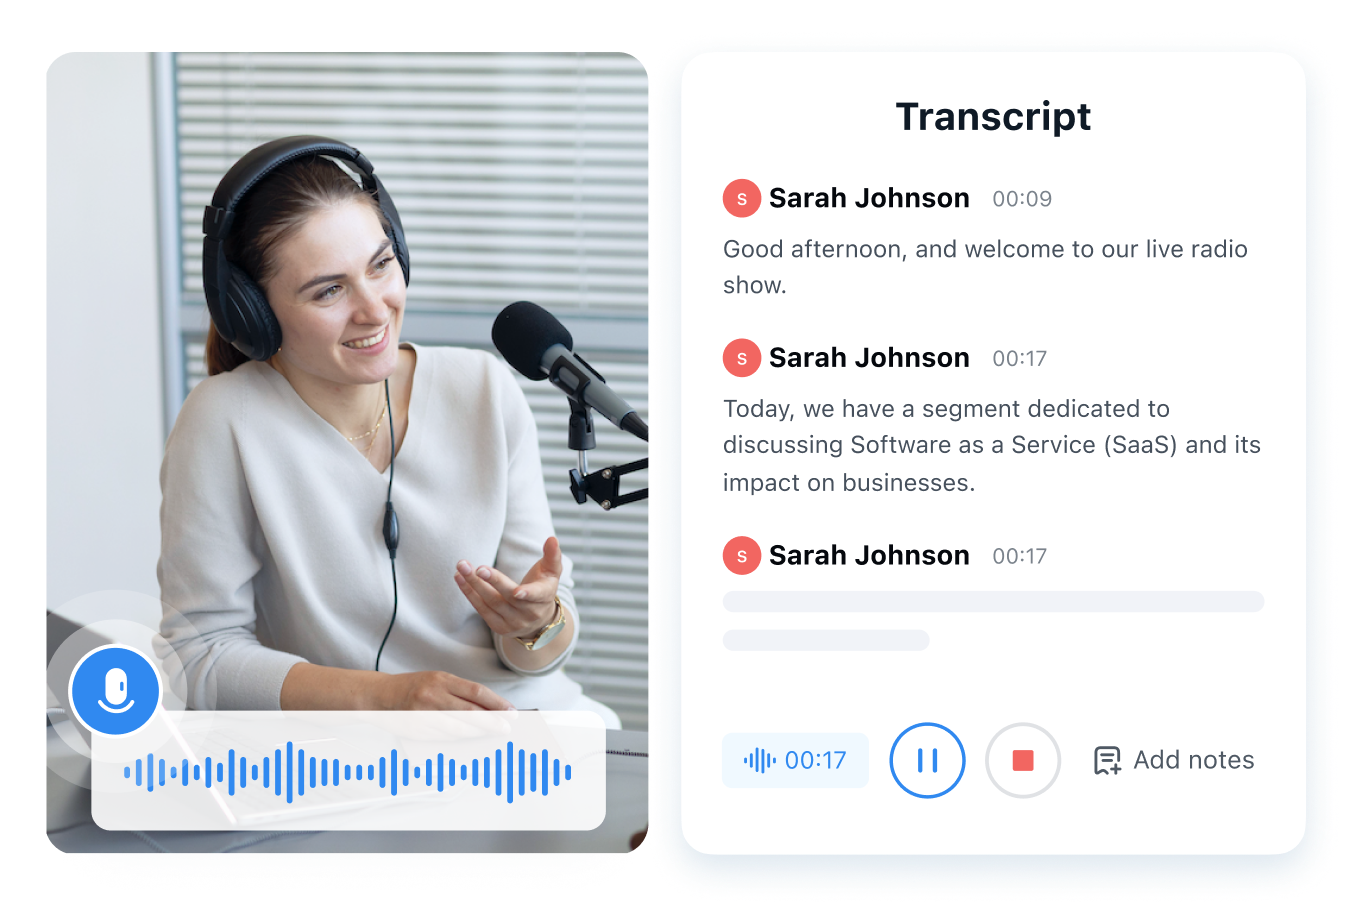
Speaker Identification
58+ Language Support & Bilingual Mode
Instant AI-Powered Summaries & Action Items
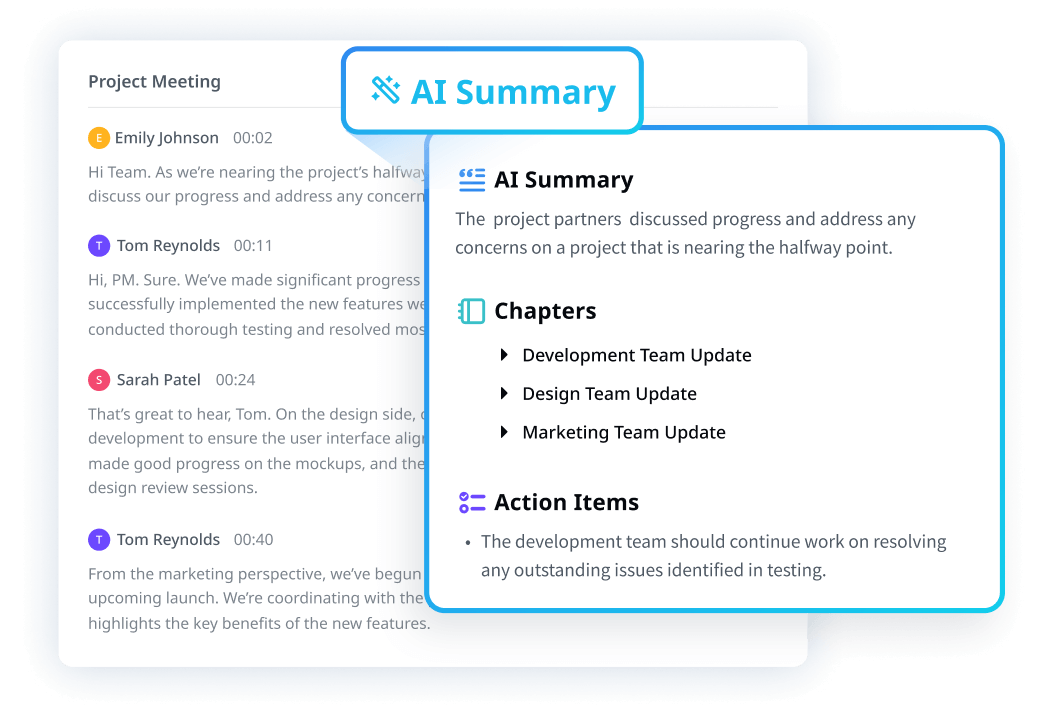
Actionable Meeting Summaries
Turn an hour-long meeting into a one-minute read. Notta automatically pulls out the key points, decisions, and action items so you know exactly what to do next.
Smart Integration & Automation
Automate your post-meeting process. Notta instantly sends transcripts, action items, and deal updates from Zoom to Notion, Slack, Google Drive, Salesforce, and HubSpot.
Boost productivity with Notta's AI Note Taker for Zoom
Seamless Integration
Automatically send your notes to Notion, Salesforce, and other tools you already use.
Custom AI templates
Design tailored prompts and templates to create recaps that fit your workflow.
Your Data is Safe With Us
Notta is SOC 2 Type II and ISO 27001 certified, using enterprise-grade security to protect your data.
Smarter Assistant
Ask questions across one or multiple recordings and get tailored responses. Create Jira tickets, draft emails, and format notes without leaving the app.
AI-driven Translation
Translate your transcripts and notes into 40+ languages instantly — making your content ready for audiences worldwide.
Sync between devices
Transcripts and recordings seamlessly sync across Macs, iPhones/iPads, Android devices, and web browsers like Chrome, Safari, and Edge.
Our users love us!

Frequently asked questions
Does Zoom offer transcripts for online meetings?
Yes, but Zoom's native transcription requires a specific Business, Education, or Enterprise license and only works with cloud recordings processed after the meeting.To use it, you must record your meeting to the cloud and wait for an email with the transcript.
For a better experience, try Notta. Our AI note-taker works with any Zoom plan (including free) to provide live, real-time transcription. Notta also automatically generates concise summaries and action items, making your meetings far more productive. It’s the smarter, more accessible way to capture every detail without limitations.
How can I enable audio transcript for Zoom cloud meetings?
If you want to enable audio transcript for your Zoom cloud meetings, follow these steps.
Step1: Sign in to your Zoom account online.
Step2: Click “Account Management”, then “Account Settings” in the navigation menu.
Step3: Click “Cloud Recording” and enable the Recording tab.
Step4: Under “Advanced cloud recording settings”, click the “Audio Transcript” checkbox to enable audio transcription.
Step5: Click “Save” to save the changes.
How can I transcribe a Zoom meeting for free?
Use Notta. Notta supports transcribing online Zoom meetings in real-time. Sign up for Notta now and transcribe an online Zoom meeting for 5 minutes to test Notta. You won’t need to subscribe unless you are satisfied with the transcripts.
Can I transcribe past meetings with Notta?
Yes, you can! You can upload recordings of past meetings to Notta, and it will generate a detailed transcript and actionable insights just like during a live session.
Can Notta transcribe in multiple languages?
While Zoom’s live transcript only supports English, Notta transcribes in 58 languages, including Japanese, Chinese, and German. It can even handle bilingual meetings in real-time, making it the perfect tool for your international team.

Mamie Kelly
Company Manager
Love Notta! Super easy to use with the clear interface and layouts. Extremely useful when it comes to transcribing my online meetings.