
How to Remove Vocals from a Song in Audacity
98% accurate, real-time transcription in just a few clicks. 58 languages and multiple platforms supported.
Removing vocals from songs can be tricky, but it doesn't have to be. This post will give step-by-step instructions on how to separate vocals from a song in Audacity.
You can use this process on any track that you want to remix. Note that this process isn't for removing instruments. This particular guide focuses on removing vocals.
First, we'll look at using the built-in Audacity vocal remover. Then we'll examine how to split the audio track to remove the vocal in another channel. Let's get started!
[Method 1] Remove vocals using the vocal reduction tool
Advantages:
Works best for most songs
Disadvantages:
Does not always wholly remove vocal
May also remove other elements of the audio besides vocal
This tutorial describes a general way to use Audacity’s built-in vocal remover. Depending on how much processing is on the vocal, this method may completely remove it. It will reduce the vocal volume significantly if it does not remove the vocal altogether.
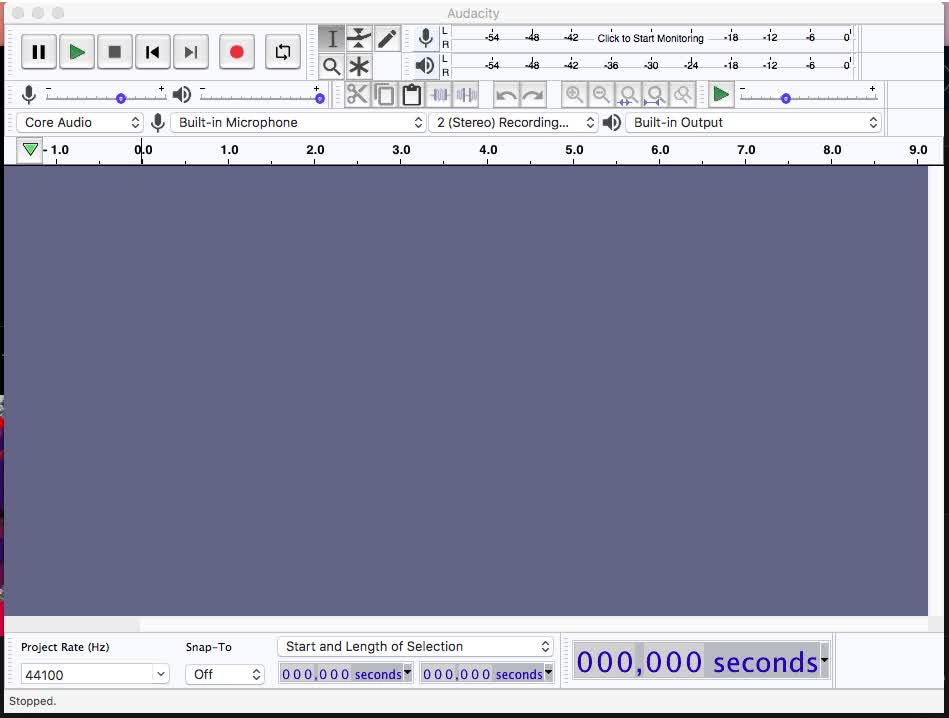
Step 1: Open Audacity.
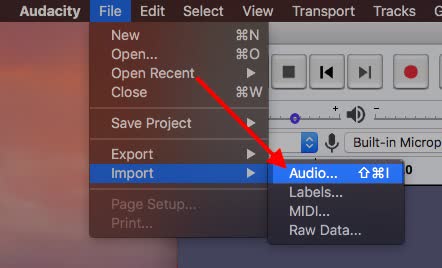
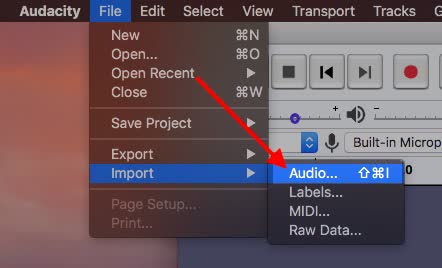
Step 2: Click File > Import > Audio.
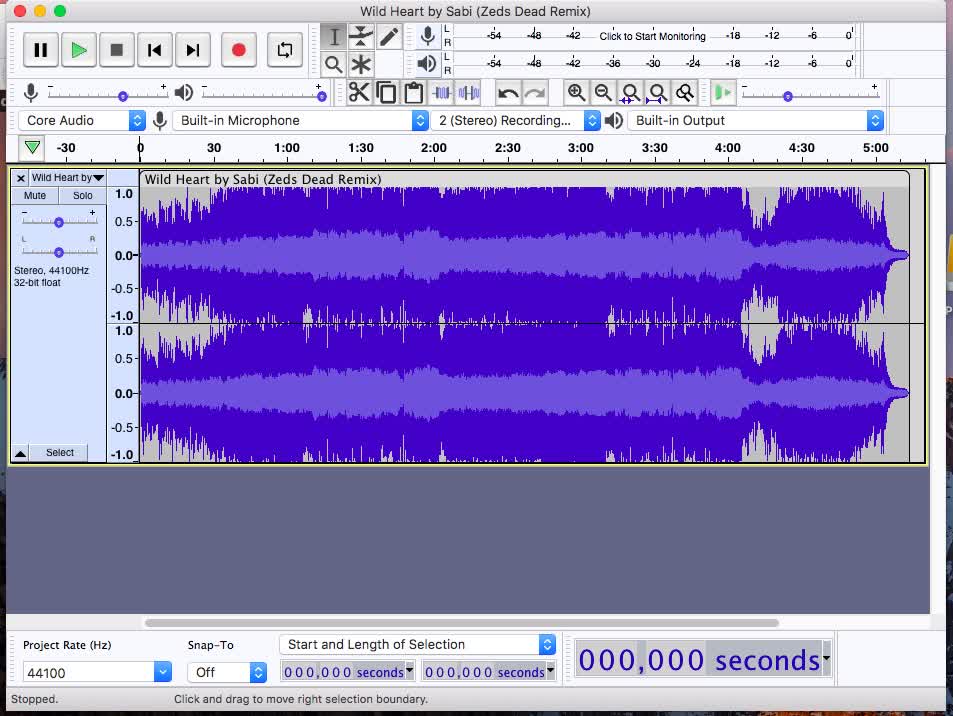
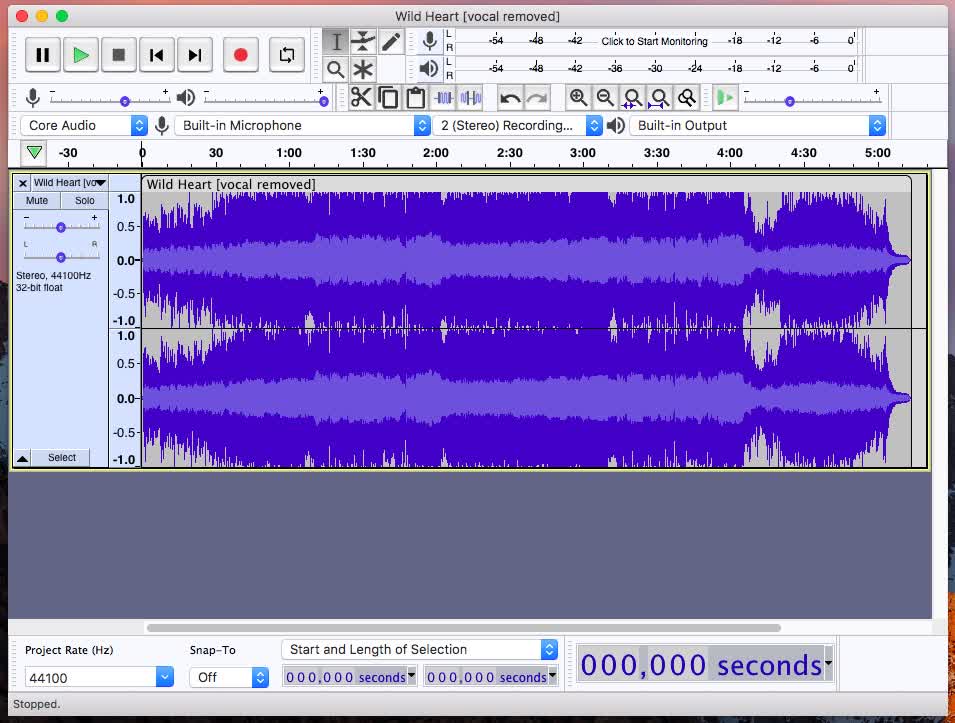
Step 3: Select the song from which you want to remove vocals. Audacity will load the waveform into the editor.
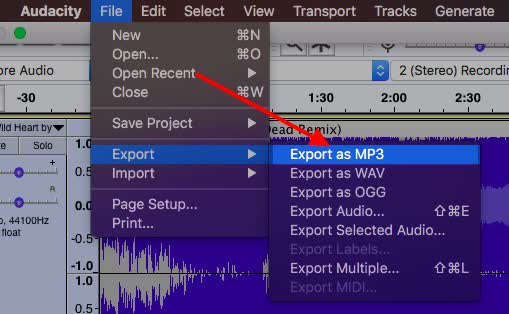
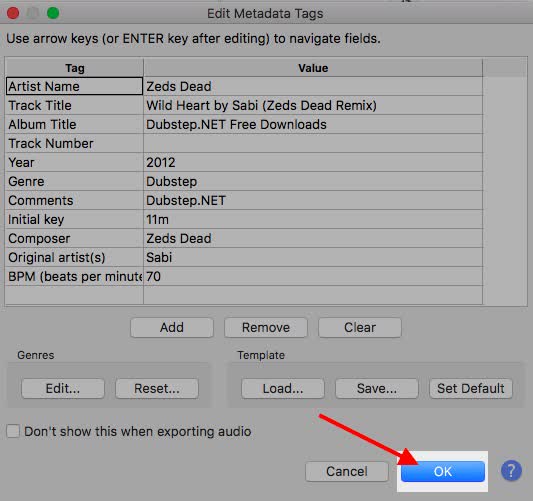
Step 4: We will make a backup so that we still have the whole song available for use later. Click File > Export > Export as MP3. If the original file is a WAV or audio file, export it to that type. Doing this will keep the audio artifacts in the best condition for editing. Name your file something you will remember.
Step 5: Click ‘OK.’
Step 6: Click ‘Close’ on the original audio file.

Step 7: Import the new audio file you just exported in Step 5.
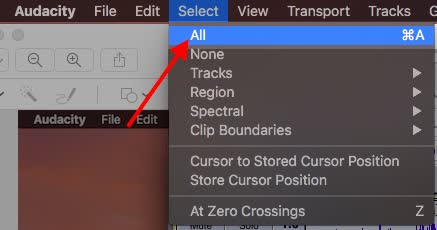
Step 8: Click Select > Select All.
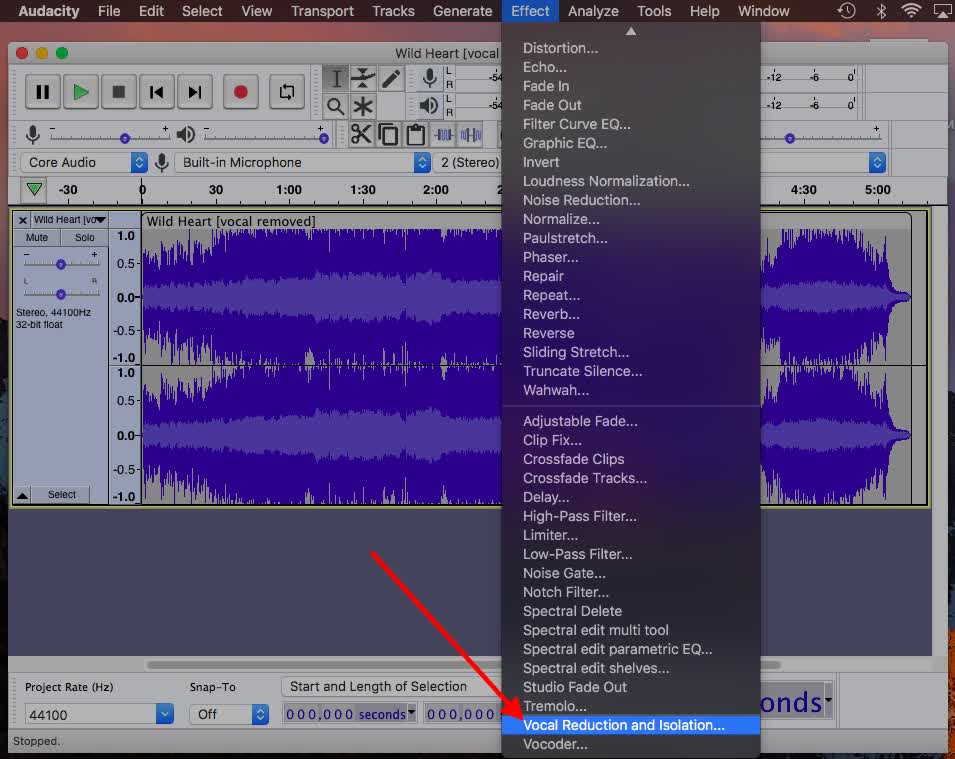
Step 9: Click Effect > Vocal Reduction and Isolation.
Step 10: Under “Action:” select ‘Remove Vocals.’
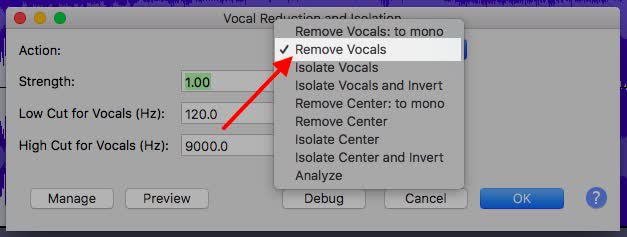
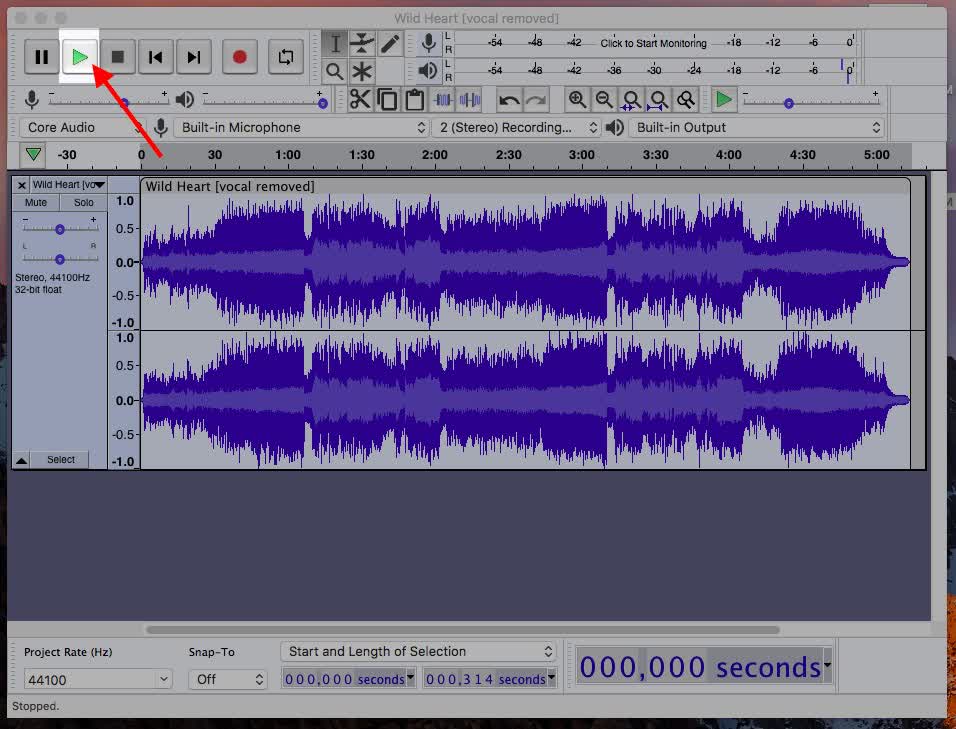
Step 11: Wait for Audacity to remove the vocal. Click ‘Play’ to listen to the edit.
Discover the magic of vocal separation with Notta. You can effortlessly separate vocals and background music from any audio and video file.
[Method 2] Remove vocals by splitting audio channels
Advantages:
Fewer steps than the first method
It will completely remove vocal if it’s in its own channel
Disadvantages:
It does not work for the vast majority of audio
This method will only work for songs with vocals in one channel and instruments in another. The only way to find out is to try your chosen piece.
Step 1: Import your audio into Audacity.
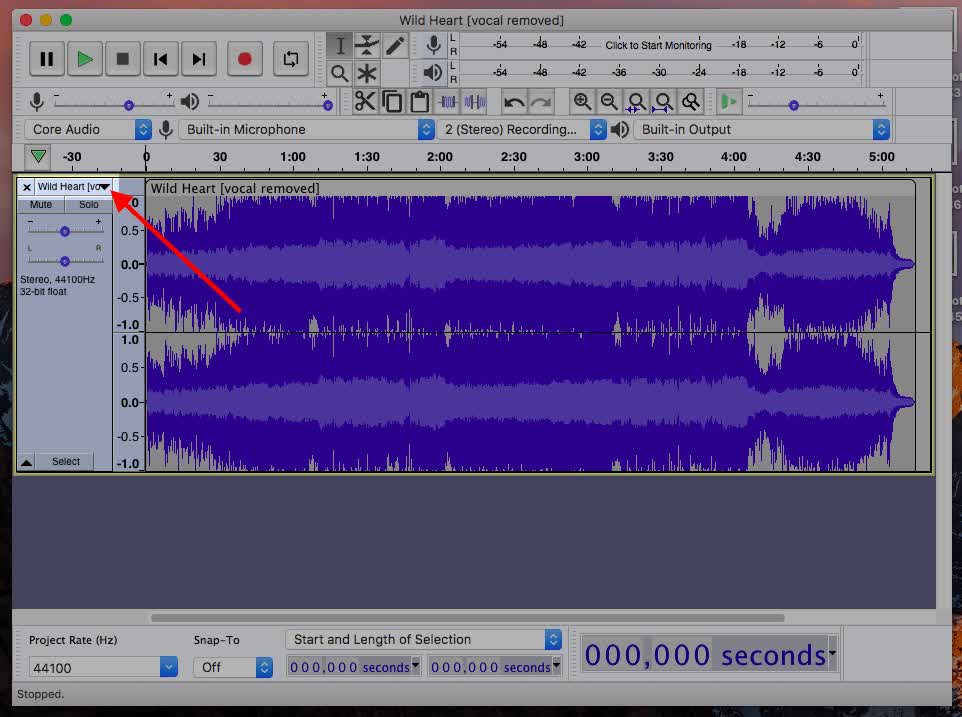
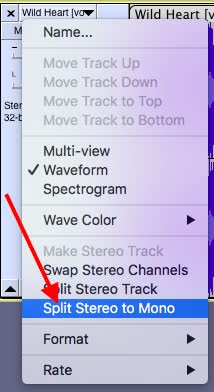
Step 2: Click the ‘Down Arrow’ on the title of the audio.
Step 3: Click ‘Split Stereo to Mono’.
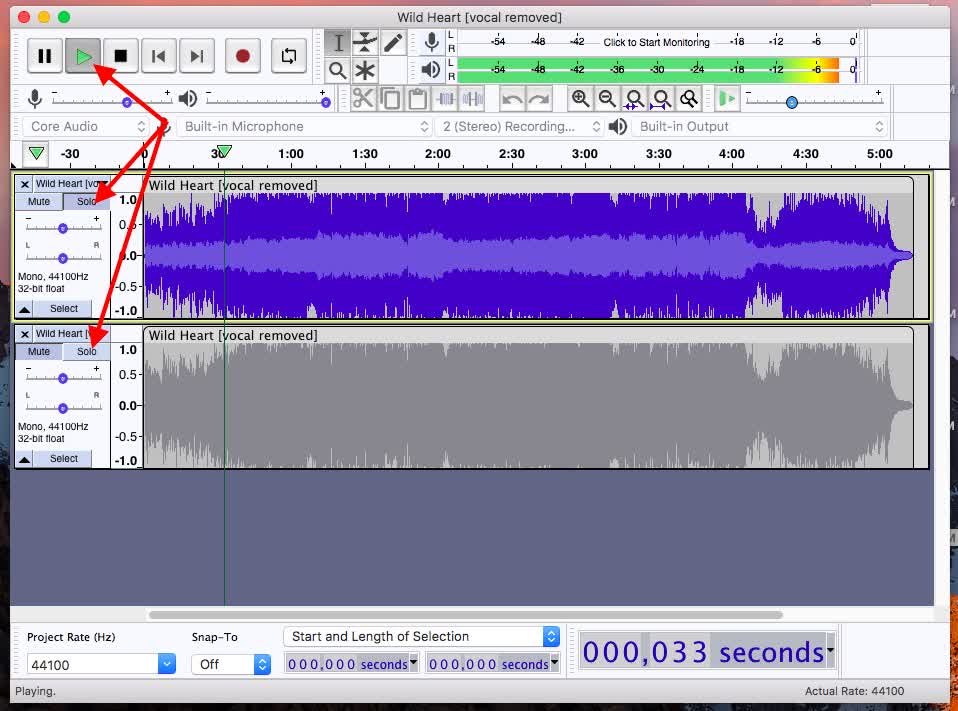
Step 4: Press ‘Play’ and click ‘Solo’ on each track to see if there is an isolated vocal on either channel.
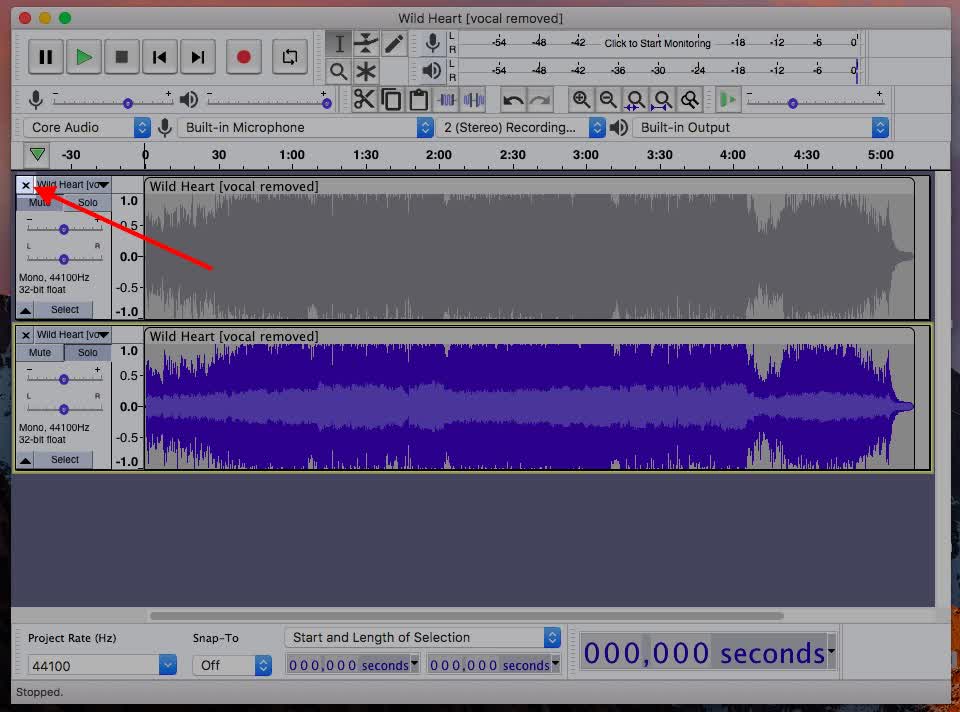
Step 5: Whichever one does not contain the isolated vocal, delete it from the Audacity session.
Audacity vocal remover not working
Here are a few things you can try if the vocal remover in Audacity is not working:
Start by uninstalling and reinstalling the latest version of Audacity.
Adjust the strength parameter of the Vocal Reduction & Isolation plugin.
Modify the high-cut and low-cut parameters. Before applying the changes, you can click ‘Preview’ to hear how it will sound.
Also, try the vocal remover with other songs. The song of your choice may have the vocals mixed in a unique place in the stereo field. If it works with other pieces, you may have to adjust the settings more for this song than others. Or you can try other vocal removers.
Notta transcribes your audio from any file type. Upload your file and experience effortless multi-format transcription with a single click.
FAQs
Where is the vocal remover in Audacity?
You can find the Vocal Reduction and Isolation plugin under ‘Effects.’ You can use the dropdown ‘Action:’ to select Remove Vocals. Then you can configure other settings to control the strength of the effect.
How do I isolate vocals in Audacity?
Select the vocals you want to isolate in Audacity. Then under ‘Effects,’ you can select the ‘Vocal Reduction and Isolation’ tool. Choose ‘Isolate Vocals’ under ‘Action.’
Final thoughts
Audacity is an excellent tool for editing audio files. When it comes to removing vocals, other programs will work better. Software designed for this, such as Notta Online Vocal Remover, can be more effective. This tool will automatically remove the vocals in most audio and video files. It’s a free and simple tool that can make your life much easier.