How to Transcribe Audio to Text in Microsoft Word
98% accurate, real-time transcription in just a few clicks. 58 languages and multiple platforms supported.
Although typing is the most common method of creating a Microsoft Word document, other options are available. For example, the Microsoft Word Transcribe feature is a convenient option if you are tired of constantly trying to improve your typing speed or prefer not to write.
Microsoft Word Transcribe allows you to convert speech to text. It comes in handy when transcribing a lecture or a Zoom meeting. However, this feature is only available to Microsoft 365 premium subscribers.
This article teaches how to convert speech to text using the MS Word Transcribe feature.
Transcribe live audio in Microsoft Word
Microsoft 365 allows users of Microsoft Word online to convert audio directly to text. Also, you have to be a premium subscriber, and there’s a five-hour limit on transcriptions. Below are the steps to transcribe live audio with Microsoft Word Transcribe.
To begin, ensure you have a microphone connected to the computer. It could be an in-built option or a separate mic that you can plug into the PC. However, ensure that the background noise doesn’t get in the way of your live-dictate.
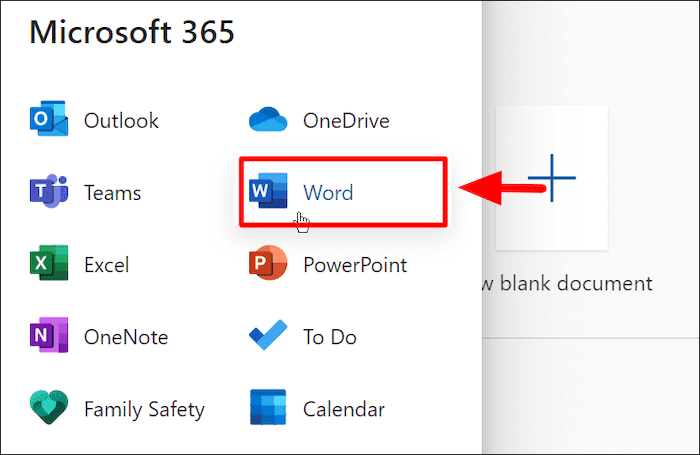
Step 1: Open Word Online and log in if you’re not already signed in.
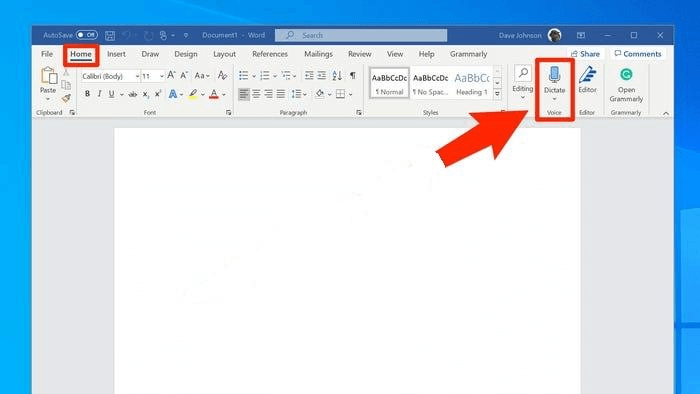
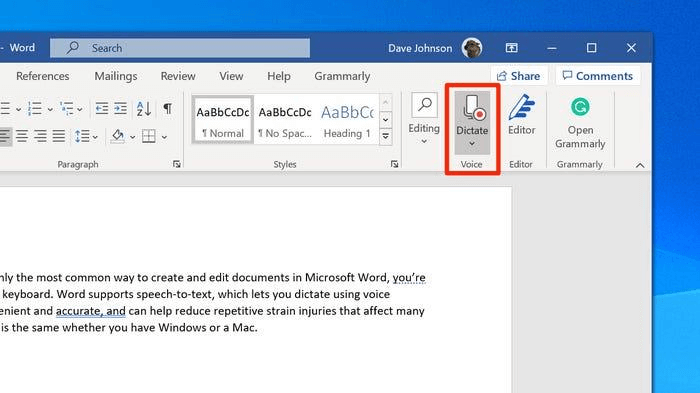
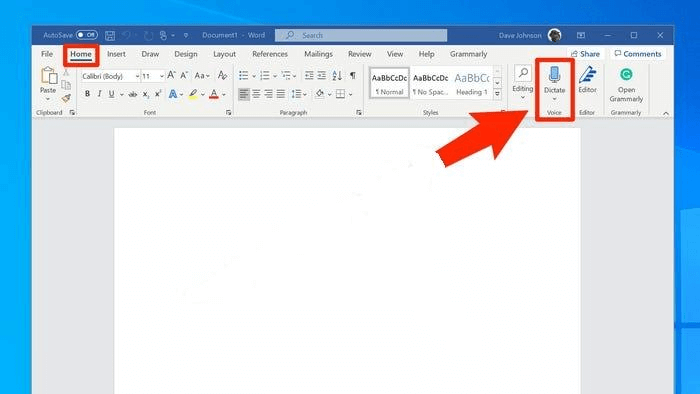
Step 2: Next, open a new Microsoft Word document. Click the ‘Home’ tab, and from the list of options available, touch the dropdown arrow next to the ‘Dictate’ tab.
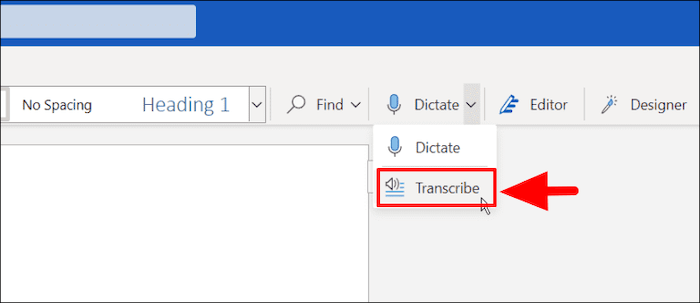
Step 3: From the dropdown, select ‘Transcribe’ to proceed.
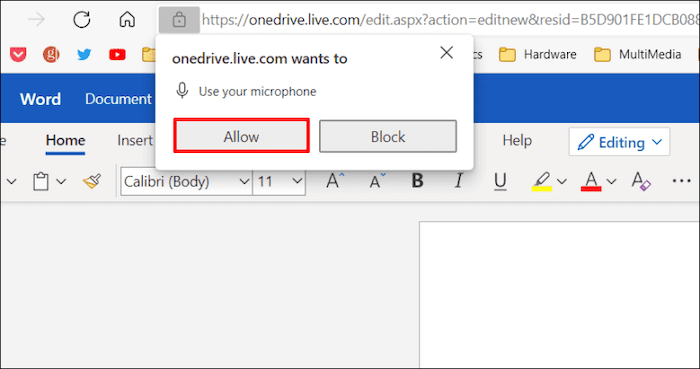
Step 4: If you haven’t transcribed previously, you’ll need to grant Microsoft access to your microphone.
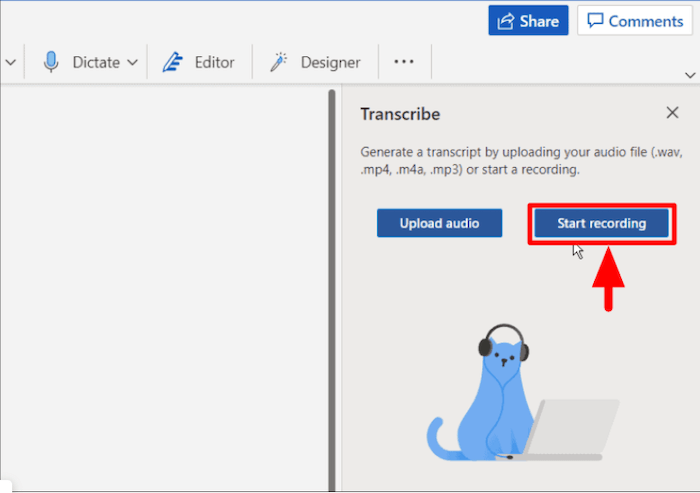
Step 5: A message will appear with two options. You can either upload an existing recording or start a new one. Select ‘Start Recording’ to proceed.
Step 6: Once you select this, the timer will start, and you can begin speaking. However, the transcription doesn’t take place as you speak.
Step 7: You can pause the recording and proceed with the ‘Dictate’ button. Ensure you leave the transcribe pane open while the recording is going on.
Step 8: Once you’re done with the recording, hit the ‘Save and Transcribe Now’ button.
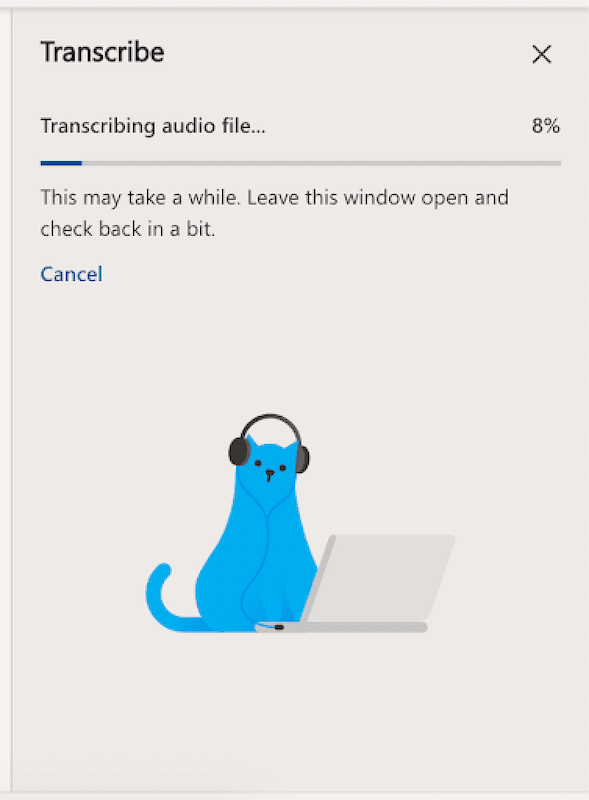
It could take a few minutes for Word to transcribe the recording and upload it to OneDrive. This depends on the length of your recording. After the transcription, the transcript will appear in the same pane the recording took place.
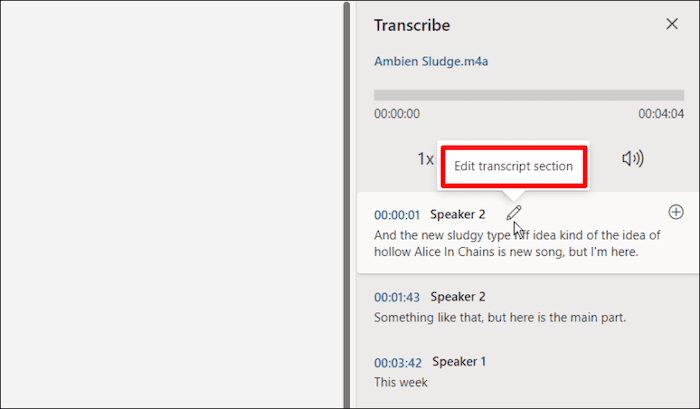
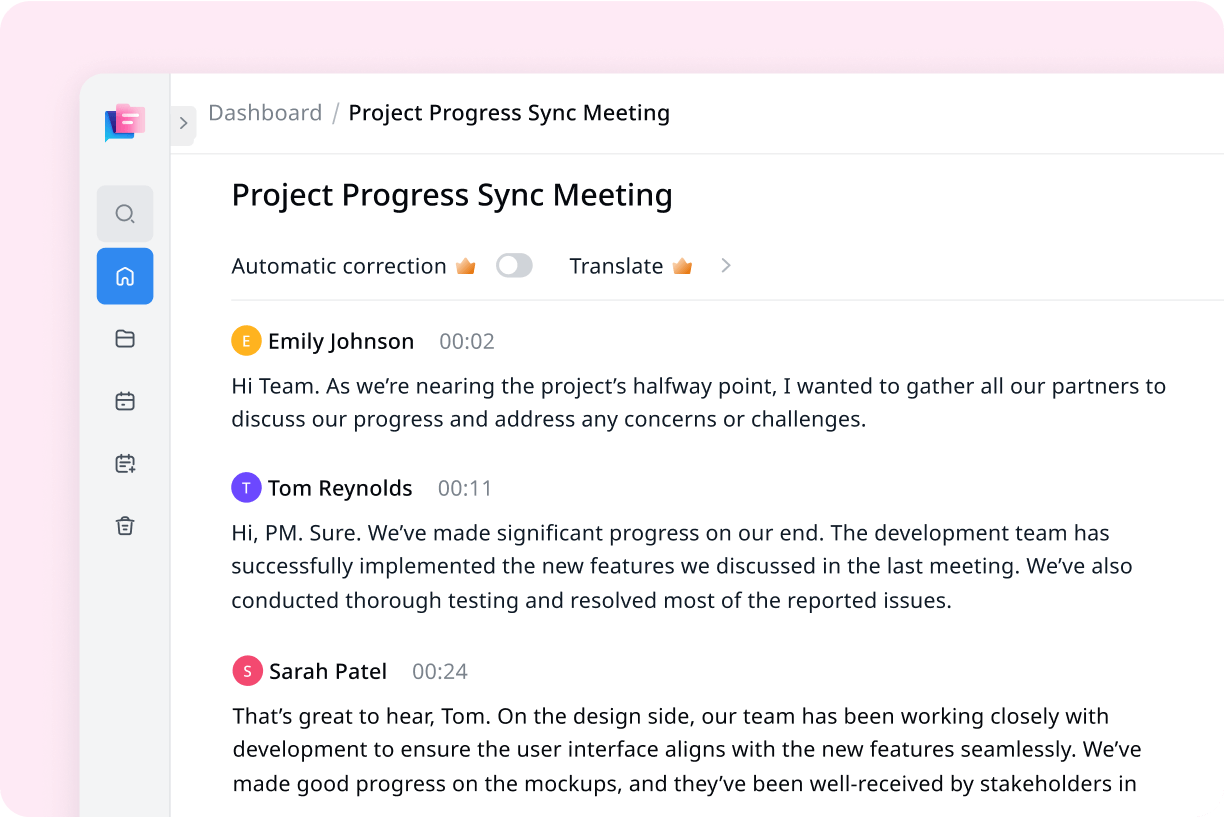
Every session comes with a timestamp, speaker name, and transcribed text. When Microsoft detects multiple speakers, it separates the text by speakers.
Use Notta's AI transcription tool to quickly and easily transcribe audio and videos. We guarantee accuracy and ease-of-use.
Transcribe uploaded audio files in Microsoft Word
As one of the best transcription software to convert audio to text online, you can also use the Microsoft Transcription feature to convert audio files. This could be handy when users want to transcribe Zoom meetings or lectures.
Follow the steps below to transcribe the uploaded audio file with Microsoft Word Transcribe.
Step 1: Sign into Microsoft 365 and then open Word Online to proceed.
Step 2: On the ‘Home’ tab, select the dropdown arrow next to ‘Dictate’ to proceed, and then select ‘Transcribe’ from the menu that appears.
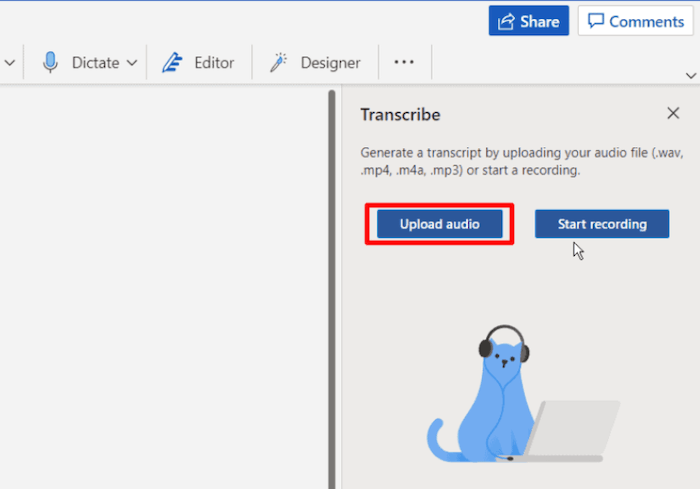
Step 3: This opens a ‘Transcribe’ pane. Select ‘Upload Audio’ to proceed. You can upload MP4, WAV, MP3, and M4A audio file types.
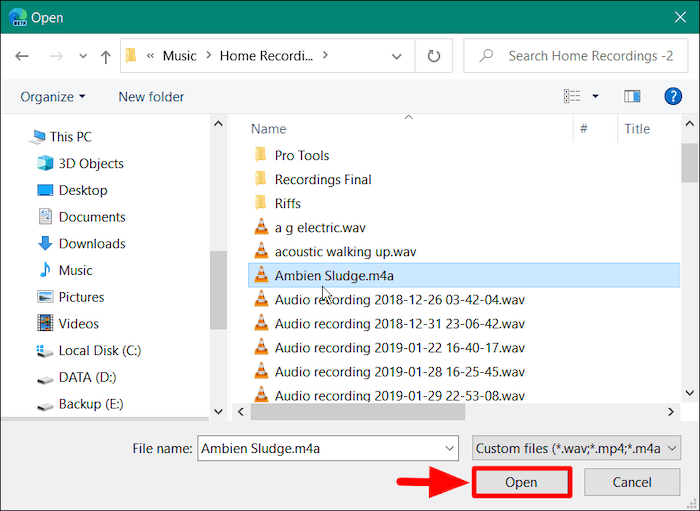
Step 4: This would open a new window. Navigate to the audio file location and select it. Once you pick the file, click ‘Open.’
Step 5: Microsoft will automatically start transcribing the audio file. Again, the file size determines how long it would take to transcribe.
Step 6: Once Microsoft finishes transcribing the audio file, it will appear in the pane where the audio file is. You can edit the transcription and save it to OneDrive when you’re done.
Convert speech to text in a few clicks with Notta's free audio to text converter. Accuracy guaranteed.
How to edit your transcript
You might notice that the transcript doesn’t reflect the recording audio accurately. Luckily you can edit the transcription whenever you want. Follow the steps provided below to edit the transcript when you want.
How to edit the transcript
To edit any section of your transcript, do the following:
Step 1: Hover the mouse over the text section that needs to be corrected.
Step 2: A pencil icon will appear; click on it to start editing the transcript in this section. Like every other text in a browser, you can select a section of the text, right-click, and view the options available.
Step 3: Copy or search any part of the text.

Step 4: Use the available playback controls to revisit the audio recording if you want to listen to a part of it. The playback buttons include volume, play, pause, forward, and back.
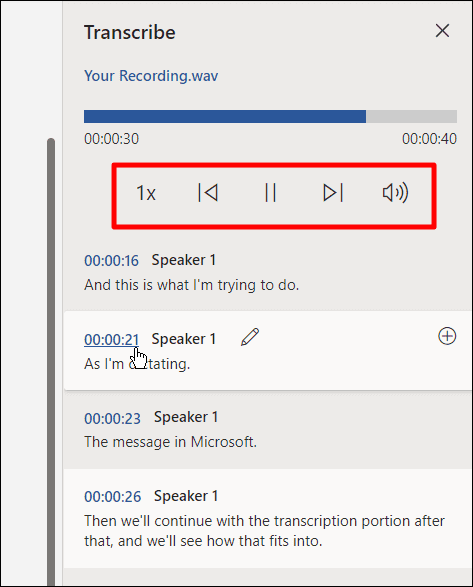
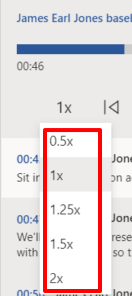
An excellent addition is the speed control that allows you to change the playback speed from slow to twice normal when you need to skip through the recording.
How to rename speakers
Another editing feature you can explore on Microsoft Word Transcribe is the changing of speakers’ names. For example, suppose there’s more than one speaker in the audio transcription.
Microsoft distinguishes them as Speaker 1, Speaker 2, and Speaker 3. However, if this is confusing, change it to the speaker’s proper name. Follow the steps below to rename speakers in the Microsoft transcription.
Step 1: Hover the mouse over the name and hit the pencil icon that appears.
Step 2: Input the new names.
Step 3: Ensure you check the ‘Change All Speaker’ box to change the name throughout the transcript.
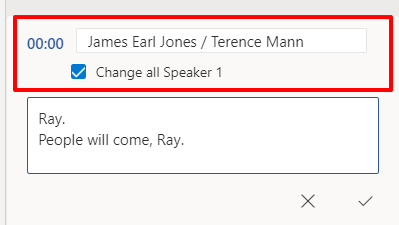
Step 4: Once you change the name, click ‘Done’ to save the changes.
How to add the transcript to your document
You can add a part or the entire transcript to a Word document in many ways. However, the most common choice is the ‘Add to Document’ option at the bottom of the Transcribe pane.
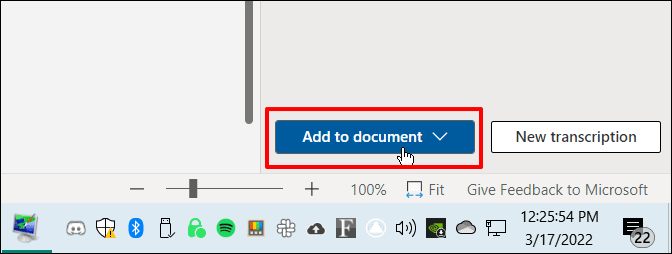
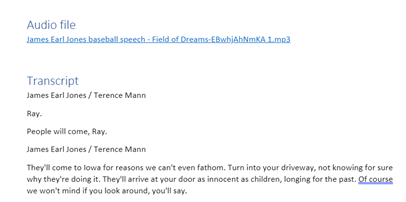
Once you select this option, the software will add the recording and content of the transcript to your document. You can click the audio link to listen again.
However, you can only edit the text, not the audio, in the Word document. Also, when added, the ‘Audio File’ and ‘Transcript’ lines will be in ‘Heading 1’ while others will be in ‘Normal’ style.
Notta - AI transcription tool outshining Microsoft Word
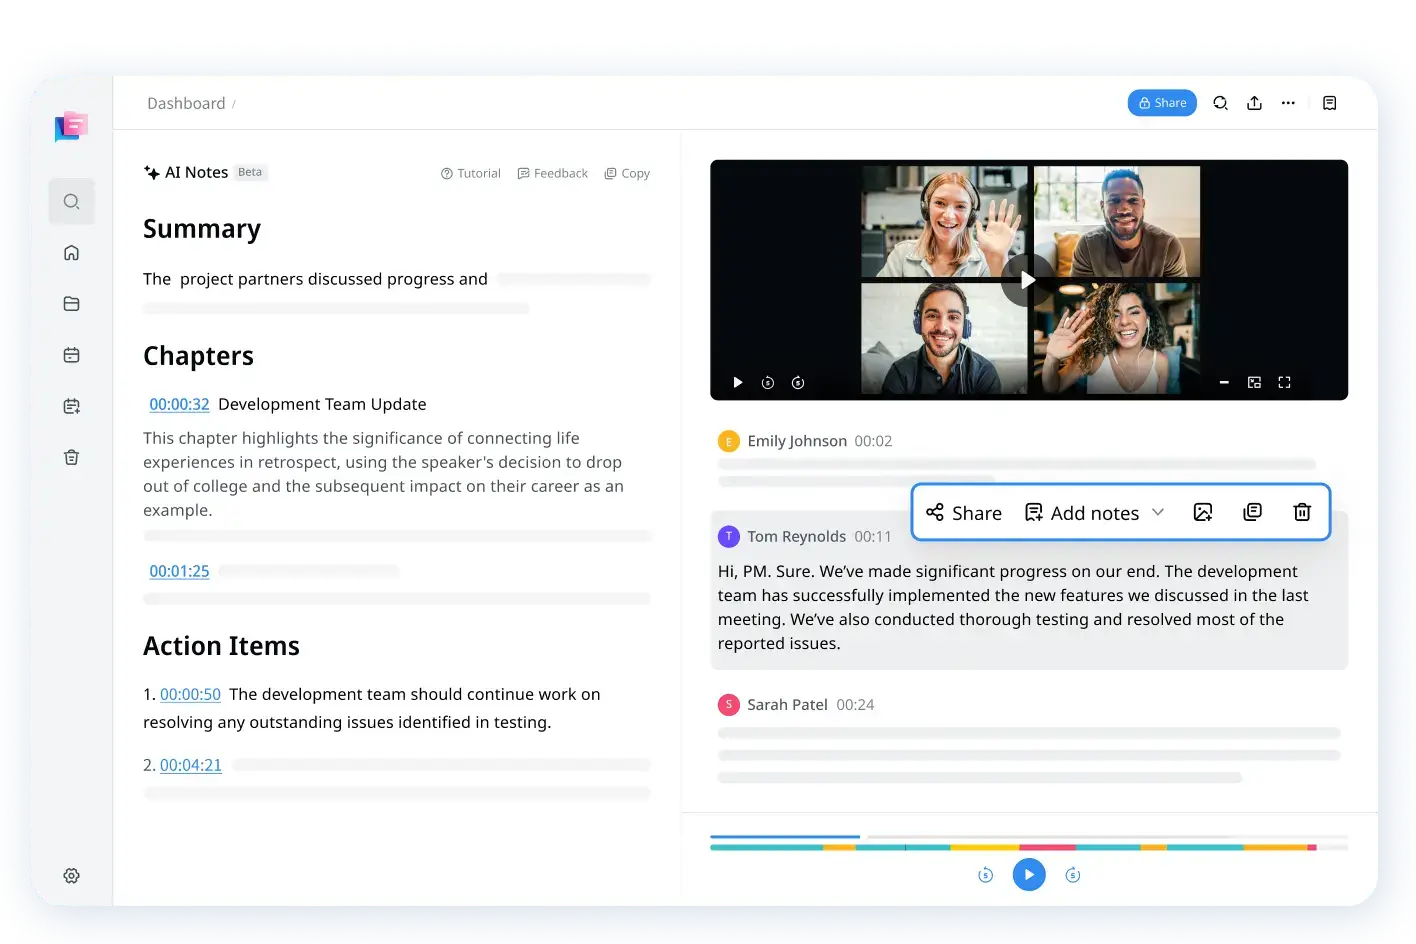
If you're looking for transcription services that offer higher accuracy and more advanced features than Microsoft Word, Notta will be the answer.
Notta is an AI-powered automatic transcription tool that supports 58 transcription languages and 42 translation languages. It caters to a global audience, enabling users to transcribe content in multiple languages effortlessly.
With Notta, you can transcribe real-time conversations or pre-recorded audio & video files with ease, making it an ideal choice for creating meeting minutes, recording interviews, or simply recording your latest great idea.
Notta also runs well online, offers mobile apps, and has a super handy Chrome extension, making it accessible to users on the go.
Additionally, Notta prioritizes data protection by being SOC 2 and GDPR compliant, so users can rest assured that their information is safe and secure.
In comparison to Microsoft Word, Notta exhibits clear superiority in terms of accuracy, ease of use, language support, and additional features. While Microsoft Word may serve as a general word processing tool, Notta is purpose-built for transcription, providing specialized features that cater specifically to transcription needs.
Wrapping up
Although this transcription feature is not perfect, it can save you a lot of time if you need to transcribe audio to text quickly. The software is built directly into Microsoft 365, a popular product with businesses.
As an alternative, Notta Chrome Extension allows you to record and transcribe recordings in real time. Sign up on Notta today to explore this unique tool.
FAQs
1. Why can’t I find the Transcribe option on my Microsoft Word?
The Microsoft Word Transcribe feature only works for Word Online, not the application. Also, you can only sign into Microsoft 365 using the latest version of Chrome and Microsoft Edge browsers, and the transcribe experience works with 80+ locales.
2. Is it free to use the MS Word Transcribe?
No, it isn’t. The MS Word Transcribe feature is only available for Microsoft 365 premium subscribers. In addition, you can only access the feature when you open Word on a web browser.
3. Are there any other alternatives to transcribing audio to text?
Yes, there are. The Notta Transcribe Audio to Text Online tool is an excellent option for accurate transcription. This AI tool allows you to easily record and transcribe meetings in real-time.
4. What version of Word has Transcribe?
Since it only works with Word Online, there’s no specific version of Word that has been transcribed. You can always access this tool through the web version of Word on your PC.
5. How good is Microsoft Word transcription?
The accuracy of the transcription can vary depending on factors such as audio quality, background noise, and the clarity of the speaker's voice. Microsoft Word is designed to provide a convenient way to generate a rough draft or initial transcription. It may require some manual editing and proofreading to correct any inaccuracies or mistakes in the transcription.
If you require highly accurate and professional transcriptions, it's advisable to consider dedicated transcription software like Notta, which often employs more advanced speech recognition algorithms. These services can offer higher accuracy and additional features tailored specifically for transcription purposes.