How to Transcribe Audio to Text in Google Docs for Free
98% accurate, real-time transcription in just a few clicks. 58 languages and multiple platforms supported.
Amidst the fast-paced modern world, time is a precious commodity, and efficiency is paramount. This is especially true when transcribing audio content, a time-consuming and often tedious process that can leave one feeling drained and overwhelmed.
Luckily there is a solution: Google Docs voice typing. This innovative feature is popular due to its ease of use and accessibility. With it, users can streamline the transcription process and free up valuable time.
Here is a comprehensive guide on using Google Docs to transcribe audio files, complete with step-by-step instructions and helpful tips. I will also introduce an innovative alternative, Notta, which offers exceptional accuracy and a range of features that make audio transcription a breeze.
Get ready to unlock the power of transcription and take your content creation to new heights!
How to use Google Docs to transcribe audio
Google Docs has a built-in voice typing feature that allows users to transcribe audio by clicking 'Voice typing.' The tool converts what you say into text and places it directly into your document. It's simple, effective, and fast! Here is how to use the tool:
Step 1: Open Google Docs and create a new page
Open Google Docs and Click 'Blank document' on the home page. This will open a new blank Google Doc in which you can begin typing.

Step 2: Access Google Docs Voice Typing
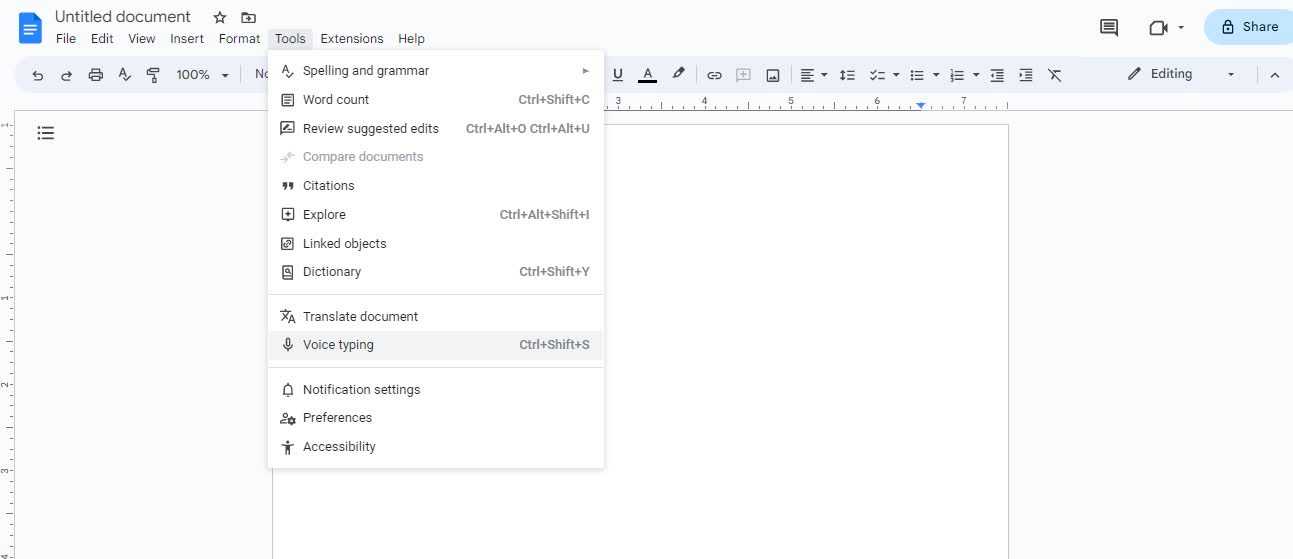
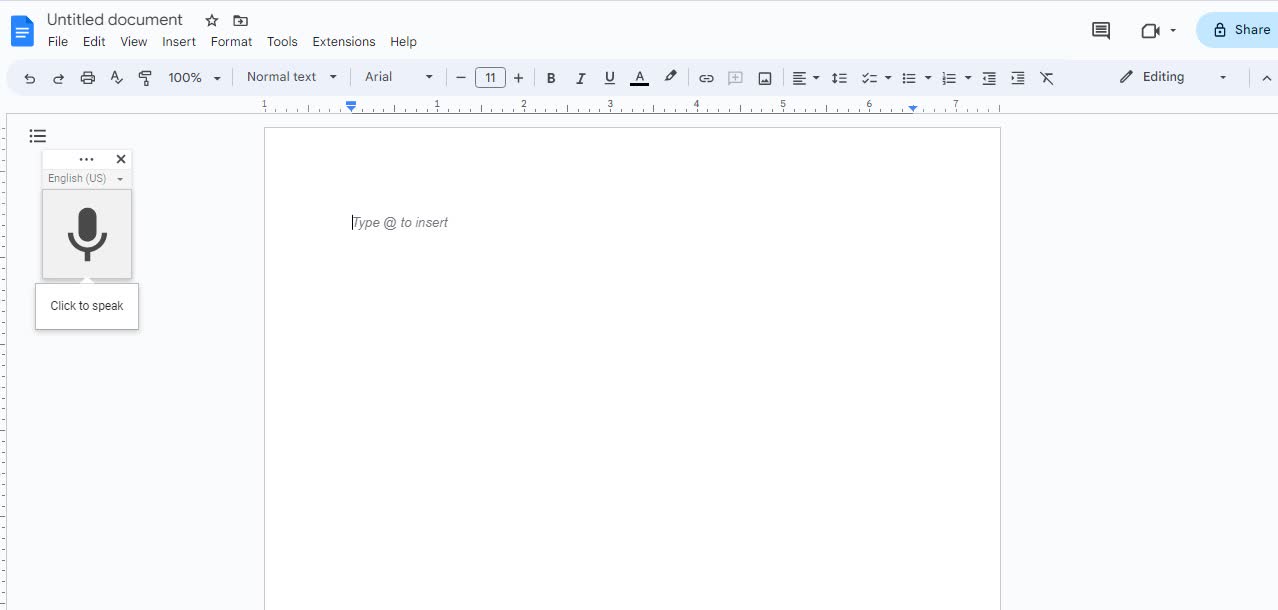
To transcribe audio, click "Tools" in the menu bar and select "Voice typing." A microphone icon will appear on your screen. Alternatively, you can use the shortcut "Control + Shift + S (for Windows)" or "Command + Shift + S (for Mac)" on your keyboard to access the tool.
Step 3: Set up your microphone
Before you start transcribing, ensure your microphone is set up and ready. Connect your microphone to your device, and verify it functions correctly.
Step 4: Choose your language
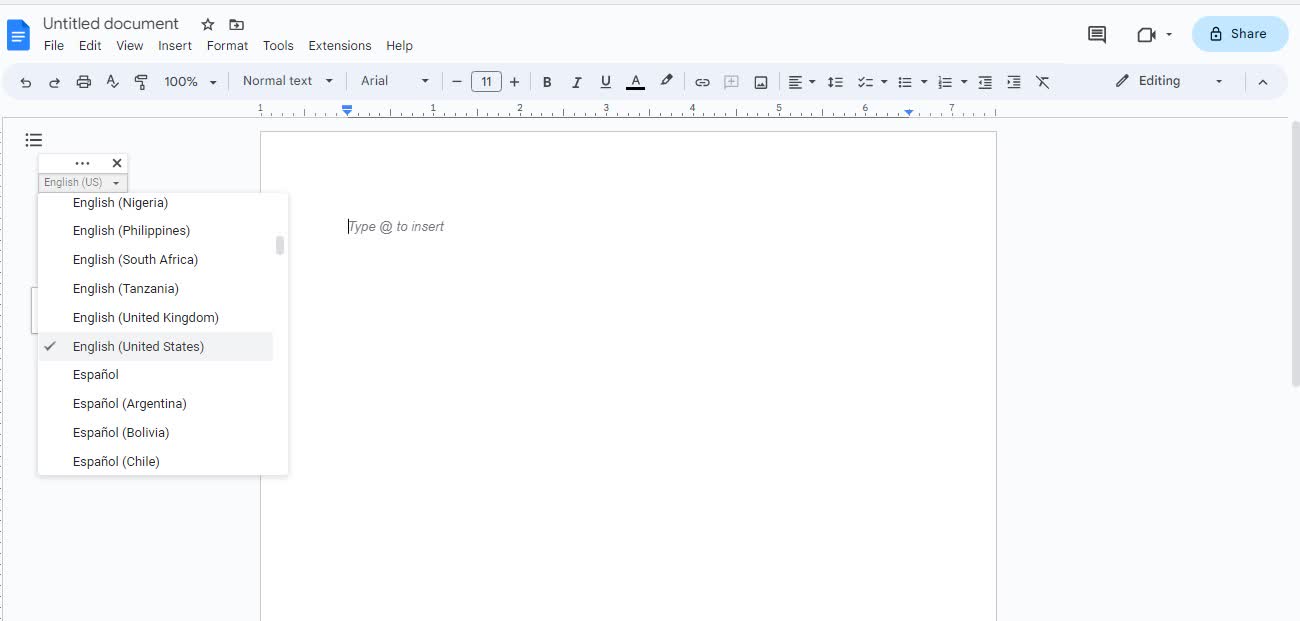
Google Docs voice typing supports over 100 languages, so select the appropriate language for your transcription needs.
Step 5: Start transcribing
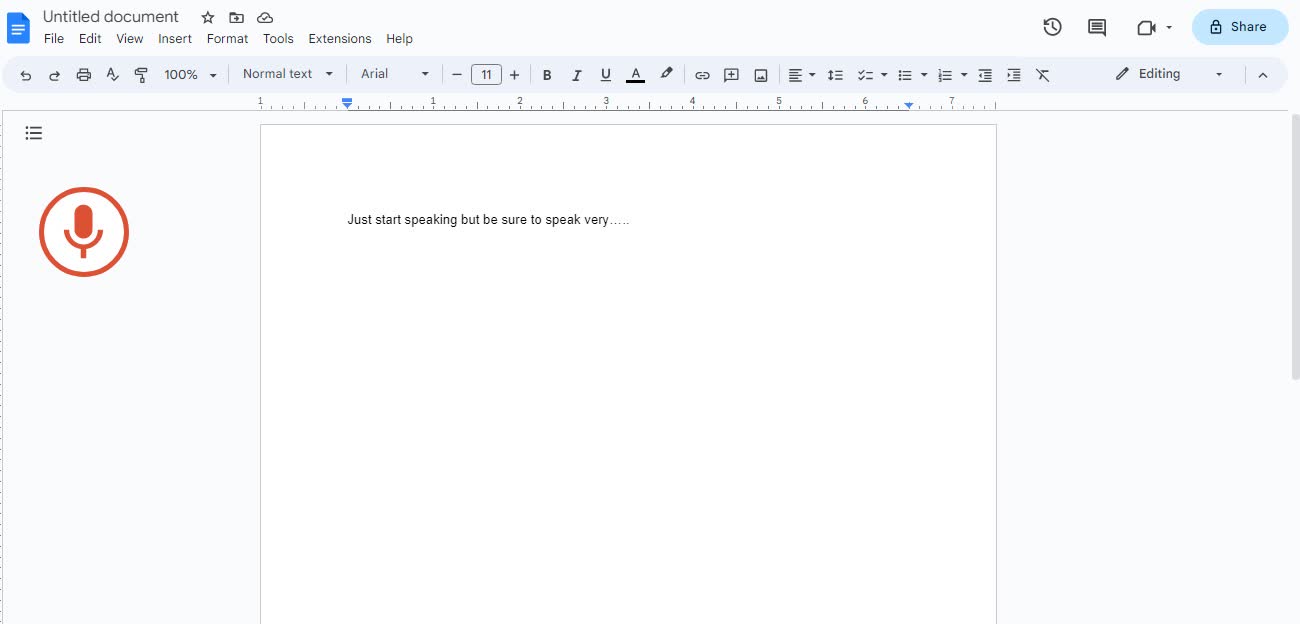
Once you have set up your microphone and chosen your language, you can transcribe. Click on the microphone icon to activate voice typing, and begin speaking into your microphone. Your words will appear on your screen in real-time as you talk.
Step 6: Use voice command
Google Docs voice typing offers a range of voice commands that can help format your transcription. For example, you can use the "period" command to insert a full stop or the "comma" command to insert a comma. You can also use voice commands to delete or replace text. However, the voice command is only possible if the account and document language are in English.
Step 7: Edit and proofread your transcript
Once you have finished transcribing, it is essential to proofread and edit your transcription for accuracy and clarity. You can use Google Docs' editing tools to format your transcription and make necessary changes.
Need help to keep up with audio and video transcripts by hand? Our tool makes the process fast and painless. Transcribing takes only minutes, not days.
Benefits of using Google Docs for audio transcription
Google Docs offers numerous benefits for audio transcription, including:
Time-saving: Google Docs allows users to transcribe audio content in real-time, reducing the time required to transcribe content significantly.
Ease of use: Google Docs is user-friendly and straightforward, making it accessible to users of all skill levels.
Free: Google Docs' audio-to-text feature is free with every Google Docs account, making it an affordable solution for audio transcription needs.
Although Google Docs's transcribing feature is free, fast, and easy to use, it may not be the most accurate tool. Therefore, speaking slowly and clearly and using proper grammar is essential when using Google Docs voice typing. If the transcript has any errors, fix them by editing the document.
Tips for transcribing effectively with Google Docs
Voice typing is the fastest way to transcribe a document using Google Docs. But its accuracy depends on your pronunciation, diction, and enunciation.
To improve your transcription speed and accuracy:
Ensure you are speaking from a quiet room.
Ensure your microphone is not too far or close to your mouth.
Speak slowly and clearly in a natural tone, without pausing between words. Only break in between commands.
The microphone has a bubble that shows the text it is transcribing. It allows you to verify if the Docs heard the correct command. If the order it picks up is wrong, you can issue an "Undo" command.
How to transcribe audio to text with Notta
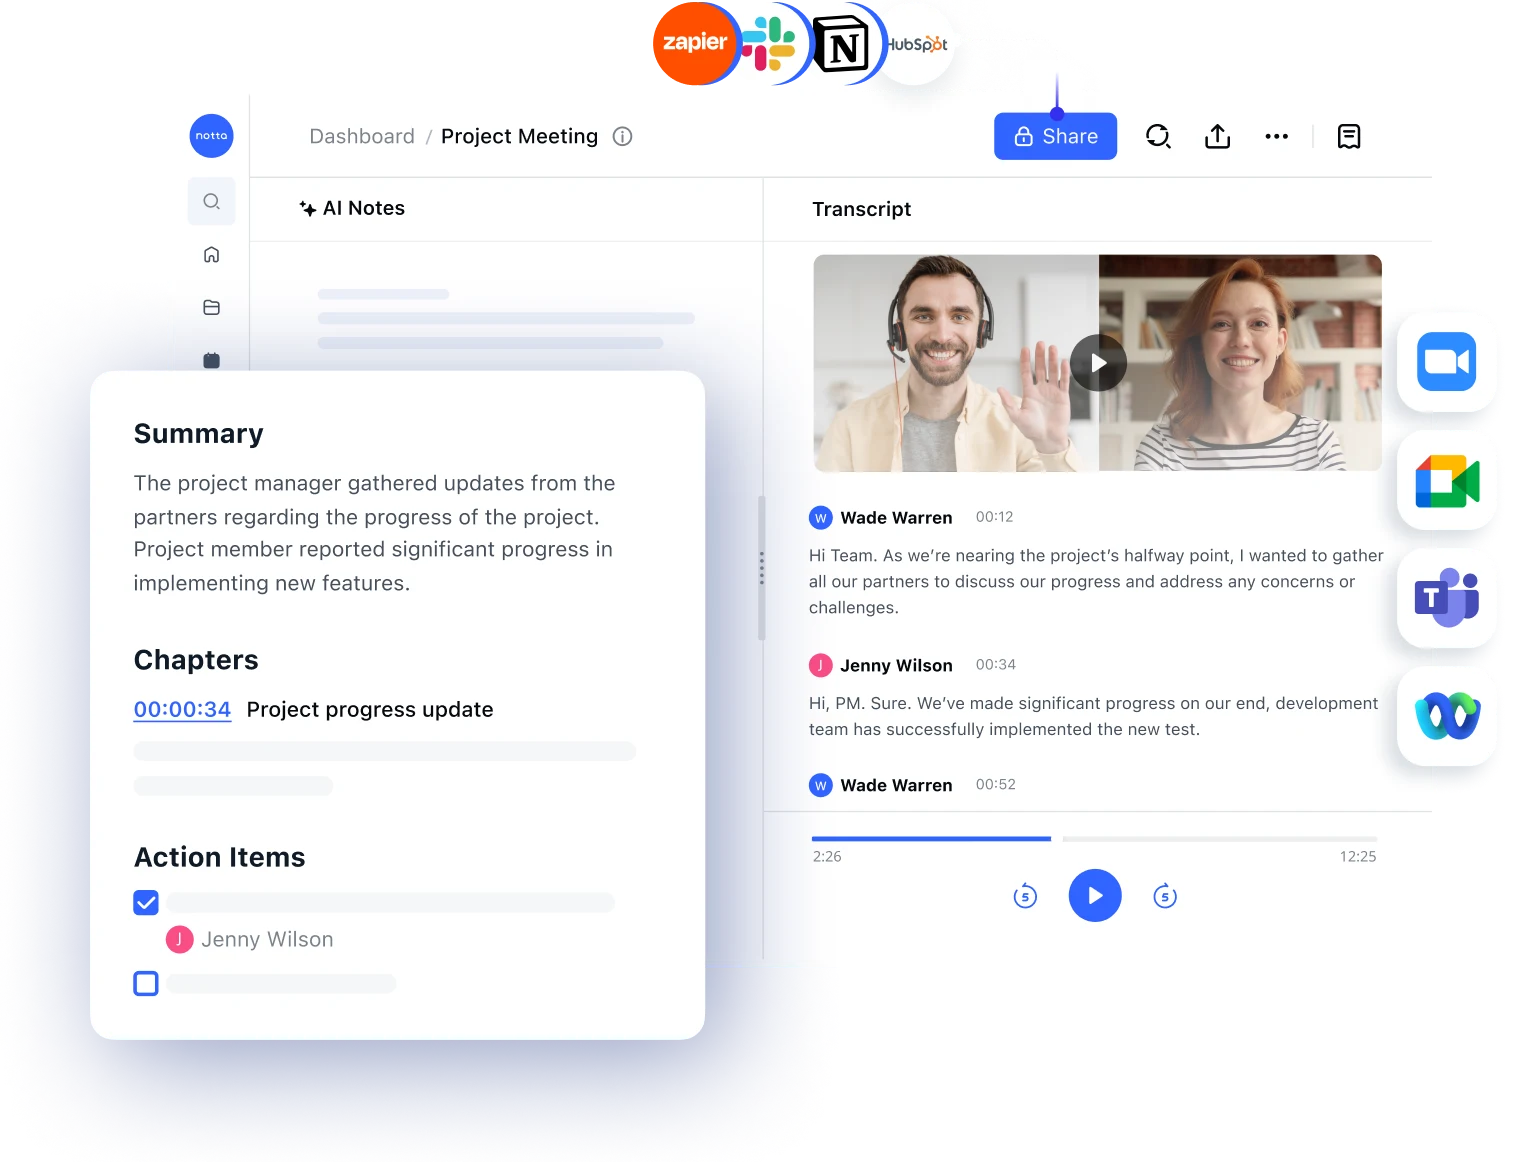
Unlike Google Docs voice typing, Notta presents a more professional and accurate solution for audio transcription.
The Notta platform offers high accuracy, allowing users to transcribe audio faster and more efficiently than other tools. Here is a step-by-step guide on transcribing audio with Notta.
Step 1: Create an account with Notta
There are two ways you can get started with Notta:
Use the Notta Web App: To begin using Notta, you can visit the Notta Web app and create an account. Use Google Chrome or Microsoft Edge for optimal performance. However, Safari is also supported. Once on the Notta Web app, you can sign up with your email or log in using a third-party account like Google, Microsoft, or Apple ID. With your account set up, you can use Notta Web and the mobile app simultaneously using the same login credentials.
Use the Notta mobile app: The Notta app is available for iOS and Android devices. Find it ready for download from the Apple App Store or Google Play. After installing, log in with your email and password. Alternatively, access the platform using a third-party account like Google, Microsoft, or Apple ID. With your account set up and logged in, you can transcribe audio with Notta.
Step 2: Upload your audio file
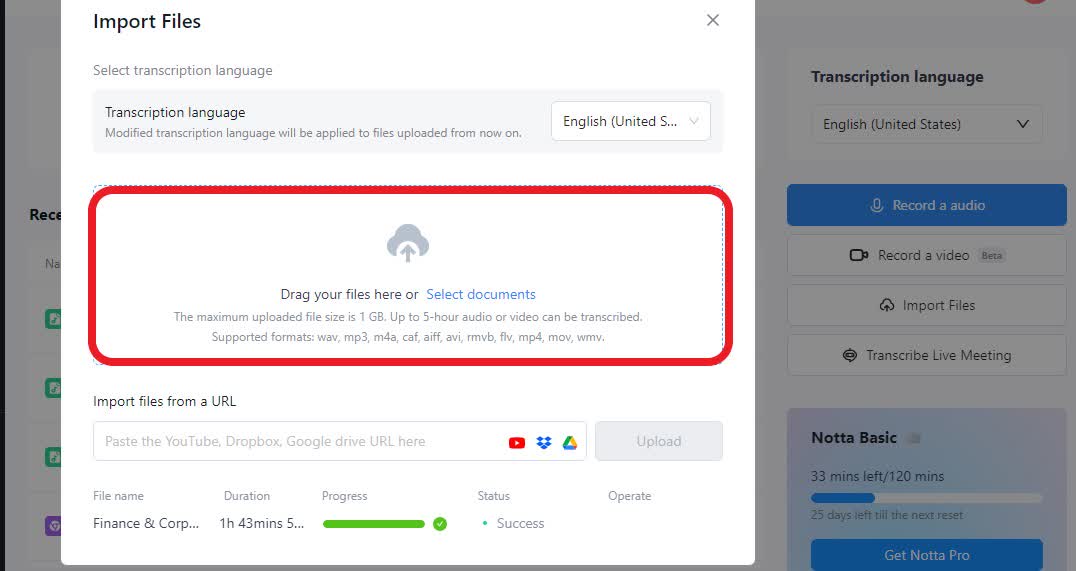
After logging into your Notta account, upload the audio/video file you wish to transcribe. Notta supports various audio and video formats, including MP3, WAV, M4A, MP4, MOV, and more.
You can do this by clicking on the "Import Files" button, which will direct you to a pop-up page where you can drag and drop your audio/ video file or select it from your computer. Remember to select the language you want the transcript to be in before completing the process.
Another option is to conduct a live screen recording and have it transcribed in real-time. This is a great feature for live events such as conferences, lectures, or meetings.
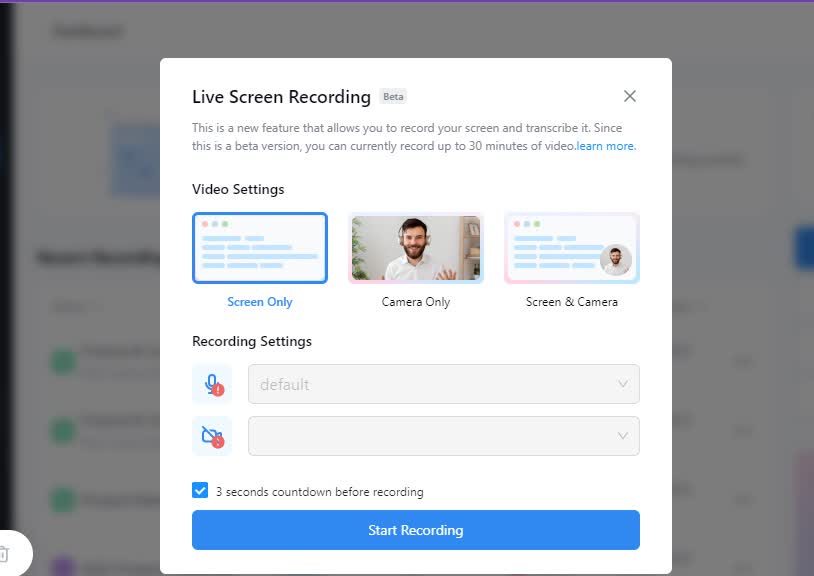
You can record your computer screen, webcam, or both; the app will generate the transcript as you record. However, since this feature is a Beta release, it's limited to 30 minutes of recording time.
Step 3: Wait for the transcription
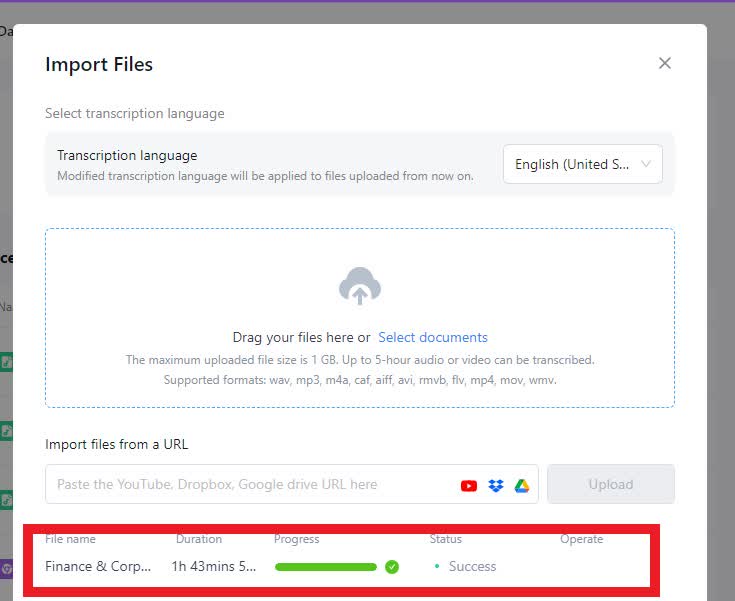
Notta's advanced algorithms start transcribing the audio, and you can see the live transcription as it progresses. The platform uses artificial intelligence to convert the audio into text and create an accurate transcript. Notta's technology ensures that the transcriptions are accurate and free from errors.
Step 4: Review and edit your transcript
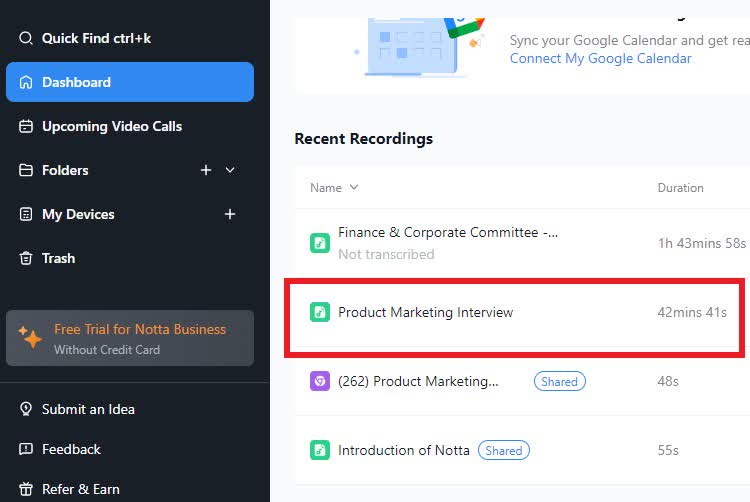
Once the transcript is complete, please find it in your dashboard. You can review and edit the transcript to ensure accuracy and clarity. Playback the audio while reviewing your work to ensure the transcript covers everything.
Step 5: Export your transcript
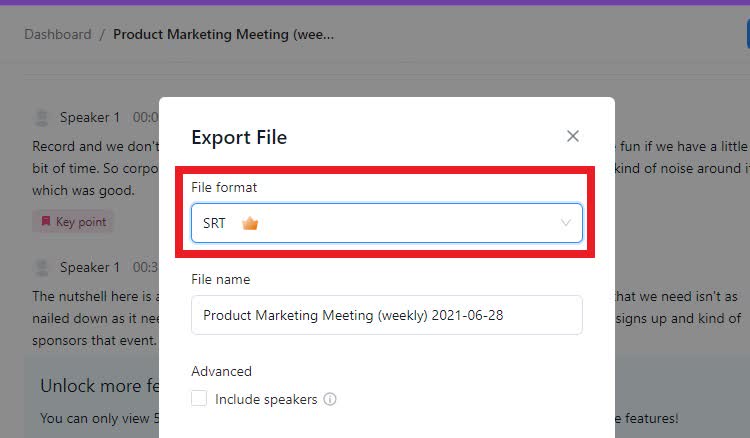
After reviewing and editing your transcript, you can export it to various formats, including TXT, DOCX, EXCEL, and PDF. Click the export button, and choose the file format you want. This will download the transcript to your device, where you can access it anytime.
Step 6: Share the transcript
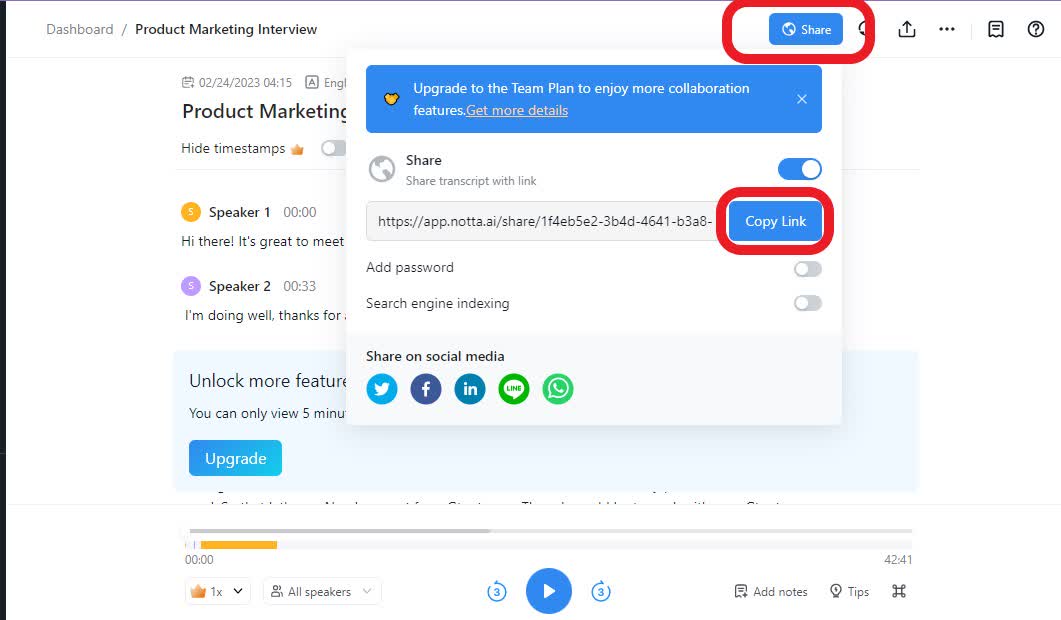
You can also share the transcript with others via a shareable link. Click the share button, and add a password to your transcript if necessary. Next, please copy the link and password and send it directly to the person or team needing it.
Notta can convert your spoken interviews and conversations into text with 98.86% accuracy in minutes. Focus on conversations, not manual note-taking.
Benefits of using Notta
As you can see, the Notta Subscribe service is an easy way to create transcripts. Several benefits make it a better option than other transcript services, including:
Fast transcription
Notta's subscription service provides users with lightning-fast transcription to quickly and accurately process audio content.
This speed is especially beneficial for businesses and professionals who must quickly transcribe large volumes of audio content. With Notta, you can receive your transcripts within seconds, allowing you to work more efficiently and productively.
Accurate
Notta provides highly accurate transcriptions as close to the original audio as possible. The platform uses the latest AI technology to identify and interpret audio content, ensuring that every word is accurate.
This is especially helpful in fields where accuracy is critical, such as legal or medical transcription.
Support for various types of audio content
Notta is not limited to transcribing just one type of audio content.
Notta's transcription service supports audio transcription, meeting transcription, recording transcription, and screen recording transcription.
This versatility makes Notta ideal for a wide range of transcription needs.
Easy to use
Ease of use is also a hallmark of the Notta subscription service. The platform's interface is easy to navigate, even for users without experience with audio transcription.
Once you upload the audio file, Notta will take care of the rest. The platform's intuitive interface makes editing and downloading the transcript very straightforward.
This ease of use is handy for users without extensive technical skills.
Secure
Notta takes security seriously, and all audio content uploaded to the platform is confidential. No one can access your transcript without your approval.
Notta employs state-of-the-art security protocols, ensuring users' audio content is safe and secure. With Notta, you can know your data is safe and protected.
As you can see, Notta's subscription-based audio transcription service provides a fast, accurate, easy-to-use, and secure solution for audio transcription needs. With support for various types of audio content and a commitment to accuracy and quality, Notta is excellent for anyone seeking a reliable audio transcription service.
FAQs
Are there limitations on the number of files I can transcribe?
When using Notta, there are no limitations on the number of files you can transcribe. You can upload and transcribe as many audio files as you need, and the transcription will be available for you to download or share online. However, to get full access to the Notta transcription tools, upgrade to a pro/ business subscription.
How can I share the transcription with online links?
Once the transcription is complete, the user can easily share the file with others by generating a link. They can do this via email, social media, or other online platforms. Anyone accessing the link can view the transcription without logging in or creating an account. However, to make any changes, they need to own an account.
Is the audio transcription service available in multiple languages?
Yes, the audio transcription service supports multiple languages. You can transcribe audio files in over 50 languages, including English, Spanish, French, German, and more. You can select the desired language when uploading your audio file; the transcription will be in that language.
What audio formats Does Notta support for transcription?
The Notta audio transcription service supports various audio formats, including MP3, WAV, M4A, AAC, and more. Upload the audio file in one of the supported formats, and the transcription will generate automatically.
Can I edit the transcription after generating it?
Yes, you can edit a transcription after generating one. Once the transcription is complete, Notta saves the transcript on your dashboard. You can edit the transcription using the built-in editor or download the transcript as a text file to edit on your computer. You can also delete the transcript if necessary.
Conclusion
Transcribing audio into text can be time-consuming and challenging, but it can also be efficient and rewarding with the right tools and techniques.
Google Docs and Notta are two excellent options for transcribing audio to text. While Google Docs' audio-to-text feature offers a free and convenient opportunity, poor audio quality may hinder its accuracy. Notta, on the other hand, provides greater accuracy and a more user-friendly interface, albeit at a cost.
Ultimately, the choice between the two hinges on individual needs and preferences. However, regardless of the chosen method, clear audio quality and careful editing are essential for producing a polished final product.
For those seeking top-tier accuracy, give Notta a try. With its advanced features and powerful algorithms, Notta can help you create a highly polished transcript. So what are you waiting for? Start transcribing confidently and enjoy the benefits of having your audio content in text format. Happy transcribing.