
How to Record Lectures
98% accurate, real-time transcription in just a few clicks. 58 languages and multiple platforms supported.
Do you have an important lecture coming up that you want to make sure you never forget? Sure, you can take notes, but wouldn’t it be better if you could just record it and listen to it whenever you want?
In this article, we’ll explain how to record a lecture using three methods:
Using a recording device
Using a laptop
Using software to record online lectures
We’ll show you the industry secrets we use to help millions of students, teachers, and professionals record lectures and meetings. By the end, you’ll be ready to keep a record of every lecture that happens throughout your educational career.
Method 1: Record lectures with a recording device
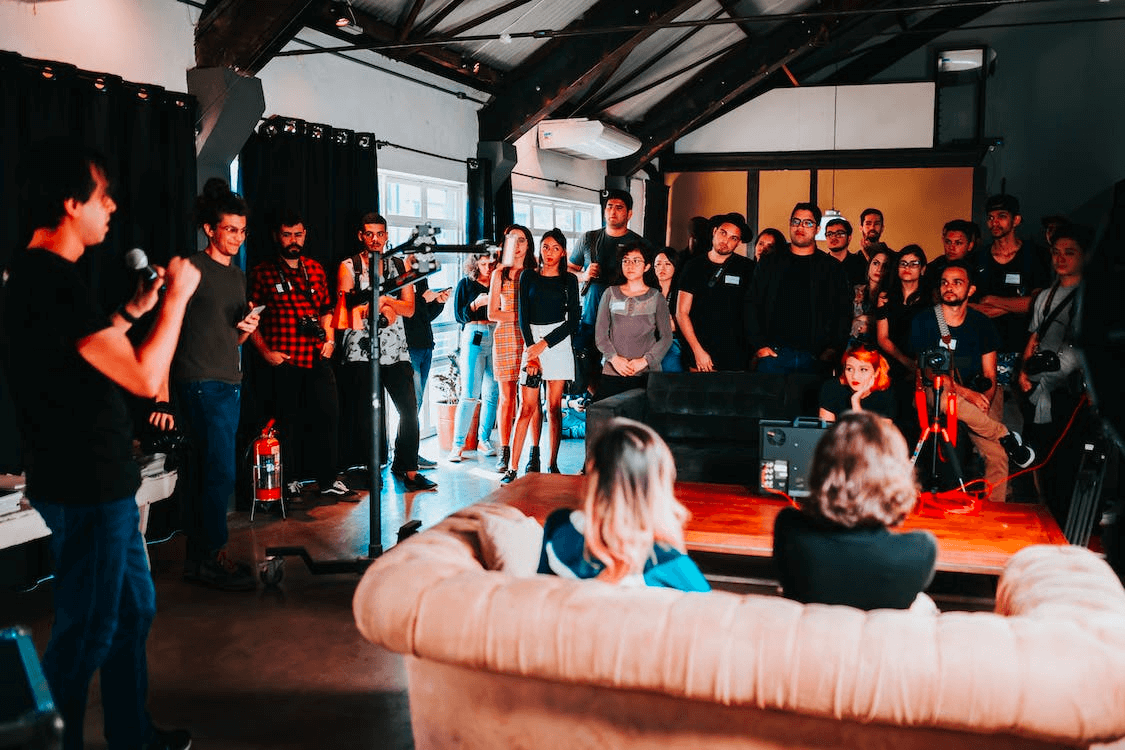
The first method we’ll explore involves using a recording device to record a lecture. You can use a digital recorder or your smartphone. Here’s how to get the best possible recording using any of these devices:
Step 1: Choose your recording medium.
Recording Device:
Select a device with a large amount of storage. Some recorders, such as the AEKOMi, have a built-in hard drive. Other, such as the Zoom H4n, store audio on SD cards. Whatever device you choose, it’s better to have more than you think you’ll need to last the current term or semester. 64 GB is enough for ~268 hours of recording.
There are some recorders that have a built-in USB drive to connect to your computer. This is meant to transfer files to your computer easily. However, these are typically USB Type-A devices. Many laptops today only take USB-C inputs, so if you choose this type of recorder, make sure you pick up the correct adapter as well.
Smartphone:
Chances are that your smartphone comes with a voice recorder pre-installed. The microphone in most current smartphones is adequate to record an entire lecture with good sound quality. The only downside is that you’ll have to share space on your phone for your recordings with pictures, apps, and other media.
Step 2: Test the sound quality of your recording medium.
Before you go to your lecture, find a place to test your recordings.
Start recording, then speak a few words at different places throughout the room. Start close, then work your way as far back as you think you might be from the lecturer.
If you have access to the classroom before the lecture starts, or you can even do the test with the lecturer present, even better.
Be aware of any background noise in certain parts of the classroom. If there is too much in one place, try to plan another place to record from.
Step 3: Get a seat as close as you can to the lecturer.
Let them know you will be recording the session.
Ask them if you can place your recorder close to where they are speaking from if you are too far away.
If you have to record from a far distance, try elevating your device. Put it on a tripod or a stack of books. This may help the speaker's voice reach the microphone in your recorder more clearly.
Step 4: Record the full lecture.
It’s important that you have a device that has enough space to record a full lecture each time.
This makes sure you don’t miss any important details.
Automatically generate notes from your lecture
After your lecture, you can upload your recording to Notta. Then, you can use it to take notes on your lecture automatically.
Step 1: Transfer the recording to a computer.
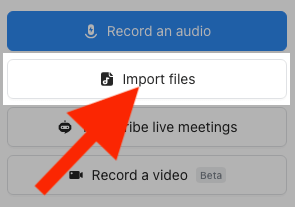
Step 2: Log in to your Notta dashboard. Select ‘Import files.’
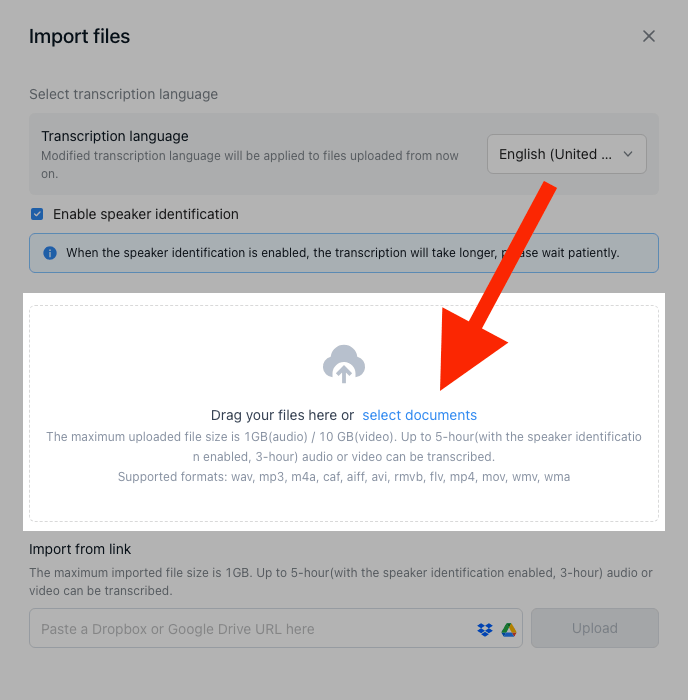
Step 3: Select your language. Drag and drop your recording, or click ‘Select Documents’ and locate the recording.
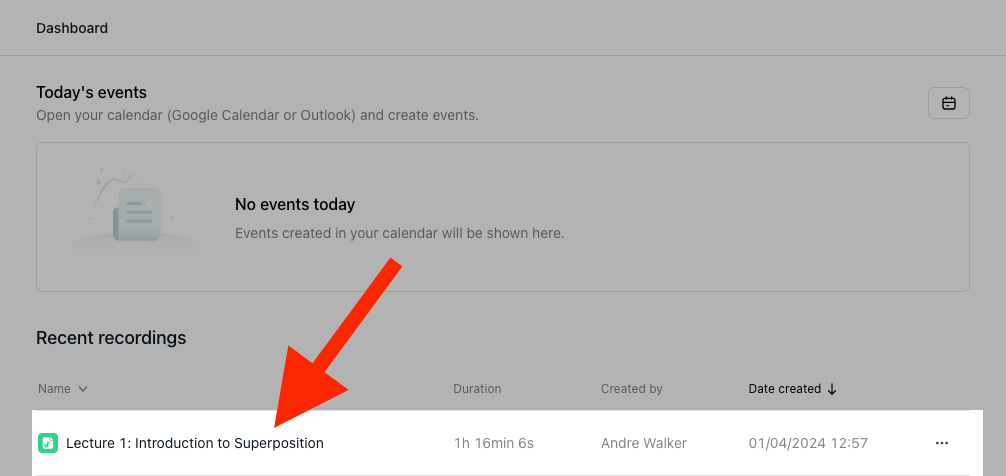
Step 4: Close the Import files window. After Notta is done transcribing your lecture, click on it from your dashboard.
Step 5: Click ‘General’ in the AI notes window.
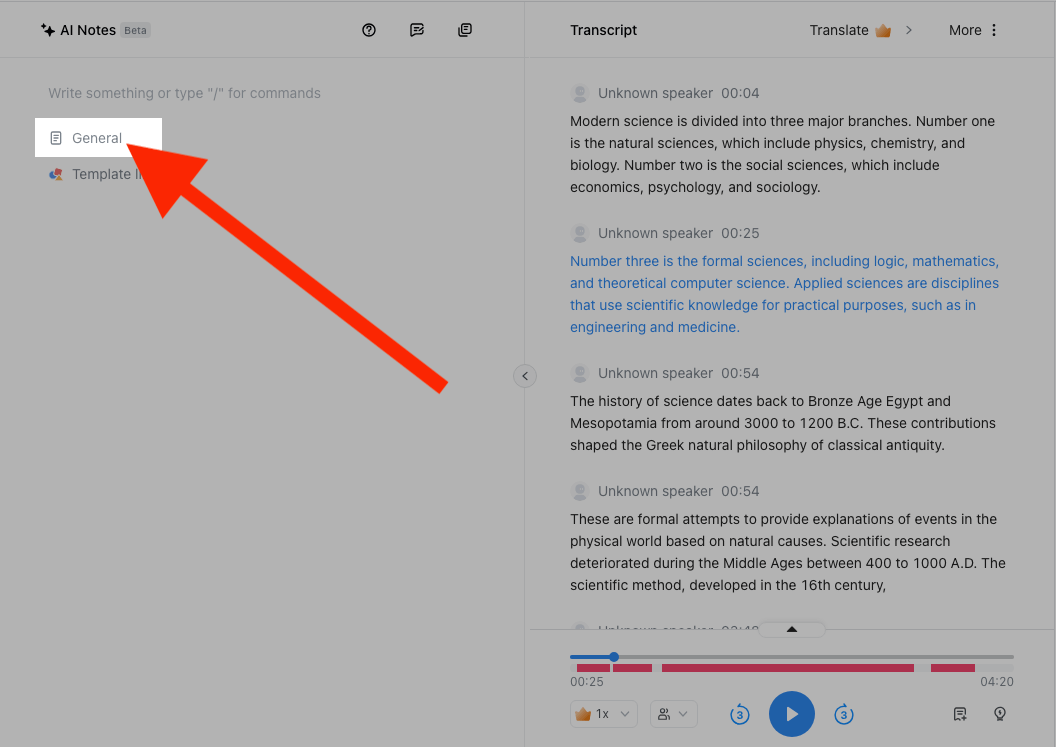
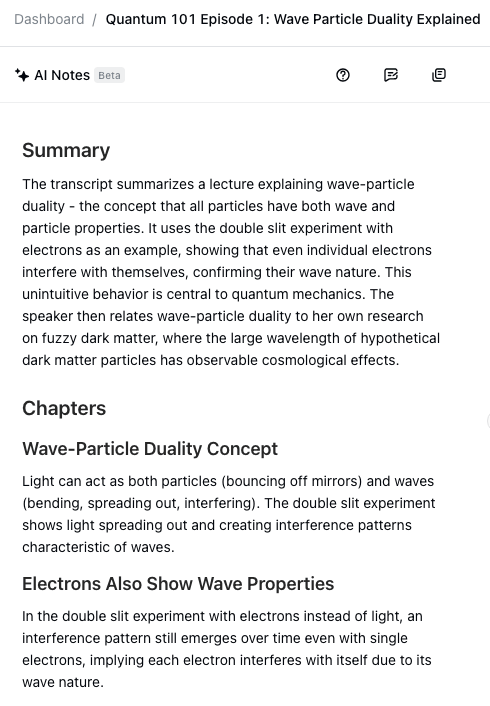
Notta will generate your notes from the lecture for you.
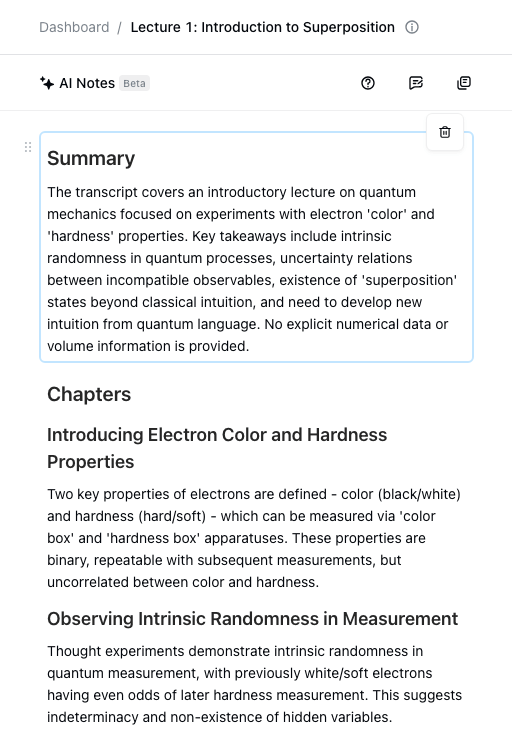
Notta can convert your lectures, interviews and other conversations into text with 98.86% accuracy in minutes. Focus on conversations, not manual note-taking.
Method 2: Recording lectures with a Laptop
This method can get tricky as it’s even more about positioning than the first method. A laptop is highly portable but not as much as a recording device or smartphone. You’ll want to be very close to the speaker so that the laptop microphone can pick up everything the speaker says clearly.
In this section, we’ll use Notta to record the lecture and transcribe it in real-time. From there, you’ll be able to generate notes automatically with AI.
Step 1: Find a seat as close the the speaker as possible. If you can, coordinate with the lecturer to let them know you need to sit in the front. Make sure you arrive at class very early so you can secure your spot.
Step 2: When you get to your seat, log in to your Notta dashboard and select your language.

Step 2: When the lecture starts, click ‘Record an audio.’ As the lecturer speaks, you will be able to watch as Notta transcribes the speech to text in real-time.
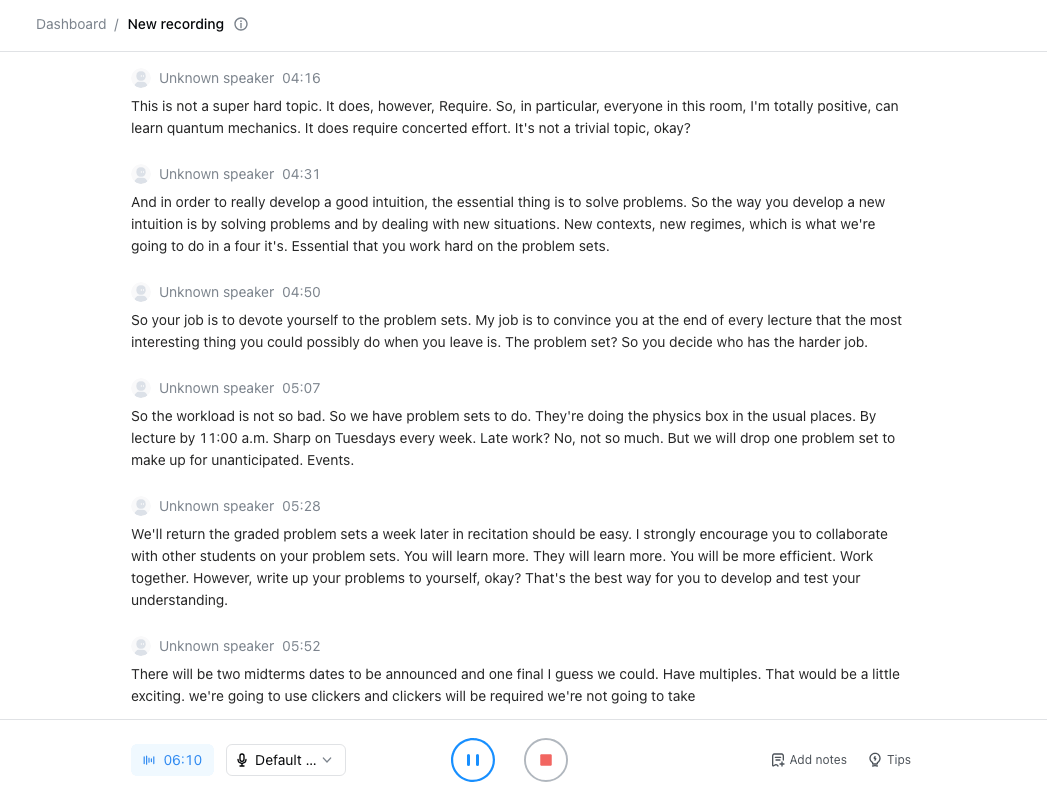
Step 3: When the lecture is over, click ‘Stop.’

Step 4: In the AI Notes window, click ‘General.’
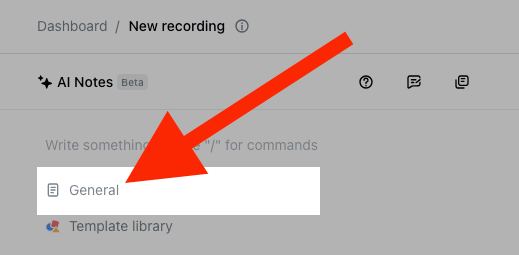
Notta will then take notes on your transcript for you.

Notta offers the most integrated AI notes, summaries, and action items so nothing gets missed.
Method 3: Record online lectures
This method will be a little easier than the first two methods because we don’t have to worry about microphones. Here, we’ll introduce how to record lectures over Zoom, Google Meet, Microsoft Teams, or Webex.
You will send a Notta robot to the meeting, and it will record and transcribe it for you. Then, you can use AI to have Notta take notes on the lecture for you.
You won’t even have to attend the lecture. However, don’t risk getting in trouble. It’s best to let the lecturer know that you are sending a bot to the lecture and that you will still be listening. That way, they won’t kick your robot or penalize you for using it.
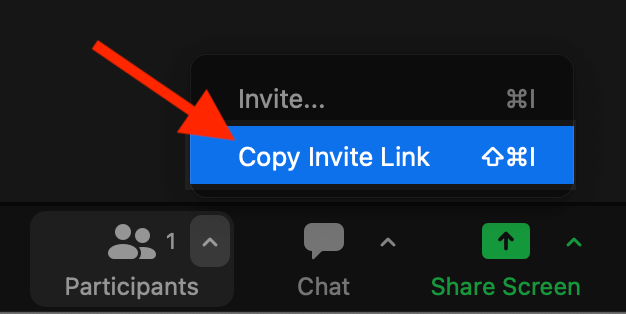
Step 1: Copy the invite link to your lecture.
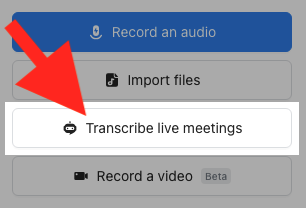
Step 2: Log in to your Notta dashboard and click ‘Transcribe live meetings.’
Step 3: Select your language. Then, paste the link to the lecture in the ‘Meeting Invite Link’ field. Then, name your robot. Click ‘Transcribe Now.’
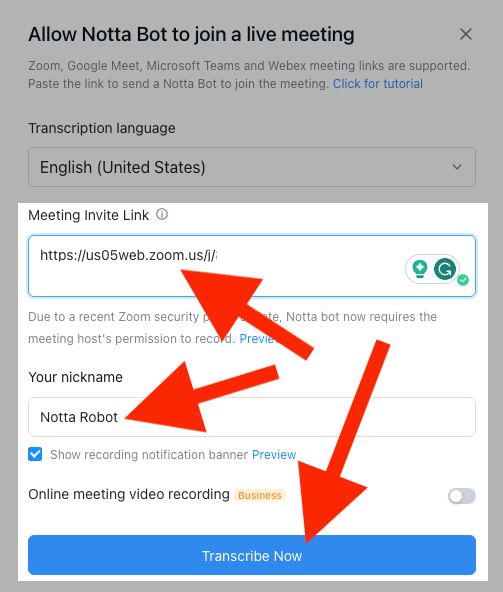
Three red arrows, one pointing to the Meeting Invite Link, one pointing to the robot nickname, and one pointing to the Transcribe Now button
The Notta robot will join the meeting.
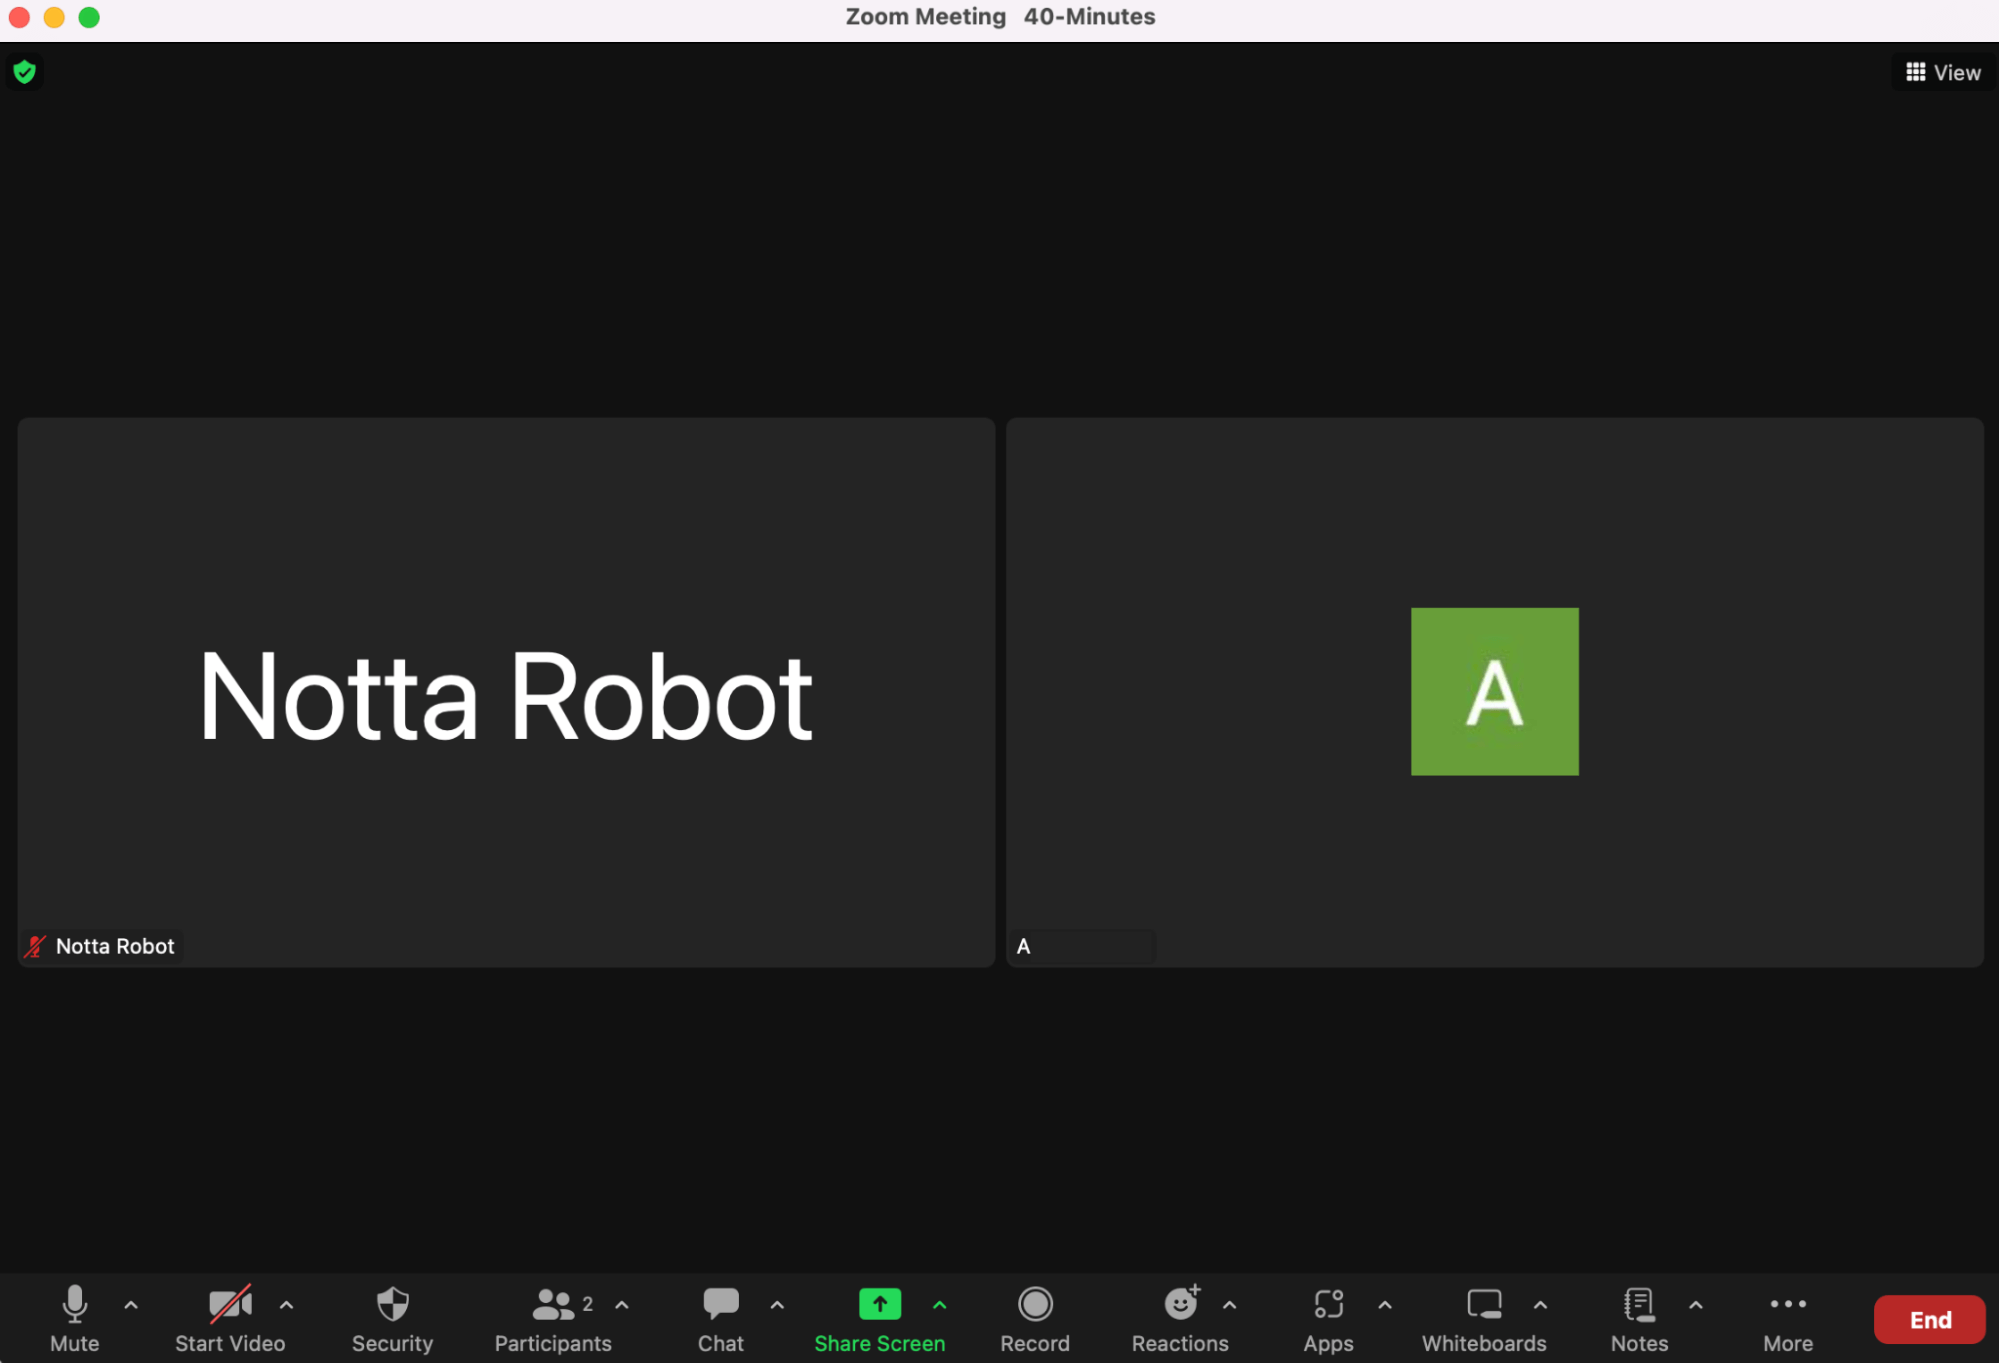
Step 4: The robot will transcribe the meeting in real-time. When the meeting is over, the robot will upload the transcription automatically.
In the AI Notes window, click ‘General.’
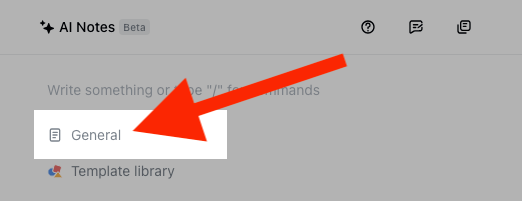
Notta’s AI will take notes on the lecture for you.
Method 4: Record lectures as a teacher
As a teacher, it’s always a good idea to have your lectures on record. Not only for students who weren’t present, you can also review them for future lessons. Here’s how to record your lectures:
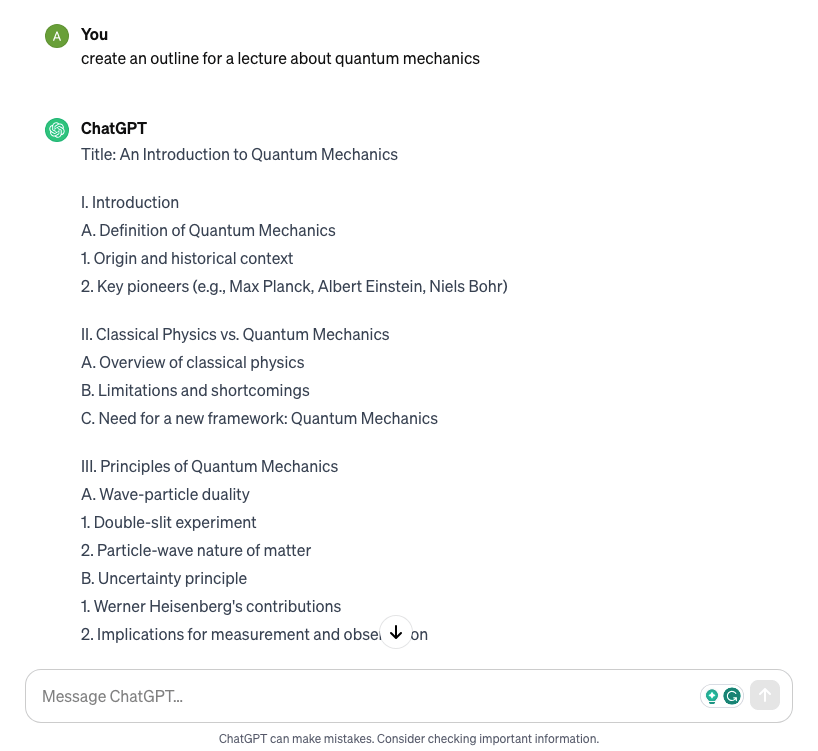
Step 1: Gather any relevant slides and exhibits that you’ll need to show during the lecture. You can use ChatGPT to create an outline of what you will talk about. Then, you can edit the outline to fit your slides and exhibits.
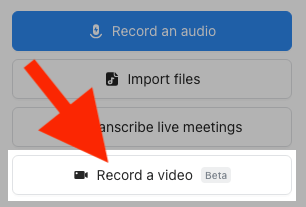
Step 2: When everything is prepared and you’re ready to record, log in to Notta. Click ‘Record a video’ on the toolbar to the right.
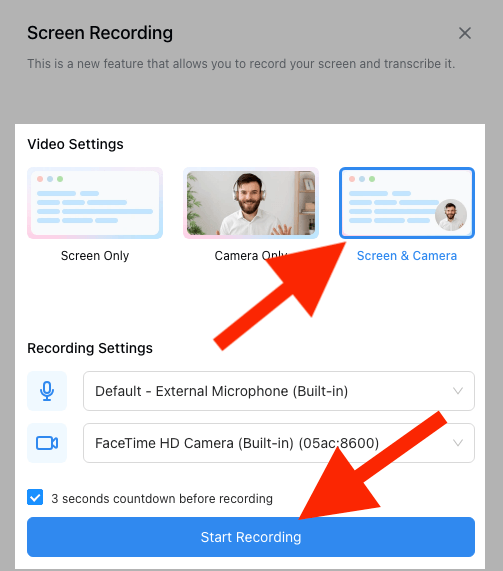
Step 3: Click ‘Screen & Camera’ and set your recording settings. Then click ‘Start Recording.’
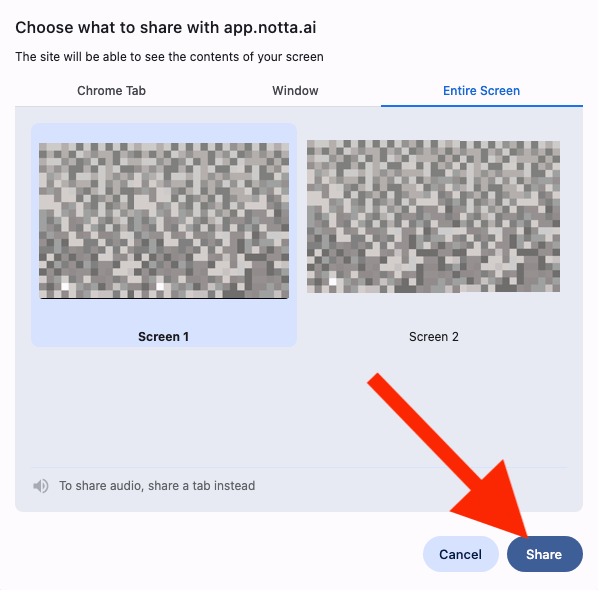
Step 4: Choose the Chrome tab, window, or screen you’d like to share. Then click ‘Share’ to start recording your camera and your screen.
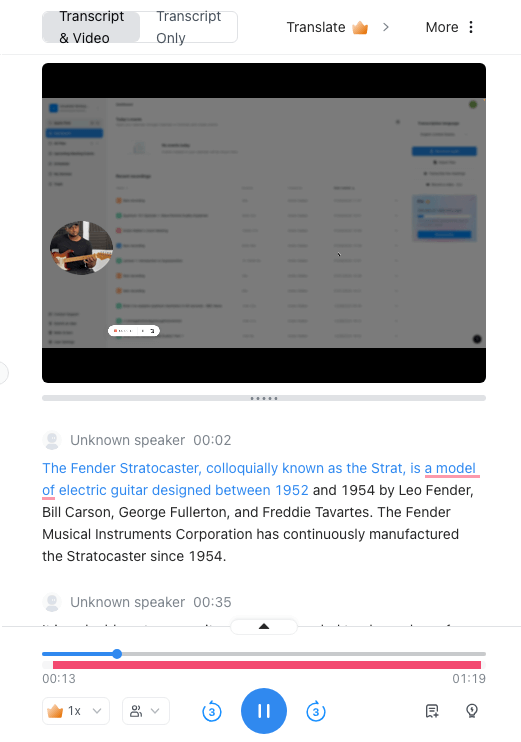
Step 5: After you’re done recording, you will see the recording of your lecture. Click on it to view your recording, and you will have a transcript as well.
Your video will be in a circle on the left. The contents of your screen will be in the background.
FAQs
How to record lectures on iPhone
iPhone’s Voice Memos is one of the most high-quality recording apps available today. Here’s how to use it to record a lecture:
Step 1: Find a seat close to the person who is giving the lecture.
Step 2: Open the Voice Memos app and press ‘Record.’
Step 3: Place your phone so that the microphone is pointing in the direction of the speaker. The microphone on an iPhone is located at the bottom of it near the charging port.
How to record lectures on Mac
There are a variety of audio programs you can use to record lectures on Mac. Some of the best options are:
Audacity
Notta
QuickTime
Here’s how to record a lecture using QuickTime, which comes preinstalled on Mac:
Step 1: Open QuickTime on your Mac.
Step 2: Click File > New Audio Recording or press Shift + Command + N.
Step 3: An audio recorder will pop up on your screen. Press ‘Record’ when the lecture begins to start recording it.
Is Voice Memos good for recording lectures?
The Voice Memos app comes automatically installed on every iPhone. That makes it an easy way to record audio without having to download any other software.
While the sound quality of it is great, it does not have the ability to transcribe the lecture to text. This can make it difficult to search through your lecture to find the information you need.
Software such as Notta can transcribe your Voice Memos to text in just a few seconds. Here’s how:
Step 1: Go to the App Store and install Notta.
Step 2: Open Voice Memos and locate the recording you want to transcribe.
Step 3: Tap on the recording, then tap ‘More’ (...).
Step 4: Tap ‘Share.’
Step 5: Tap ‘Notta.’ Notta will open the Voice Memo and transcribe it to text automatically.
How to record video lectures
Here’s how to record a video lecture:
Step 1: Decide on your approach. There are three main types of video lectures:
Slideshow + Video - Make a PowerPoint presentation with a video of you speaking in the corner of the screen
Slideshow + Audio - Make a PowerPoint presentation with a voiceover of you speaking
Multimedia Presentation - Use virtual whiteboards to show a video of you lecturing and making demonstrations on the board at the same time.
Step 2: Select a video production tool. You may choose to record your lecture directly in PowerPoint or a tool with cloud storage such as Notta.
Step 3: Create an outline for what you will speak about.
Step 4: Make your slides in PowerPoint or a similar slideshow tool.
Step 5: Test your camera and your microphone to make sure you can capture a quality recording.
Step 6: Start recording your lecture using your video production tool.
Step 7: Add captions. You can use the transcript from Notta for video captions
Step 8: Edit your video so there’s no silence or noise and the beginning and end.
Step 9: Share your lecture with students and back it up for future reference.
How to record Zoom lectures
The best way for students to record a Zoom lecture is to send a robot to the meeting to record it for you. It will transcribe the lecture to text as well for your notes. Here’s how to record a lecture on Zoom:
Step 1: Log in or create an account with Notta.
Step 2: Click ‘Transcribe live meetings’ on the toolbar to the right.
Step 3: Select your language
Step 4: Copy and paste the invite link from the Zoom meeting into the ‘Meeting Invite Link’ box.
Step 5: Name your robot.
Step 6: Click ‘Transcribe Now.’ The robot will enter the meeting and record and transcribe it in real-time.
Final thoughts
We hope this post helped you record lectures in your personal and educational life. With a little preparation and the right tools, you’ll be more than ready to learn any topic quickly and efficiently.
When you’re in the middle of a busy semester with hundreds of hours of lectures, use Notta to take notes for you. Sign up for free access today.