
How to Record Audio on Google Slides: 4 Free & Paid Tools
98% accurate, real-time transcription in just a few clicks. 58 languages and multiple platforms supported.
Google Slides is one of the popular presentation tools that go way beyond the classic slideshow experience. I've been using Google Slides for years for just about everything — from product launches and pitch decks to class launches and education lectures, but what I missed was the presentation audio.
While visuals convey only the information, audio acts as your voice on the stage. But let's make it clear: Google Slides does not come with an in-built audio recording feature — though it's pretty easy to add audio using third-party apps. In this comprehensive tutorial, I'll reveal how to record audio on Google Slides with simple tools.
4 ways to record audio on Google Slides
Google Slides is one of the most common and robust free presentation tools I've been using for quite a while now. While I appreciate the easy-to-use nature of this Google product, it still falls short when recording audio — though not at all its fault, Google Slides isn't designed to do so.
Here is how to record audio on Google Slides on Mac and Windows using some of the best audio recording tools.
#1 Use Notta
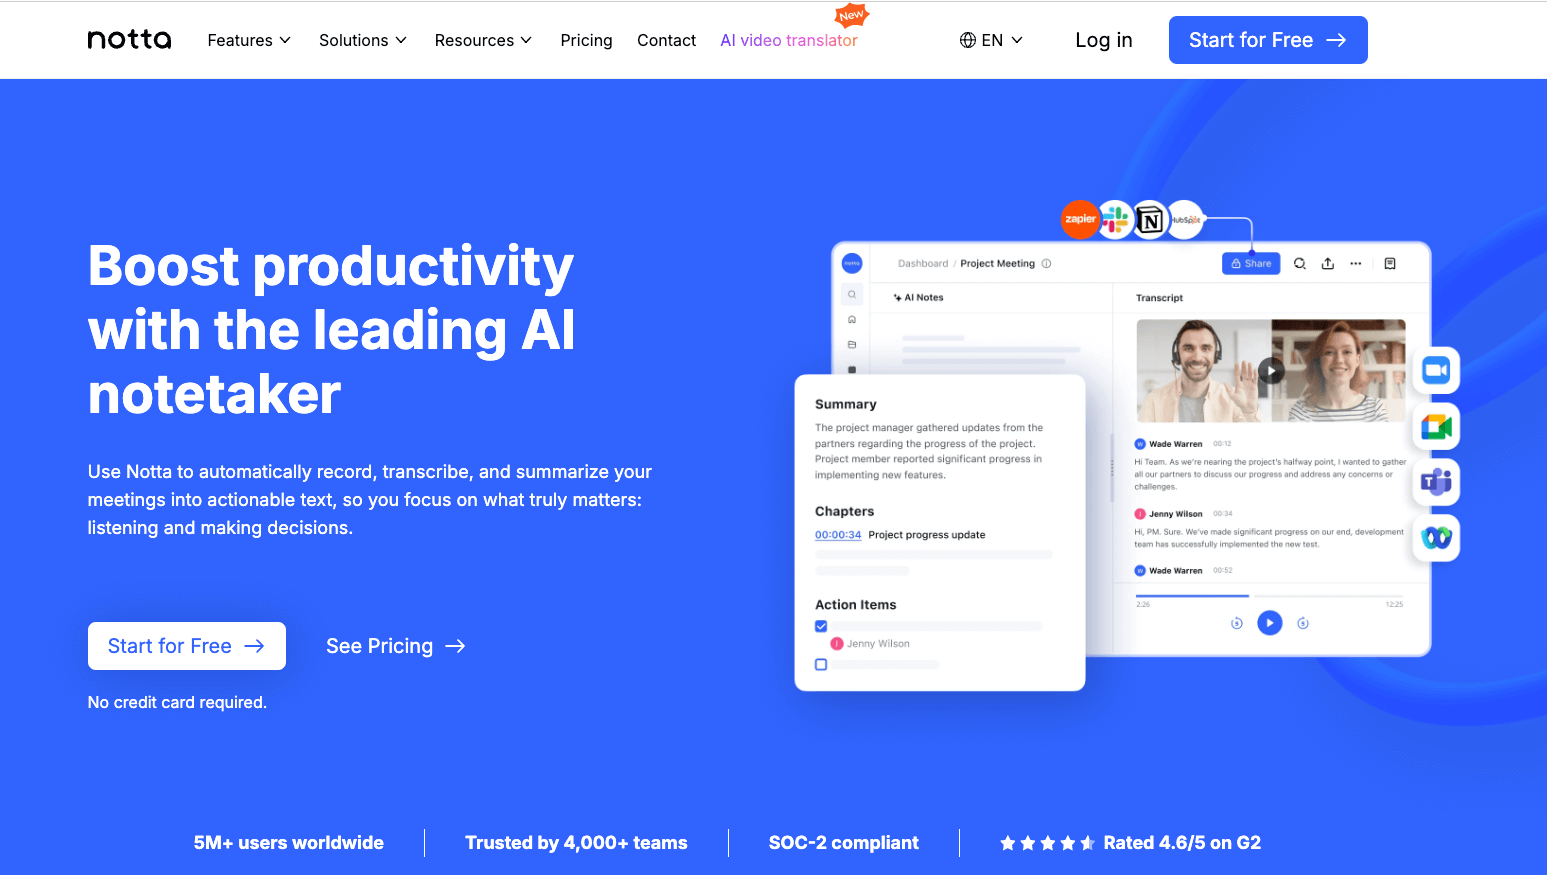
If you're a presentation designer who wants to record audio and insert it into slideshows, Notta is your app. In addition to a generous free plan, I appreciated the ability to adjust the playback speed — something I typically have to manually do in another app.
Notta also has plenty of export choices, including the typical MP3 format, and seamlessly connects with other apps like Notion and Salesforce. This is one of the few AI recording apps on this list that allows you to leave notes on your audio recordings.
Notta can convert your spoken interviews and conversations into text with 98.86% accuracy in minutes. Focus on conversations, not manual note-taking.
Here's how to use the Notta voice recorder for Google Slides:
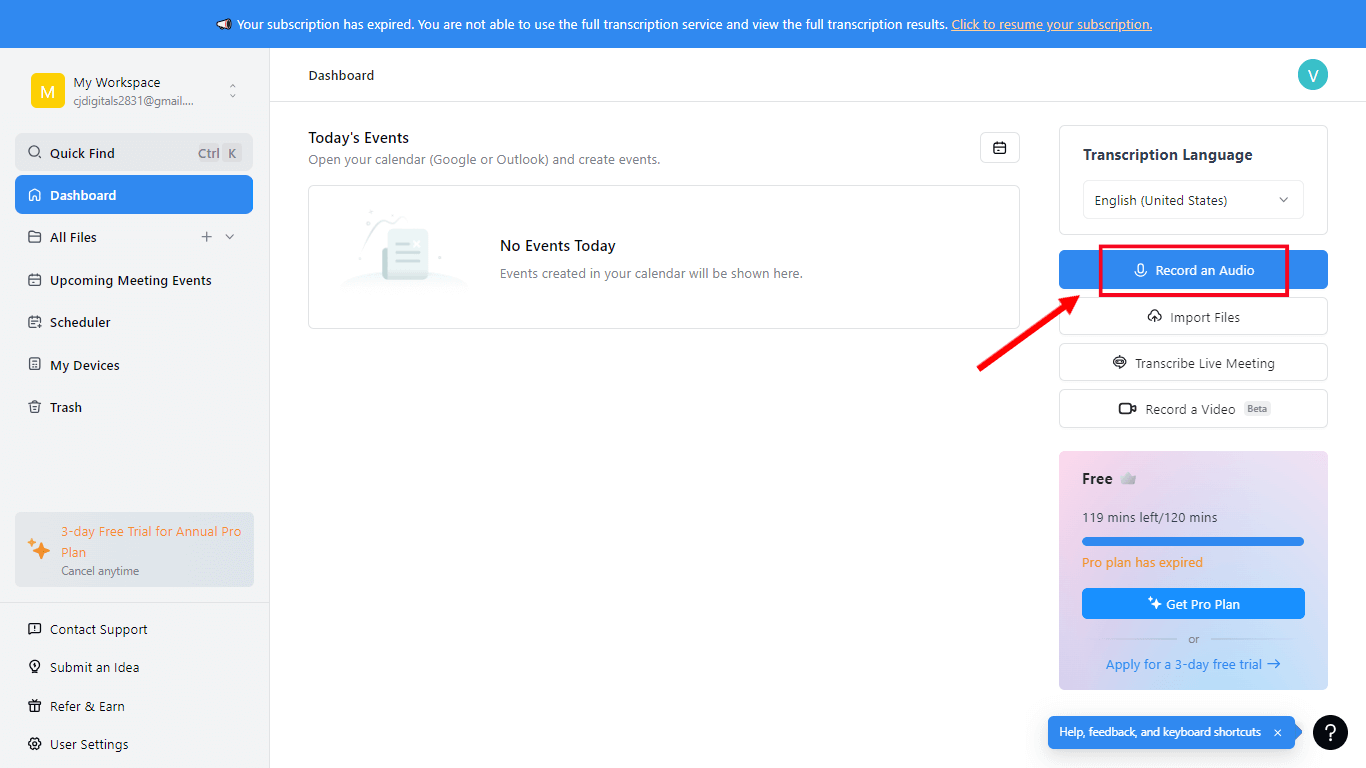
Step 1: First, log in to your Notta account. If you don't have one yet, sign up for a free Notta account to start recording and transcribing files. Upon entering the dashboard, hover over the 'Record an Audio' option available on the right navigation panel.
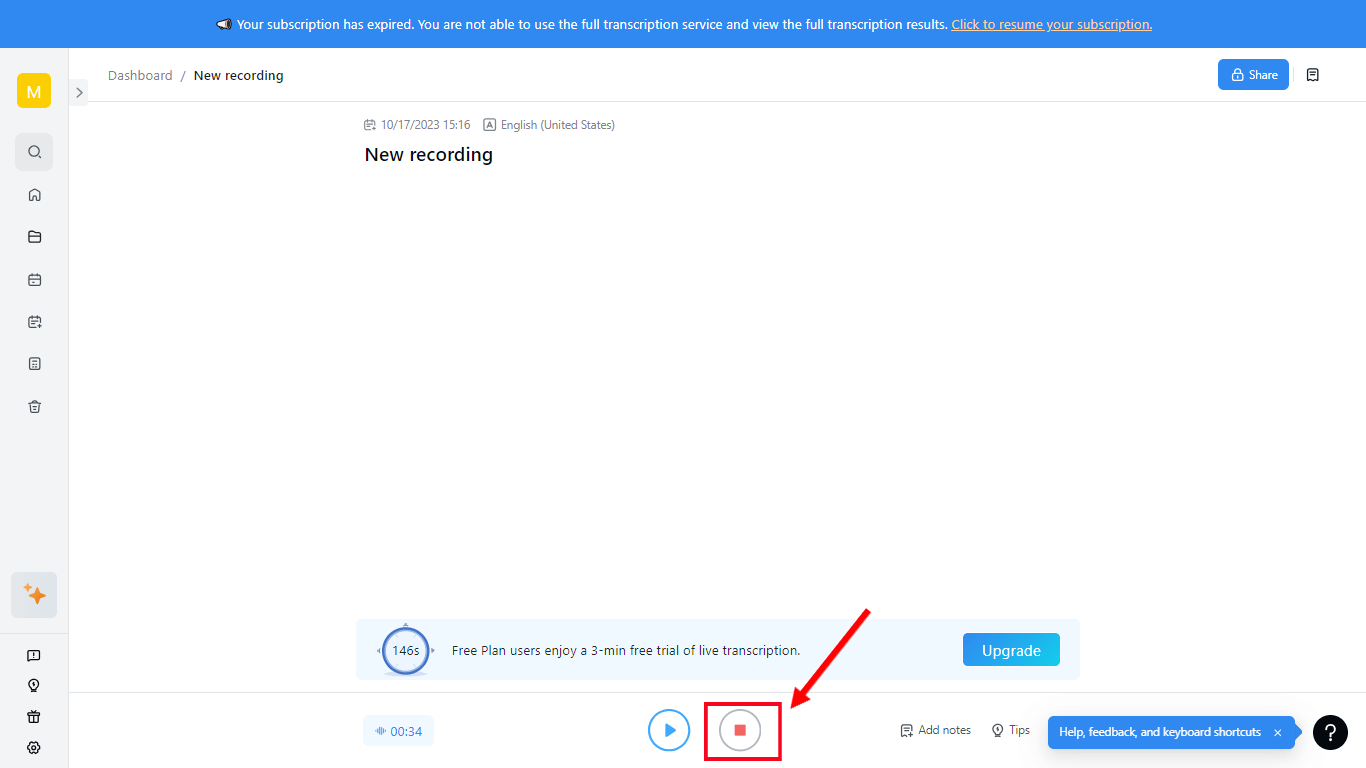
Step 2: Start speaking, and Notta will start recording and converting speech-to-text in real-time. When you are done, select the 'Red' button (as seen in the below image).
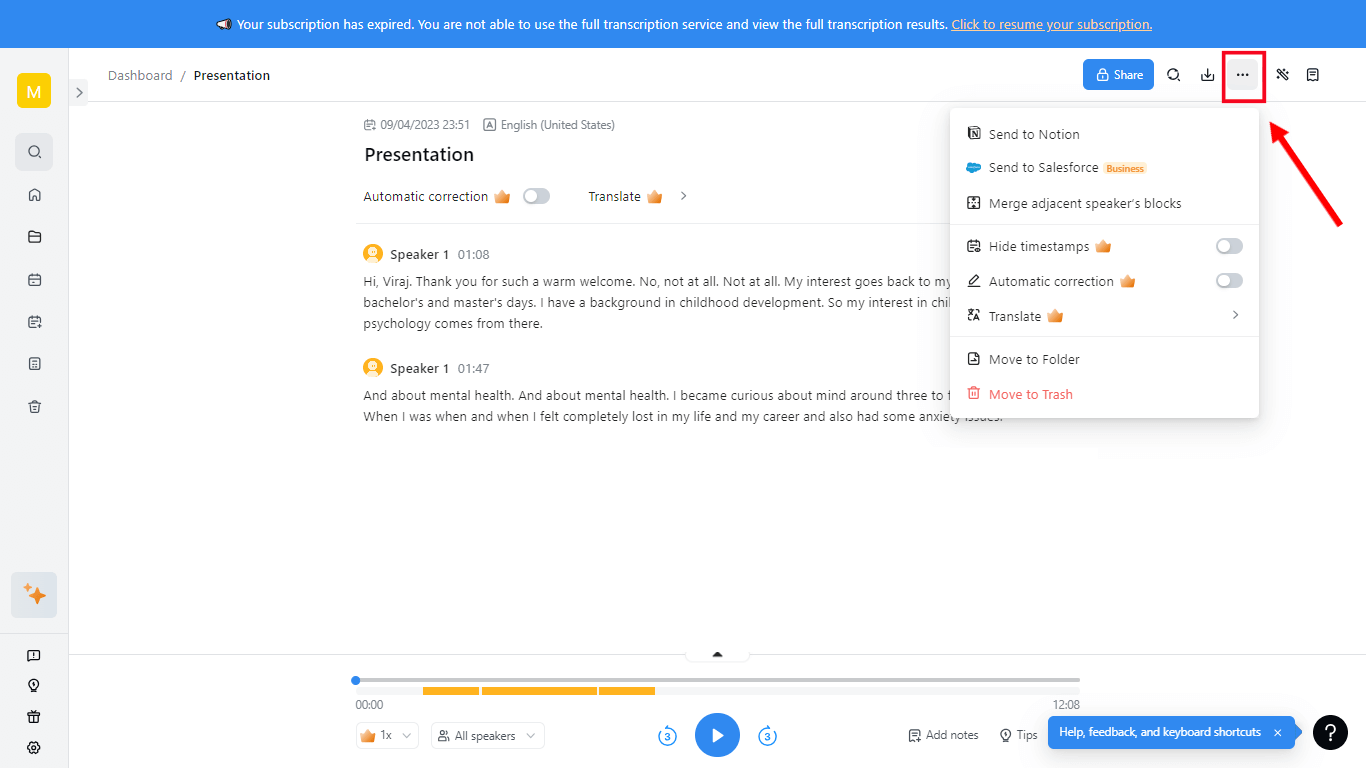
Step 3: Click the 'Download' option to save the audio file in MP3 format. You can manually add the downloaded audio file to Google Drive, which can then be inserted into the slideshow presentation.
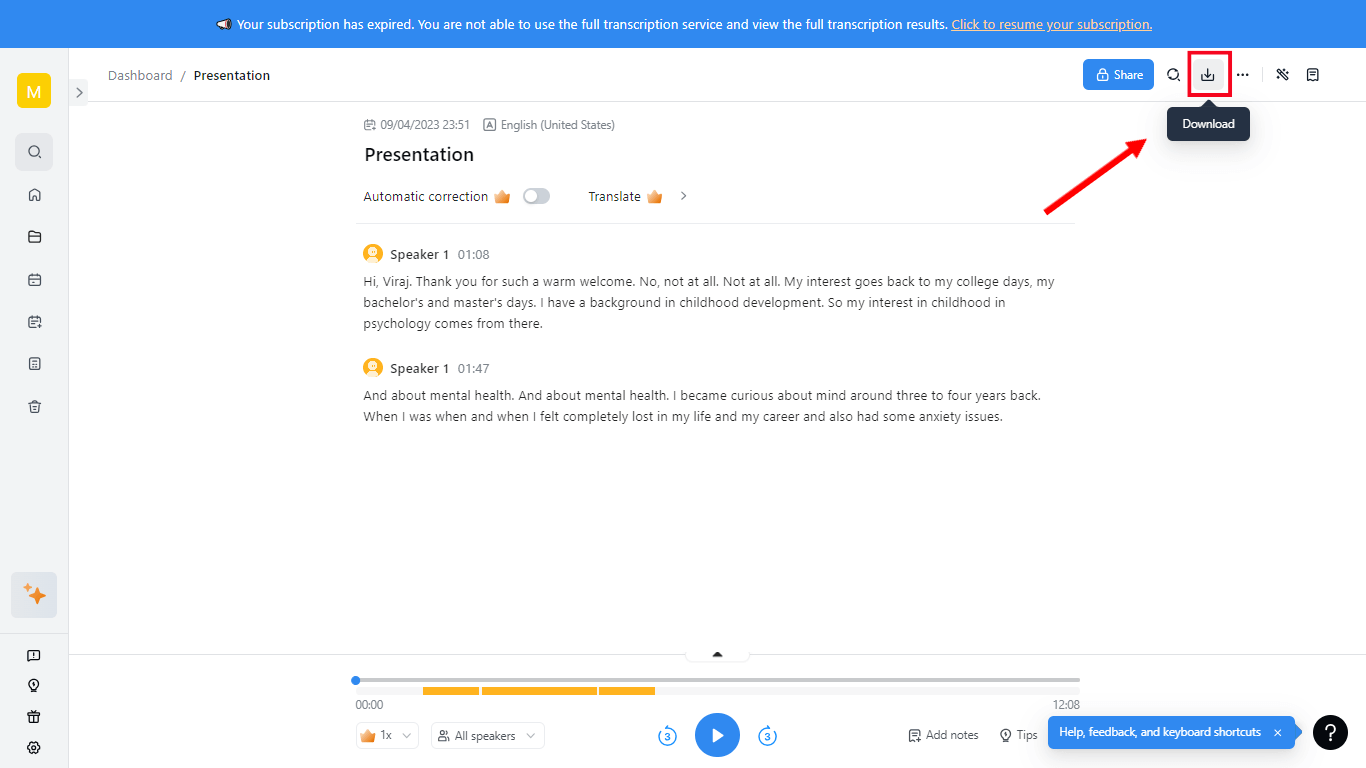
Step 4: If you want to export an audio file to third-party applications like Notion or Salesforce, select the three dots available next to the 'Download' icon.
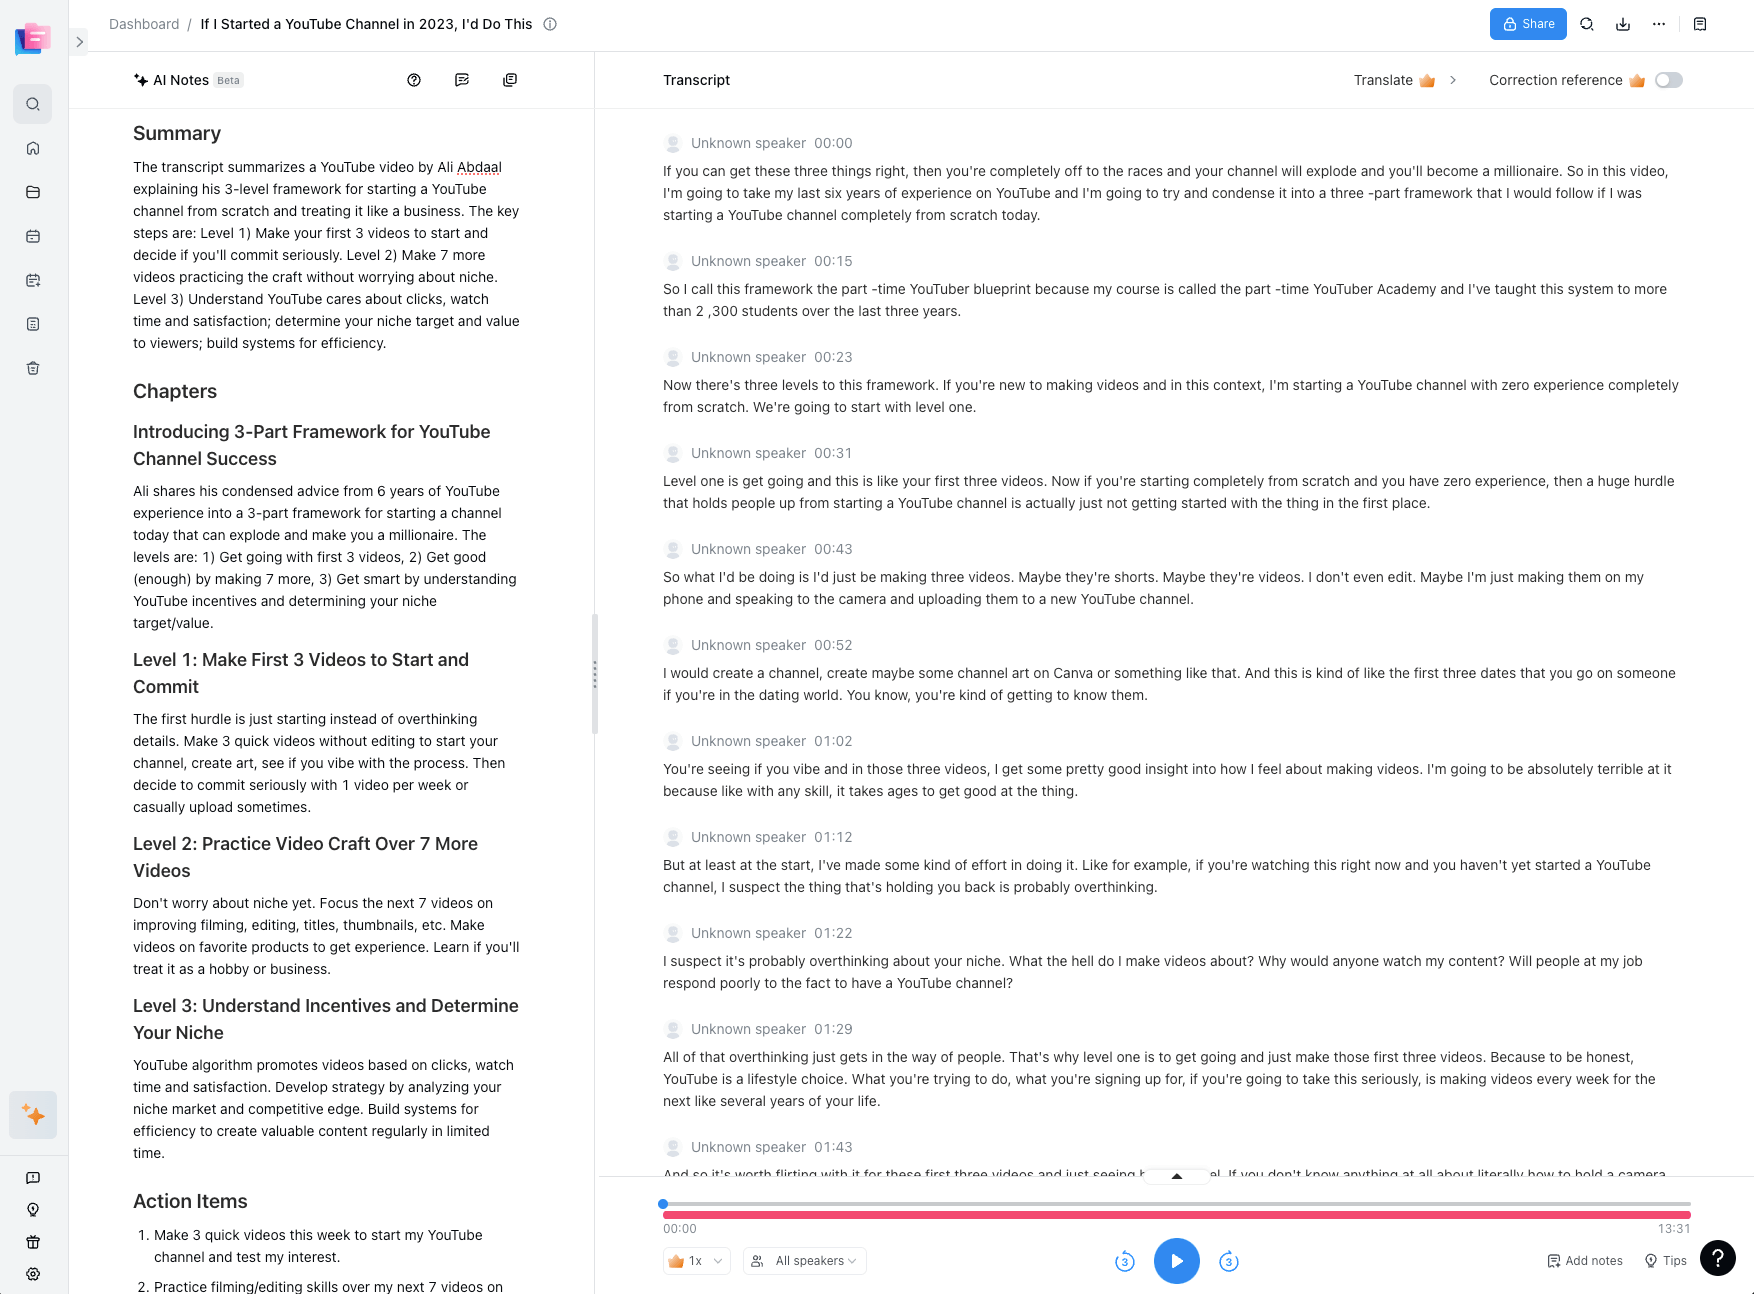
Bonus: Notta AI Summary Generator can be a handy tool, especially if you are giving a lengthy presentation. For example, you can create a quick summary of the recorded audio to help the viewers get an overview of what was discussed in the presentation.
Advantages
Notta has a user-friendly and interactive interface, which makes it suitable for beginners and professionals alike.
The AI tool comes with a free plan, so you can test the features before paying a penny.
It has a high accuracy rate of 98.86% when recording or transcribing files.
Disadvantages
You'll need to upgrade to a paid plan to explore all the features of Notta — though it is pretty affordable.
#2 Online Voice Recorder
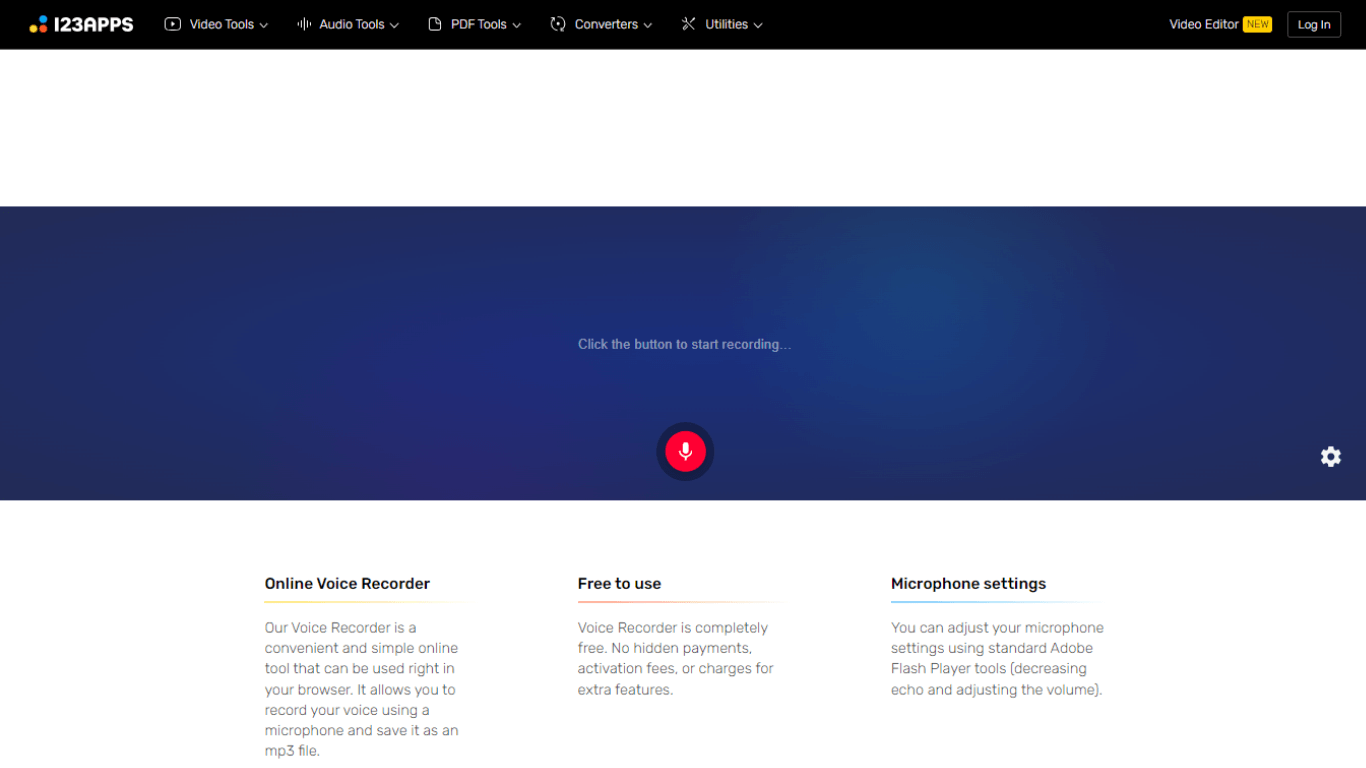
Out of all the apps on this list, Online Voice Recorder is one free voice recording tool with basic features. It's free, simple, and, most of all, comes with customizable microphone settings. There are many other editing features, too, including auto silence trimming, cropping, and saving audio.
Advantages
You can use Online Voice Recorder directly in your browser — without the need to download any app.
With standard Adobe Flash Player, you can decrease echo and adjust the volume in a few clicks.
It is completely free to use.
Disadvantages
The interface of the Online Voice Recorder tool can be improved.
There are no advanced editing options available.
The AI tool is solely designed for recording purposes.
#3 TwistedWave
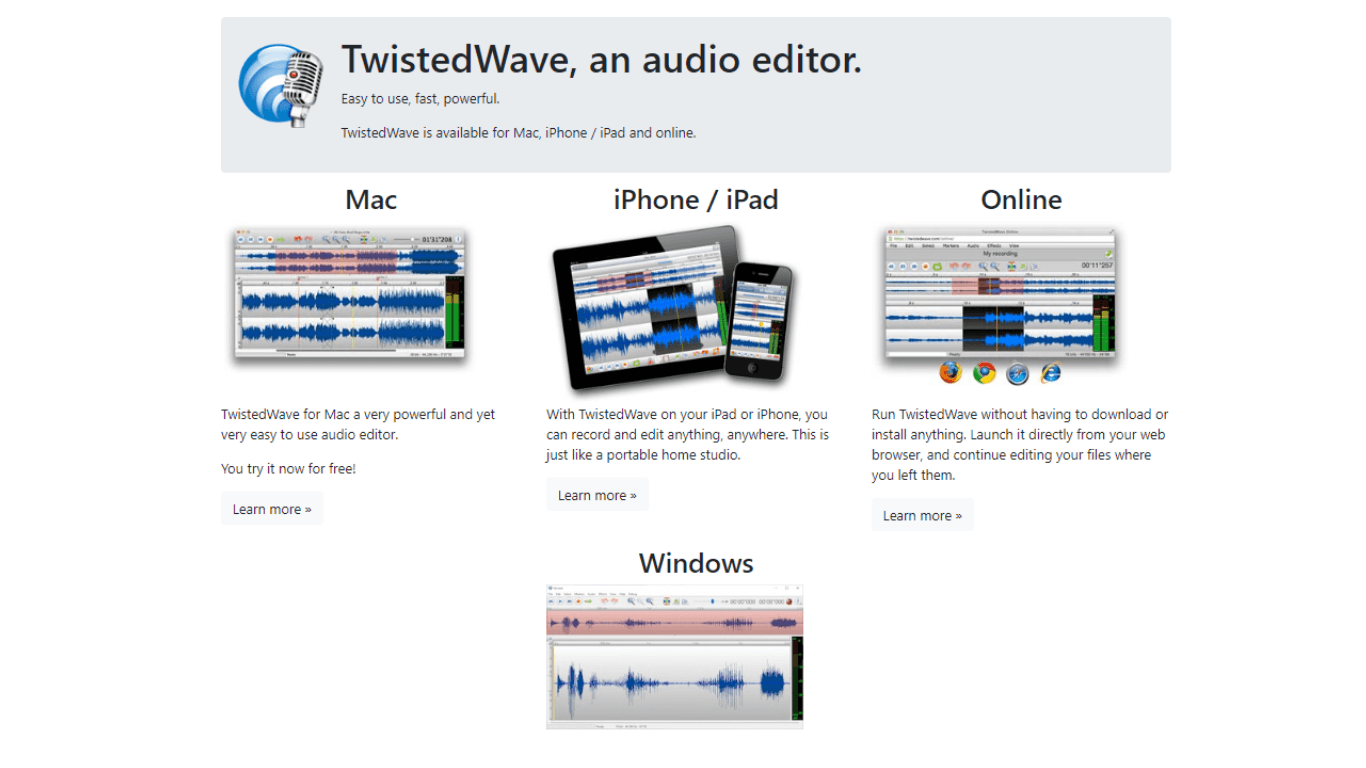
TwistedWave is one of the great options for the casual recorder. For one, it is designed for both Mac and Windows users. It can even be used without downloading or installing anything — just open TwistedWave and start recording. While there aren't any advanced options (mainly transcription features), it comes with a built-in silence detector and batch processing engine.
Advantages
TwistedWave is available on Mac, Windows, and iPhone/iPad.
New users get the 30-day demo to test the tool.
You can directly save your audio file to Google Drive.
Disadvantages
TwistedWave can be a bit complex for a minimalist like me.
The paid plans of TwistedWave are a bit on the higher side.
#4 Audacity
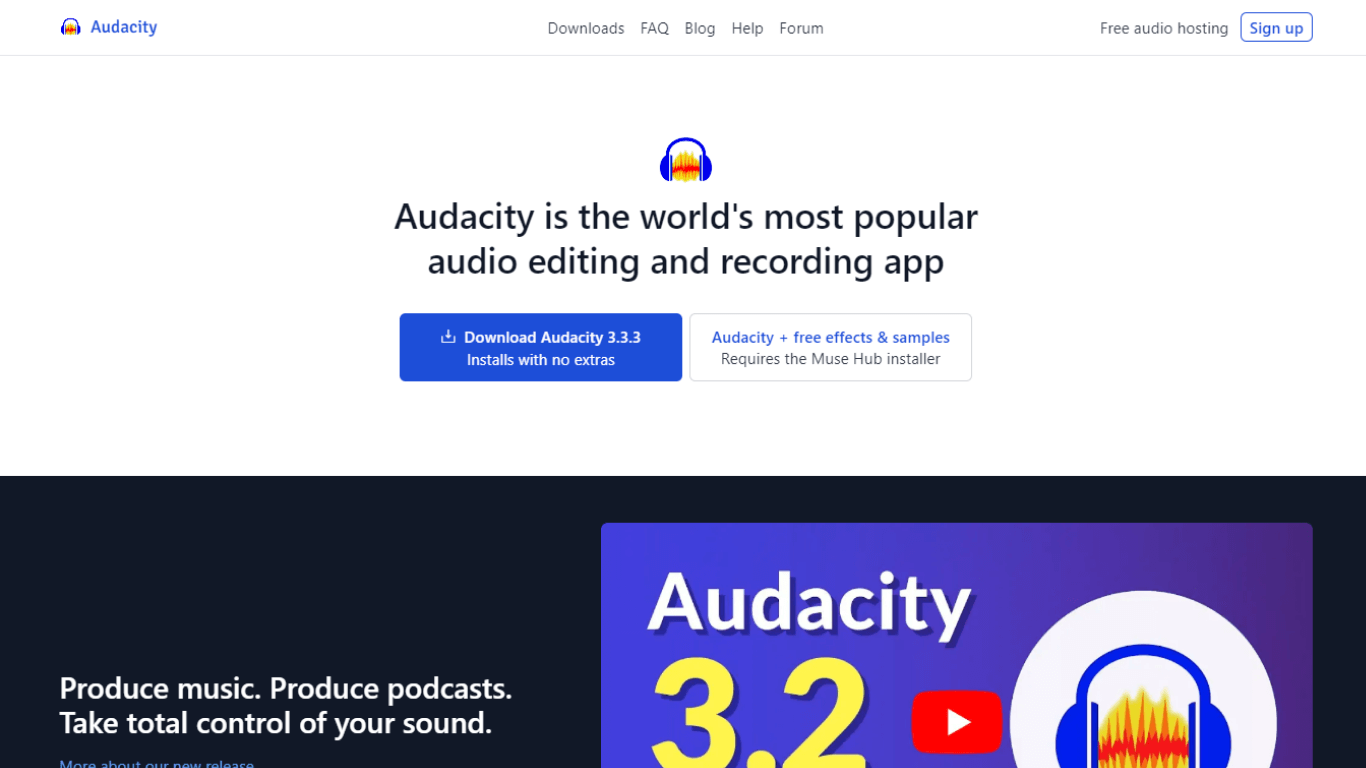
Audacity is another capable free audio recording and editing tool money can't buy. The open-source development model includes a full set of recording and editing features. However, the basic and slightly clunky interface makes it less ideal than some of its rivals.
Advantages
Audacity is compatible with Windows, macOS, and Linux/GNU.
It supports popular audio files like WAV and MP3.
You don't have to pay anything to use Audacity.
Disadvantages
You cannot record multiple audio sources at once.
Audacity does not come with a lot of advanced features like real-time transcription.
The previewing effects are slow compared to other tools.
How to add voice to Google Slides
As you can see, there are a lot of ways (or, I may say, third-party tools) to record audio on Google Slides. Once you have recorded the voice for the presentation, upload the audio file to Google Drive and then add the voice to the Google Slides.
Here is the step-by-step tutorial on how to add voice to Google Slides.
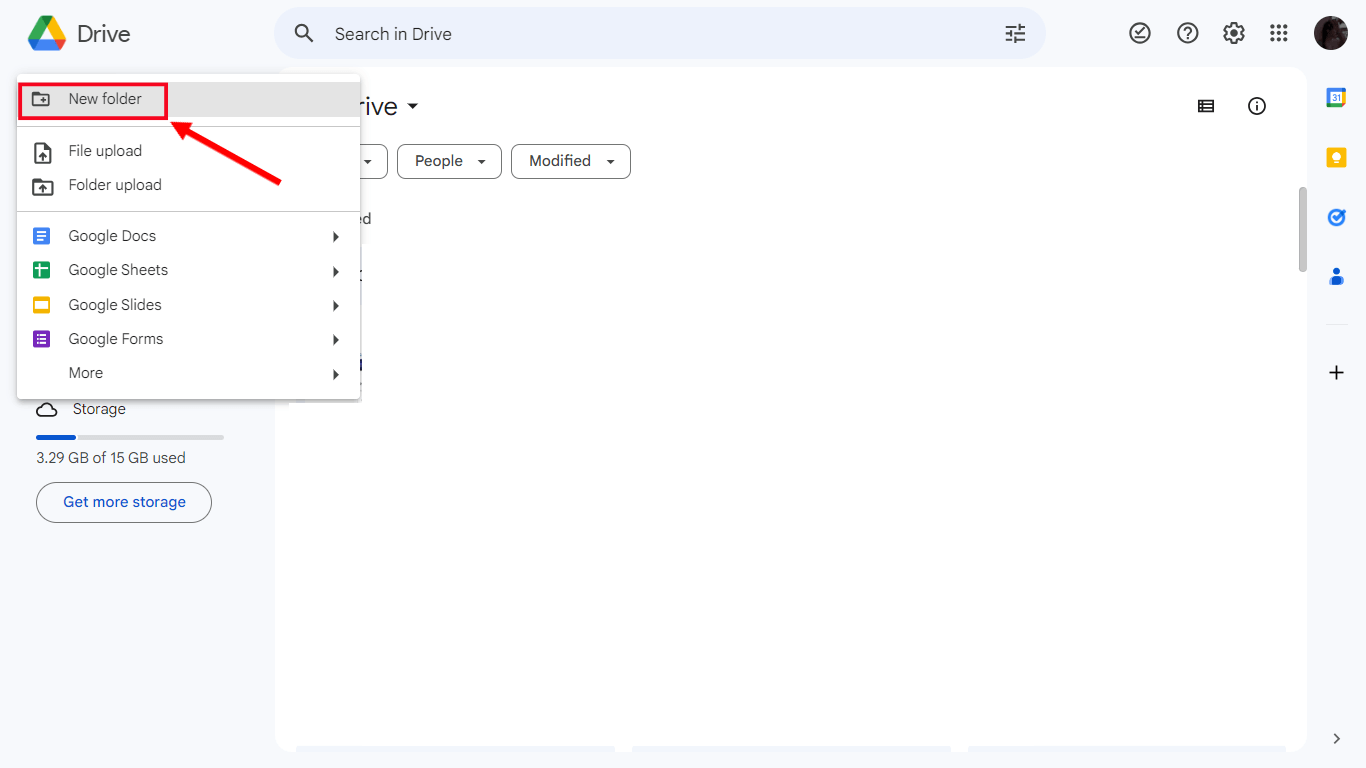
Step 1: Before you begin, you'll need to upload the file to Google Drive. Don't worry; adding audio files is easy and free. Open Google Drive and locate the '+New' icon located in the top-left corner. Select 'New Folder' to create an audio location for Google Slides presentation.
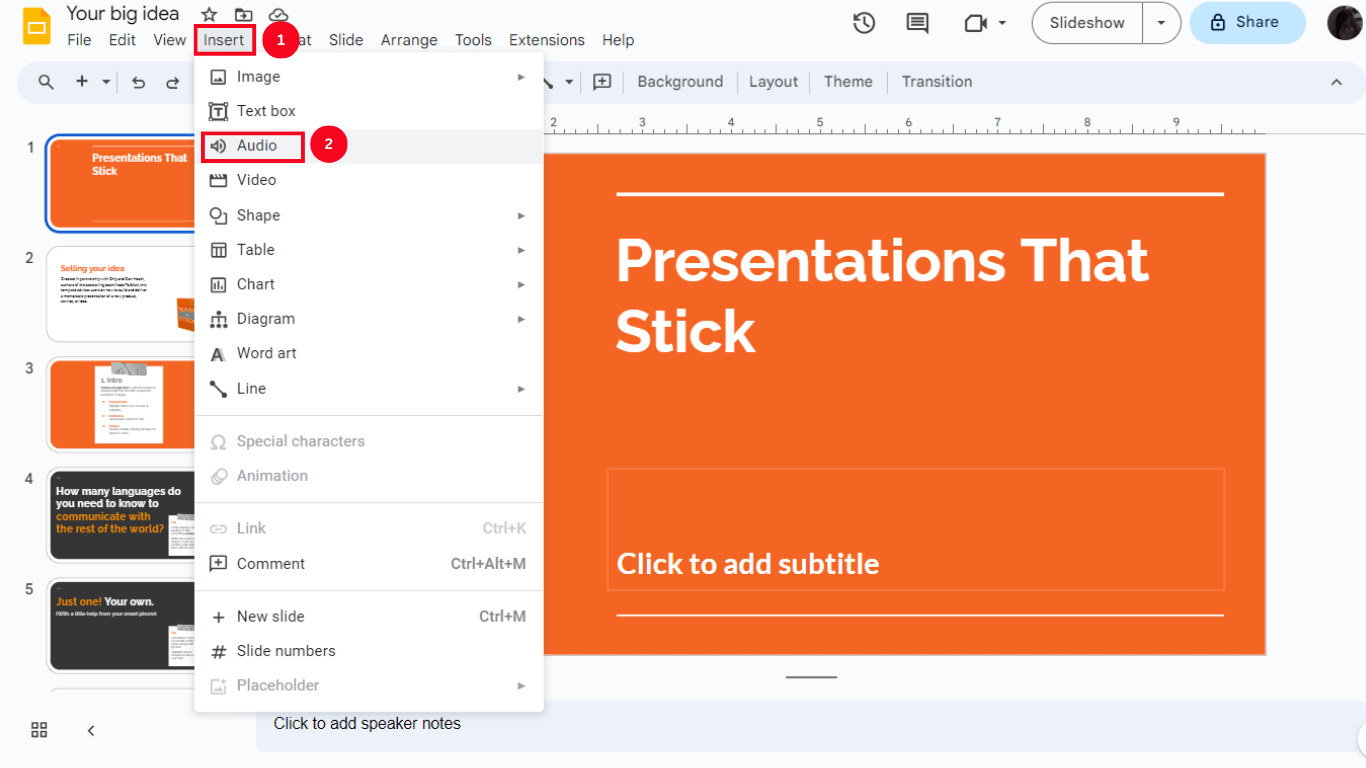
Step 2: Next, insert audio from Google Drive into Google Slides. For this, open the Google Slides in which you want to add the audio and move to the menu toolbar.
Select the 'Insert' option from the toolbar, followed by clicking the 'Audio' option to view and choose the audio recently saved to Google Drive.
After you insert audio into the slide presentation, a little speaker-shaped icon will appear on one corner of the slide. Just check the audio by clicking the speaker icon.
If you don't like the placement of the icon, hover over the speaker icon and drag it to any position on the slide.
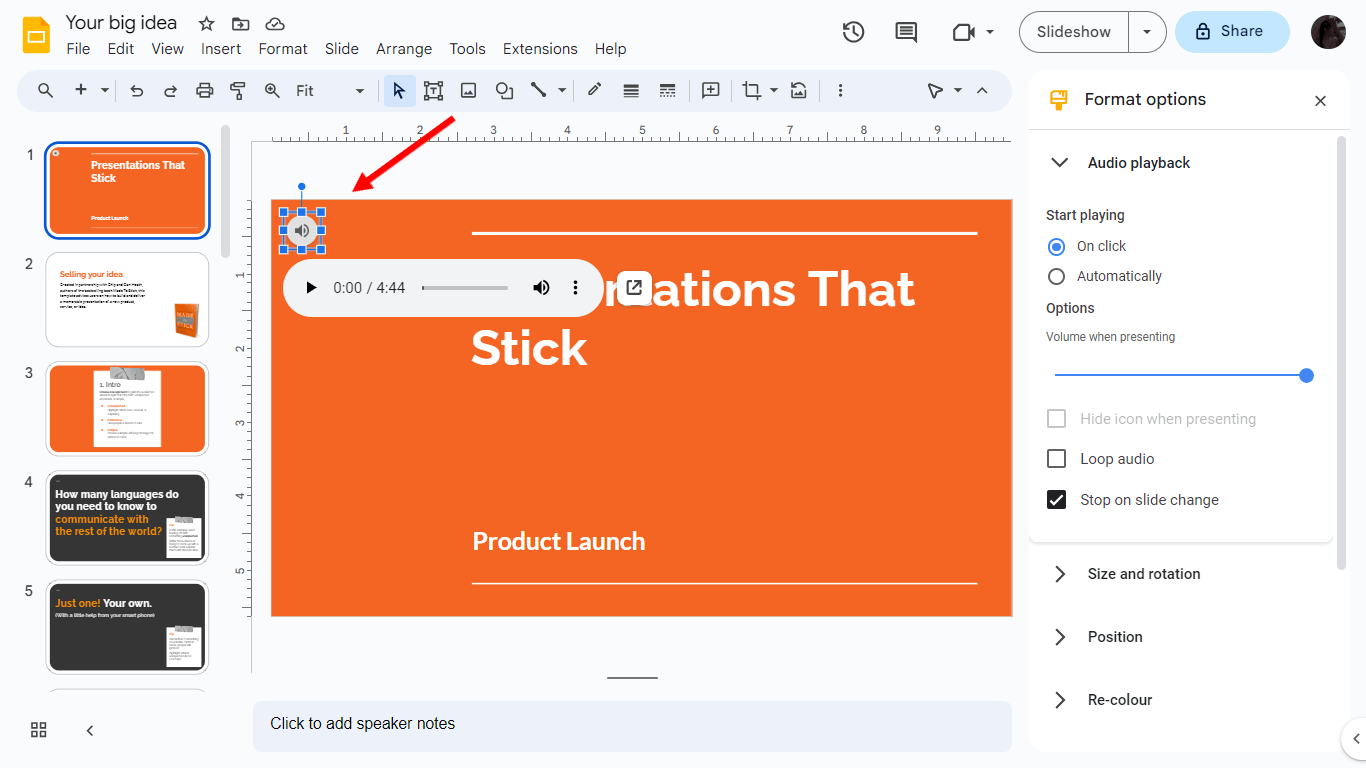
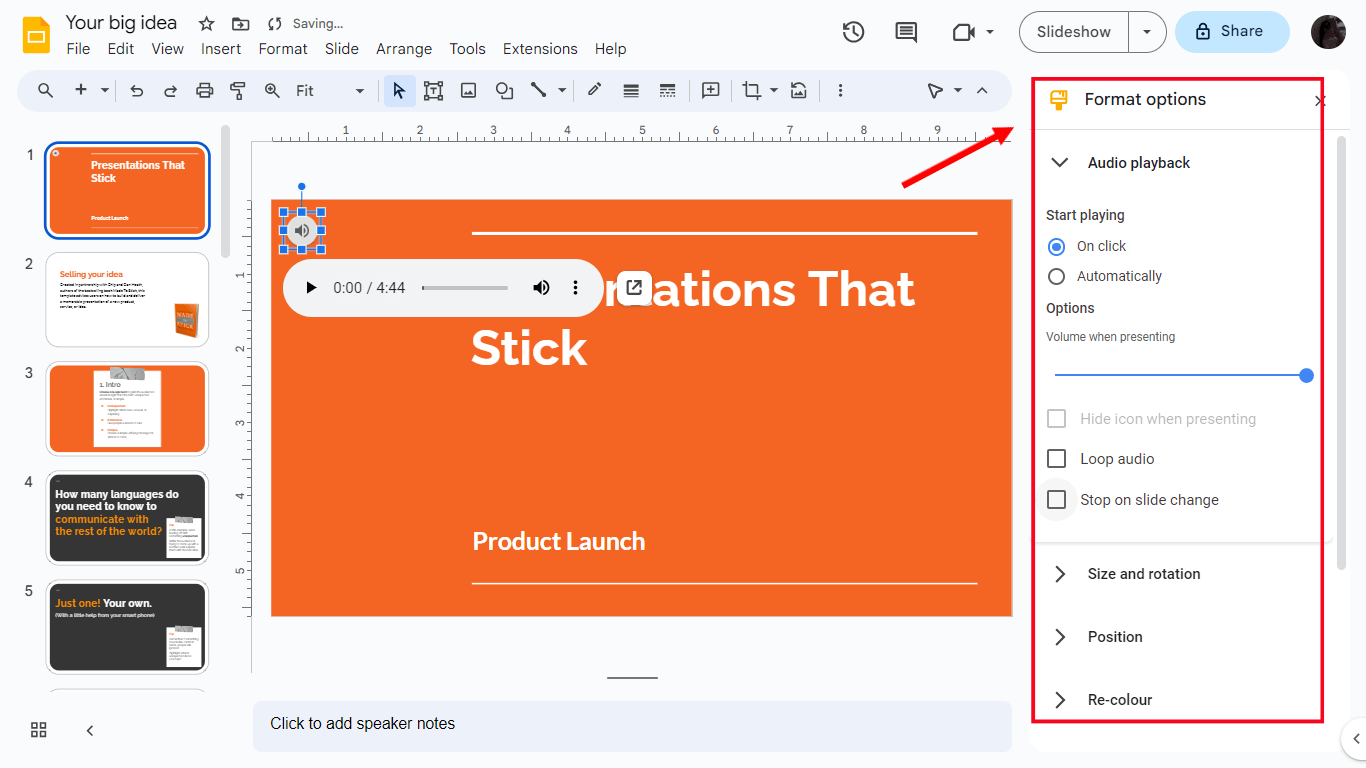
Step 3: Fortunately, Google Slides lets you make basic audio or sound adjustments by clicking the 'Format Options' in the toolbar. Here is a quick overview of the options available:
Audio Play: Under the 'Start Playing' option, you can either select 'Automatically' or 'On click' to choose whether the audio will play automatically or require a click.
Other Options: You can adjust the volume of the audio file playback using the 'Volume when presenting' scale. Click 'Loop audio' to continuously repeat the audio file playback.
You can also uncheck the 'Stop on slide change' box so the audio continues to play even when the slide changes.
Notta offers the most integrated AI notes, summaries, and action items so nothing gets missed.
FAQs
Can I record my voice on Google Slides?
Google Slides does not offer any in-built voice recording tool — at least, not yet — though you can add audio to the slideshow. You can find the steps in the 'How to record voice on Google Slides' in the above sections. You can use AI tools such as Notta for top-notch audio recording, which can be quickly uploaded to Google Slides presentation.
Can I do voice-overs on Google Slides?
In short, yes. You can do voiceovers on Google Slides by accepting the audio files created by any voice recording software and a decent microphone. For example, you can use Notta to record your voice, which can then be added to individual audio files to appropriate slides in the presentation.
Why can't I add audio to Google Slides?
Since there is no option to directly record audio and add voice notes to Google Slides, you'll need a separate application to do the job.
Key takeaways
If you are using Google Slides for creating presentations but want to make them more interactive, using a third-party recording tool makes sense. Those who are struggling with how to record audio on Google Slides can choose the Notta recording tool.
Whether you want to record your voice for presentations or transcribe any lengthy audio or video file, Notta can do it all. It's an AI tool that helps anyone record, transcribe, or summarize any audio or video files to automate workflows — without any complications.