
10 Best Zoom Transcription Services to Transcribe Your Meeting
Saving time and effort with Notta, starting from today!
Struggling to keep track of everything discussed in your Zoom meetings? Taking notes during a fast-paced conversation can be stressful and distracting, making it easy to miss important details. Whether you’re a busy professional managing back-to-back calls or a student attending virtual lectures, an accurate meeting transcript can save time and improve productivity.
To help you find the best solution, we researched and tested the top Zoom transcription services that combine user-friendly features with precise accuracy. In this guide, we’ll share our top 10 recommendations to make your meetings more organized, accessible, and efficient. Keep reading to find the right transcription tool for you!
Does Zoom provide a transcription service?
Yes, Zoom provides a transcription service built into its software. However, Zoom’s transcription service is limited and will require significant editing for a usable transcript, memo, or work report. For example, Zoom’s transcription doesn’t include capitalization or punctuation, so you need to edit and add in all punctuation to make your transcription readable.
What makes a good Zoom transcription service?
While creating this guide, I compared many features to understand what makes an excellent Zoom transcription service. Here are the top 5 features I found to be most important:
Accuracy: Accuracy is the single most important feature when it comes to transcription software. Otherwise, you’ll waste valuable time editing your transcription for mistakes and formatting your transcription into a usable work memo, notes page, or report. When available, I included the exact accuracy rate.
Pricing: An excellent Zoom transcription service is a worthwhile investment that can save money, time, and frustration. However, I did check if the pricing was both competitive and reasonable. I included options with different pricing models, as some people may prefer a one-time payment per transcription, while others may prefer a subscription model.
Editing Capabilities: A great transcription software should offer a variety of editing features to quickly perfect your transcript and generate notes, reports, and memos. No transcription service is 100% accurate, so I looked into software that has user-friendly editing capabilities.
Flexibility: I looked into Zoom transcription services that offer flexible access across different devices. For example, does the software provide a mobile app or Chrome extension so you can use it on your preferred device or browser?
Recording options: How does the Zoom transcription service integrate with Zoom? Does it offer a built-in recording option or a Live bot? Or do you need to record the Zoom meeting separately and upload it to the transcription service to work?
10 best Zoom transcription services
1. Notta
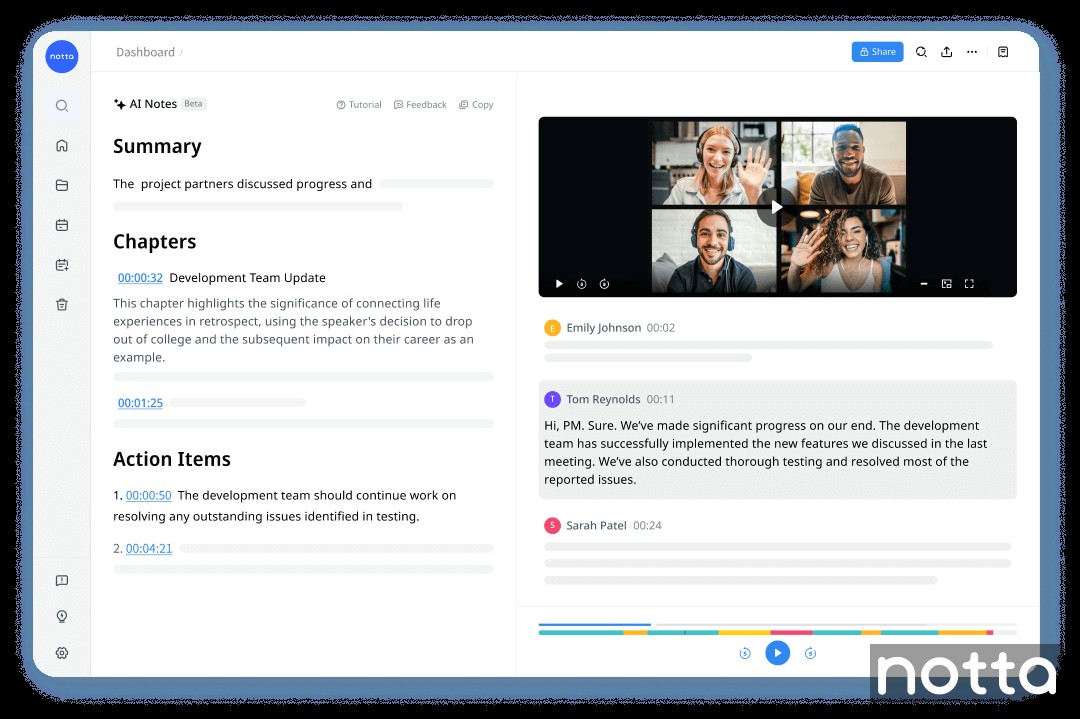
Notta is the ultimate meeting transcription app for Zoom since it can transcribe meetings with up to 98.86% accuracy, so you can focus on the conversation instead of scrambling to take notes. Not only does Notta create accurate transcripts, but it also generates AI summaries that highlight important moments.
However, the best way to use Notta for Zoom transcriptions is with their Notta Bot. You can schedule Notta Bot to automatically join your video meetings on Zoom,Microsoft Teams, and Google Meet.
I also love that Notta connects to Notion, so you can easily export your transcripts to Notion. In addition, you can export your transcripts in multiple formats, including .pdf, .docx, .txt, and .xlsx.
Notta can also generate reports and memos from your transcriptions, saving time and energy. Its automatic correction and real-time editing features help reduce the need for manual edits after the meeting.
Lastly, Notta doesn’t share data with third parties or collect data. The software keeps your private information encrypted both at rest and in transit, so your data stays secure.
Verdict: Best for individuals who want to transcribe live meetings & edit transcripts.
Key Features:
Syncs transcripts across multiple devices.
Add images and comments to the transcript.
Highlights text during playback.
Auto-join and transcribe online meetings with Notta bot (your online meeting assistant).
Generate summaries with action items powered by AI.
Pricing:
Free plan
Pro: $8.17 per user per month
Business: $16.67 per user per month
Enterprise: contact sales
Supported video conferencing platforms: Zoom, Google Meet, Webex, and Microsoft Teams
Supported transcription languages: 58 languages, including English, Spanish, Chinese, Japanese, Arabic, and French.
2. Otter
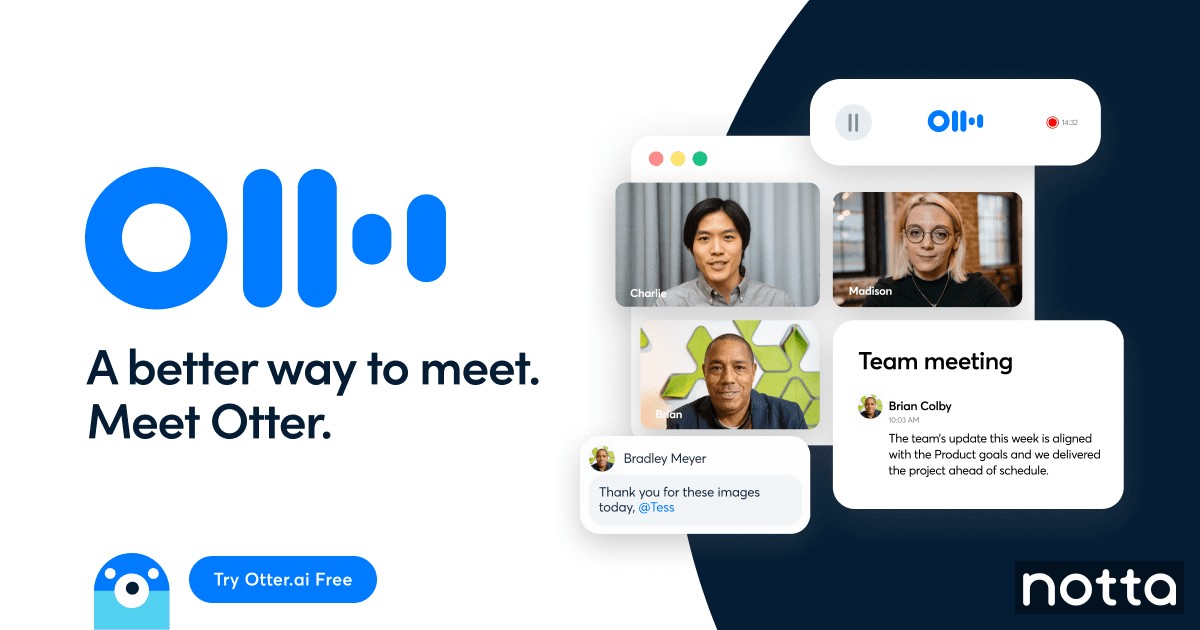
Otter has an Otter Assistant feature that allows you to record in-person, hybrid, virtual, and mobile meetings. Otter Assistant can also be synced to your Google or Microsoft calendar, allowing you to automatically schedule the Otter Assistant to join your Zoom, Microsoft Teams, and Google Meet calls.
You can also interact with Otter’s meeting assistant during calls by asking questions, scheduling follow-ups, and even drafting emails using just your voice.
Otter’s AI technology continues to improve transcription accuracy over time by learning your team’s conversational styles and vocabulary.
Otter takes notes in real time and automatically generates a summary of your Zoom meetings. All your notes are stored in one central, secure, and easily accessible place, helping you stay organized and on track. I also like that Otter lets you edit, annotate, and share transcripts with your colleagues.
Verdict: Ideal for team-based businesses.
Key Features:
Speaker identification.
Multiple export options.
Live captioning available.
Team collaboration features.
Pricing:
Free plan
Pro: $16.99 per month
Business: $30 per month
Enterprise: contact sales
Supported video conferencing platforms: Zoom, Google Meet, and Microsoft Teams
Supported transcription languages: English and regional accents
3. Verbit
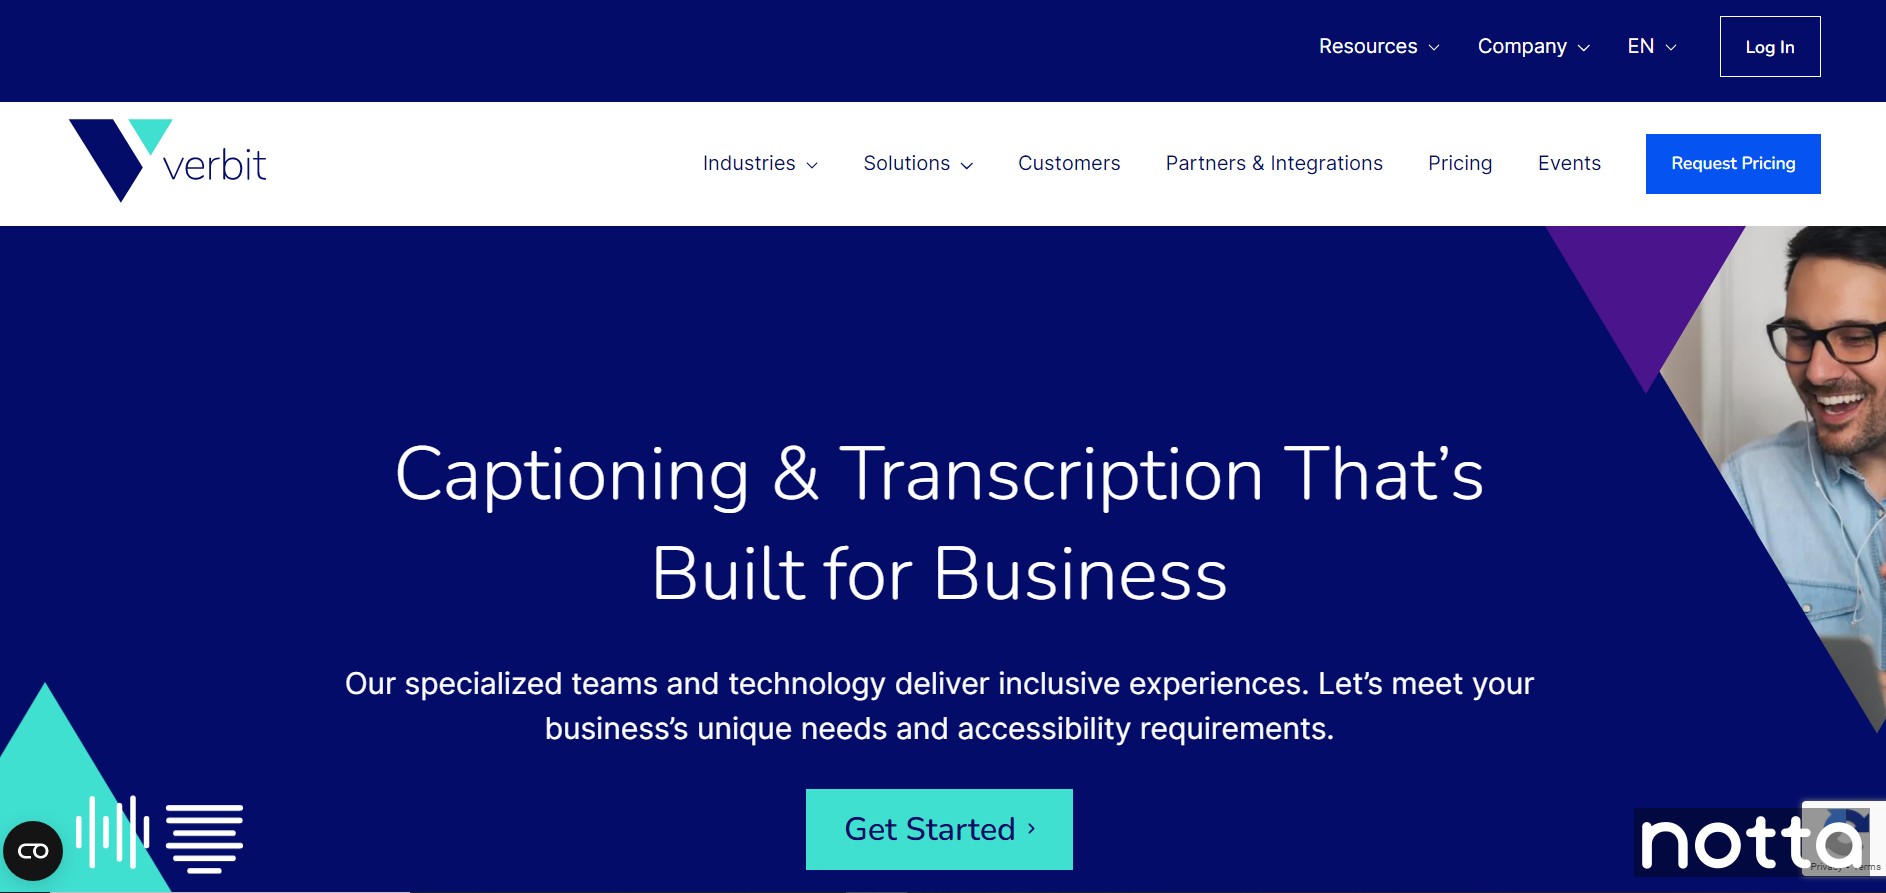
Verbit is an ideal platform for companies that host regular live events and large meetings. It offers professional-grade accuracy and the ability to schedule real-time services.
I like that they have an accurate and searchable transcription database. Their software is also AI-based and can create customizable transcripts with flexible formatting options
The biggest downside to Verbit is its lack of transparent pricing, since the cost depends on project volume and services. It's harder to compare options or estimate expenses upfront compared to other transcription services on this list.
Verdict: Best for accessibility and compliant meeting procedures.
Key Features:
Integrated captions that support ADA guidelines.
24/7 End-to-End support.
Integrates with Google Drive, Zoom, Vimeo, YouTube, Dropbox, and more.
Pricing:
Self-service: $29 / month
Full service: Custom pricing per project
Supported video conferencing platforms: Zoom and Microsoft Teams
Supported transcription languages: 50+ languages, including Spanish, French, German, and Mandarin
4. Grain
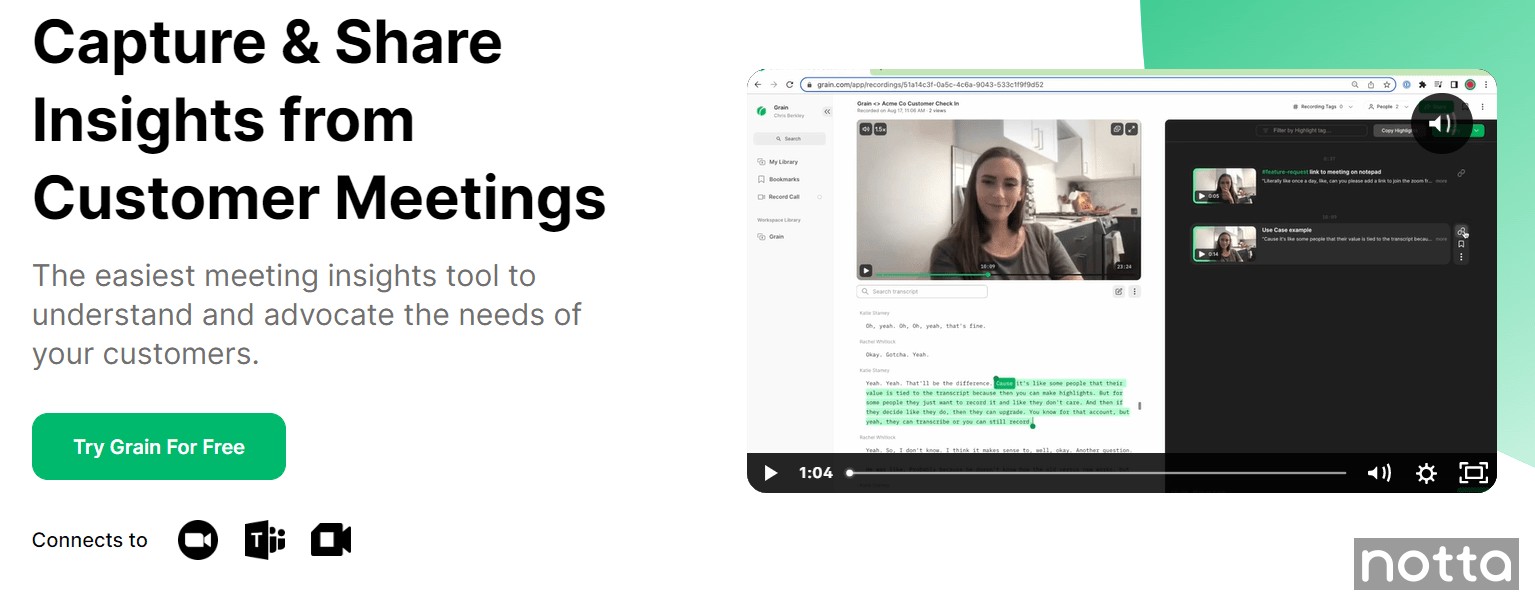
Grain can auto-record Zoom, Google Meet, and Microsoft Teams meetings when you connect your calendar and set record rules indicating which types of meetings you want Grain to record. Alternatively, Grain can capture meetings ad hoc if you enter the Zoom meeting ID or link.
I like Grain’s “Share a Highlight” feature, which allows you to create a transcript snippet and share it on Notion, Slack, Twitter, or via email.
Another unique feature is ‘Summarize Conversations’, which compresses a 60-minute meeting into a 3-minute video summary. This feature is excellent for work, as you can share a short summary of a meeting with coworkers who couldn’t attend, or bosses who just need a quick overview of the discussion.
Finally, the new Ask Grain tool allows you to ask the AI questions about the meeting so you can easily find important information.
Verdict: Ideal for individuals interested in sharing clips of the transcription
Key Features:
Integrates with Salesforce, Notion, Slack, and more.
Search across conversations.
Build a team’s video meeting workspace.
Pricing:
Basic Plan: $0
Starter Plan: $19 per user per month
Business Plan: $39 per user per month
Enterprise Plan: contact sales
Supported video conferencing platforms: Zoom, Google Meet, and Microsoft Teams
Supported transcription languages: Bulgarian, Croatian, Catalan, Czech, Danish, Dutch, English, Finnish, French, German, Greek, Italian, Latvian, Norwegian, Polish, Portuguese, Romanian, Russian, Slovak, Slovenian, Spanish, and Turkish.
5. Fathom
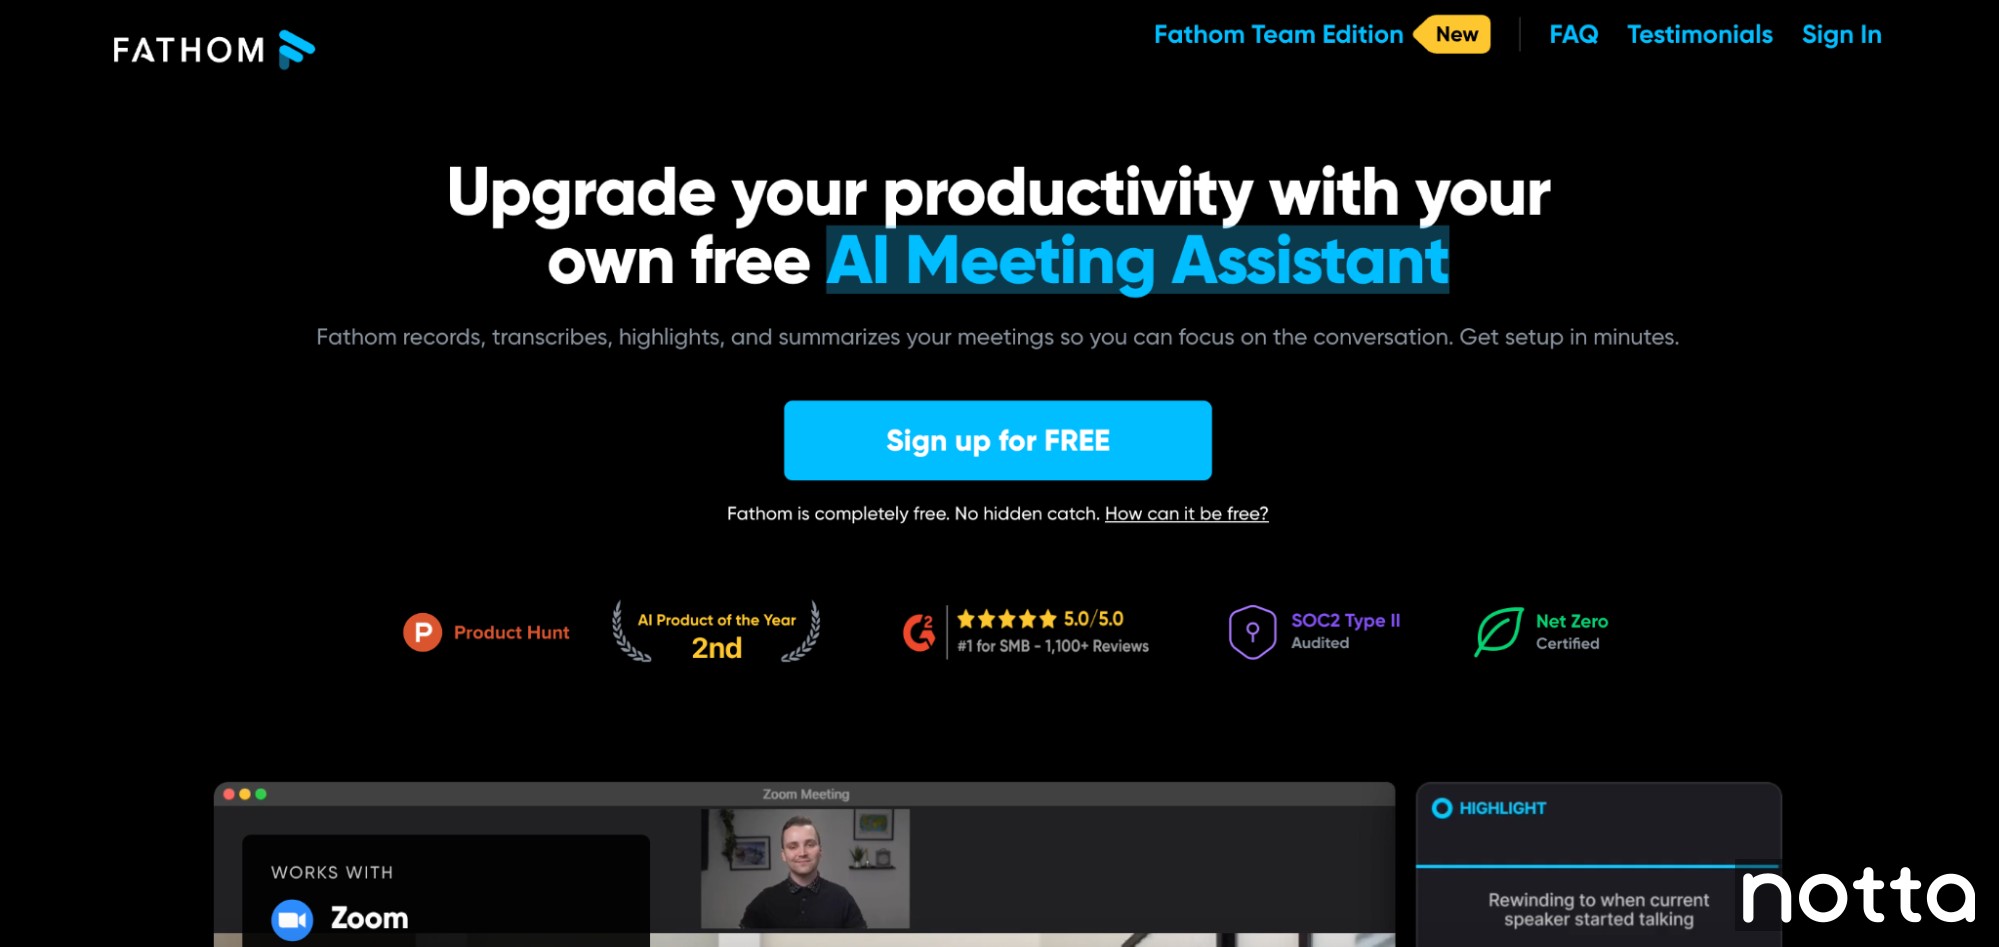
Fathom, a recent addition to the AI meeting assistant market, is initially focused on simplifying note-taking for Zoom meetings. It has now expanded its support to include Google Meet and Microsoft Teams.
While Zoom users can easily access Fathom within the app marketplace, users on other platforms will need to download the desktop software for seamless integration.
I really like is the new Custom Dictionaries feature, which lets you add industry-specific terms, acronyms, and product names to make the notes and transcripts more accurate.
Verdict: Best for individuals managing meetings from start to finish
Key Features:
Automated note-taking for Zoom meetings.
Integration with Google Docs and Gmail.
Highlight crucial points during a meeting with a single click.
Instant download link of transcripts and Zoom captions.
Pricing:
Free for individual use.
Premium: $15 per user per month
Team Edition: $19 per user per month
Team Edition Pro: $29 per user per month
Supported video conferencing platforms: Zoom, Google Meet, and Microsoft Teams
Supported transcription languages: English, French, Spanish, Italian, German, and Portuguese
6. Fireflies.ai
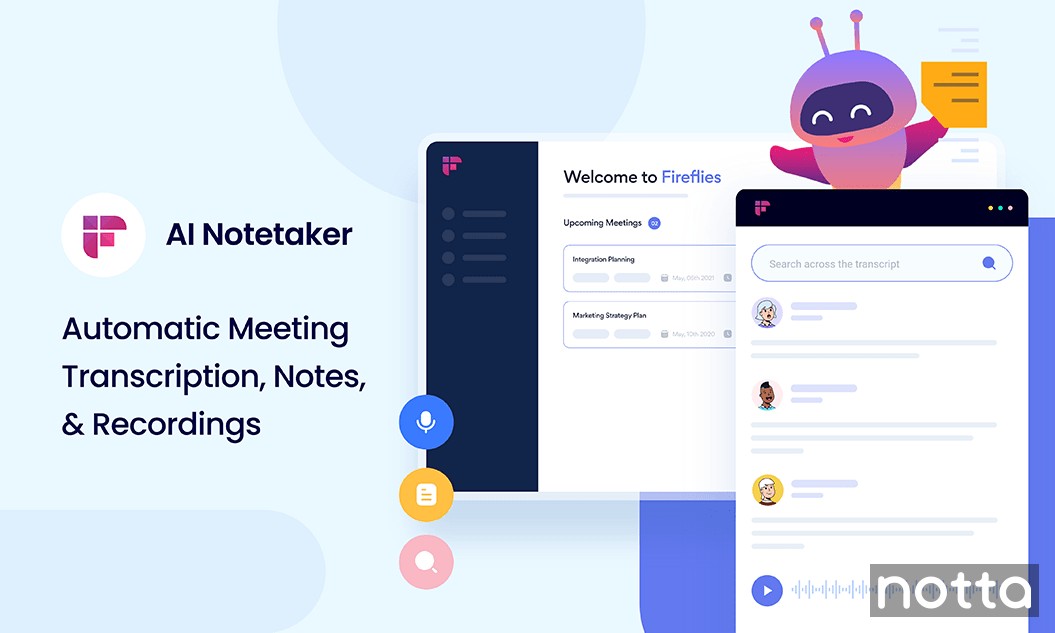
Fireflies is a conversation-tracking platform that transcribes, records, and analyzes meetings and video calls. If you are interested in assessing sales or client calls, Fireflies may be a good choice for you due to their detailed call analysis.
You can schedule Fireflies to join your Zoom calls and record and transcribe the meeting. I like Fireflies’ collaborative features, such as highlighting specific parts of the Zoom call and sharing this highlight with coworkers or colleagues rather than sending them an entire transcription. Its search function is another win that allows you to review an hour-long call in less than five minutes by searching for top highlights and action items within the transcript.
Verdict: Ideal for individuals interested in many integration options.
Key Features:
Chrome Extension allows you to capture meetings directly.
SOC 2 Type 2 & GDPR Certified for top-notch security.
Support lots of video meeting platform integrations.
Pricing:
Free Plan: $0
Pro Plan: $18 per seat per month
Business Plan: $29 per seat per month
Enterprise Plan: $39 per seat per month
Supported video conferencing platforms: Google Meet, Microsoft Teams, Webex, Skype, Bluejeans
Supported transcription languages: English and other 69 languages.
7. Happy Scribe
Happy Scribe offers transcription and subtitle services that allow you to collaborate with others on the transcript, with the option to share your files in a view-only or edit mode. Happy Scribe’s automatic transcription has an 85% accuracy rate, but their human translation and transcription services offer a guaranteed 99% accuracy rate.
I like that it is team-friendly software because you can create spaces to share files with the rest of your team and integrate them with many popular work applications.
However, you need to be the host of the Zoom call to use Happy Scribe, since you must save the Zoom recording and upload it to the platform for transcription. It doesn't support real-time transcription for online meetings.
Verdict: Ideal for users needing nearly perfect accuracy
Key Features:
Upload unlimited audio or video.
Files are protected and private.
Integrates with Zapier, YouTube, and more.
Pricing:
Starter: From $12 per 60 minutes
Lite: $9 per month ($0.15/min)
Pro: $29 per month ($0.05/min)
Business: $89 per month ($0.01/min)
Optional add-on: Human-made services: $2.00 per minute
Supported video conferencing platforms: GoToMeeting, Microsoft Teams, Skype
Supported transcription languages: Over 120 languages, including English, French, Spanish, Portuguese, Italian, Polish, German, and Dutch
8. Go Transcribe
Go Transcribe has a simple interface that converts video recordings into text in minutes. While Go Transcribe doesn’t offer a built-in bot that records Zoom calls, you can upload the meeting recordings and let the app transcribe the audio or video files within a couple of minutes. It supports various video formats, including AVI, FLV, M4V, MPEG, MPG, MTS, WMA, and WMV.
Go Transcribe offers a powerful editing suite that allows you to highlight, delete, edit, and comment on the transcript. You can also speed up playback to review your recording faster and finish the task more quickly.
Verdict: Best for users who need to deal with lots of audio and video files.
Key Features:
Email support.
Unlimited storage.
Timestamps by paragraph.
Pricing:
Pay as you go: $12/hour
Standard subscription: $36/month
Business subscription: $90/month
Supported video conferencing platforms: Zoom and Goto Meetings
Supported transcription languages: English and 30 other languages, including various accents and dialects.
9. 3PlayMedia
3PlayMedia offers accurate closed captioning and transcription services, including real-time live captioning and audio descriptions. It allows you to edit audio for derivative and research content easily.
If you work in the legal or medical industries, 3PlayMedia provides accurate, HIPAA-compliant, and secure solutions for transcriptions. Each video file goes through two rounds of professional transcription to ensure your transcription has the highest possible accuracy.
Lastly, 3PlayMedia offers organization features and allows you to monitor the status of your files as they are transcribed.
Verdict: Ideal for users needing HIPAA-compliant and secure transcriptions
Key Features:
Caption encoding and open captioning are available.
Integrates with Vimeo, YouTube, Zoom, JWPlayer, and more.
Accessibility compliant.
99% accuracy rate on all files.
Pricing:
Custom pricing
Supported video platforms: Amara, Brightcove, Cvent, Facebook, and Vimeo.
Supported transcription languages: English, Spanish, 20+ languages in total.
10. Rev
Rev is a speech-to-text transcription service that uses advanced speech recognition software to create transcripts in under five minutes. Rev includes editing tools to perfect your transcription, a review and edit function, speaker identification, and custom timestamps to make reviewing your transcript easier. I also like that they offer a mobile app to record memos, meetings, and lectures on the go.
The biggest downside to Rev is its lack of built-in summarization tools, which means you’ll need to summarize your meeting notes manually or use another app to do it.
Verdict: Good for individuals needing text transcription on the go.
Key Features:
Export your files as MS Word, VTT, SRT, PDF, and more.
95%-96% accuracy rate or 99% for human-reviewed transcripts.
Custom timestamps.
Pricing:
Basic: $9.99 per user per month
Pro: $20.99 per user per month
Enterprise: Custom pricing
Pay-by-the-minute: $0.25 per minute for AI transcription
Supported video conferencing platforms: Zoom, Google Meet, Microsoft Teams, Webex
Supported transcription languages: 35+ including Greek, Hindi, and Slovak
Why do you need a Zoom transcription service?
Zoom's built-in transcription feature is slow and unreliable. Here are a few reasons why using an alternative option can be a better choice:
Advanced editing capabilities: For example, Notta highlights text as you listen and allows you to edit the text in real-time.
Edit your transcription on the go: Some transcription services allow you to edit on your laptop, smartphone, tablet, or other devices, which is far more convenient. These services are also designed to be user-friendly on different devices, so their functionality is better than the default transcription service in Zoom.
Support more languages: Zoom transcription currently supports 35 languages. However, other Zoom transcription services may support over 100 languages.
Team collaboration: Many Zoom transcription services provide advanced features for teams, such as creating folders, sorting and renaming your files, and the ability to save data to multiple formats. Some services, like Notta, even allow you to insert images, making your transcription more visually appealing.
Key takeaways
An excellent Zoom transcription software saves you time and energy by reducing the manual workload of taking notes during your Zoom call. Their features can optimize your work, allowing you to record critical information for yourself and your colleagues.
Before selecting a transcription service, I recommend that you decide which features are essential. For example, are you okay uploading a recording of the Zoom call to the transcription service, or would you prefer a real-time transcription service like the Notta Bot? Are editing and collaborative features a big deal for you?
Notta is an ideal choice for Zoom transcriptions because it offers real-time and post-meeting transcription options, as well as many editing, collaboration, and export features to save you time and energy.

FAQs
Is it free to use Zoom live transcription?
Yes, Zoom live transcription is free. However, the accuracy of Zoom live transcription compared to other speech-to-text and transcription software is lower, making it a poorer choice for transcribing your meetings and calls.
How can I convert a Zoom recording to text?
You can convert a Zoom recording to text by uploading it to a transcription or speech-to-text service like Notta.
The transcription service will convert the audio recording into a text file and provide you with tools to make edits to the transcription text, formatting, and punctuation. This allows you to convert the transcript into notes, memos, reports, or a study guide.
How to enable and use Zoom live transcription?
To enable and use Zoom live transcription, take the following steps in your user settings:
Step 1: Go to ‘Settings’ and locate the Meeting section. Scroll down to ‘Meeting Advanced Settings.’ Locate ‘Closed Captioning’ under this section.
Step 2: Click the toggle button and turn it from gray to blue. Click ‘Enable’ when the new message box appears on the screen.
Step 3: Check the box beside ‘Allow live transcription service to transcribe meetings automatically.’
Step 4: Click the ‘Save Captions’ toggle button and turn it from gray to blue. This will save a copy of the transcript for both hosts and participants.
Why my Zoom meeting is not live transcribing?
Your Zoom meeting is not live transcribing if you don’t have your closed captioning Zoom settings set to ‘Enable live transcription service to transcribe meeting automatically.’ If this button isn’t toggled to blue under ‘Settings,’ Zoom will not live transcribe.
How do you transcribe a Zoom meeting in real-time?
You can transcribe a Zoom meeting in real-time by activating Zoom’s live transcription feature. Alternatively, I recommend using a 3rd-party speech-to-text or transcription software to transcribe your Zoom meeting, like Notta.
This kind of software typically offers better accuracy and more advanced features that make it easier to edit, collaborate, format, and share your transcription. Some tools even include a live bot that can join your Zoom call and transcribe everything in real time, so you don’t miss any important details.

