
How to Take Audio Notes on iPhone
98% accurate, real-time transcription in just a few clicks. 58 languages and multiple platforms supported.
Whether you want to quickly record a brainstorm with a colleague, an interview with a prospective client, or your latest brilliant business idea, taking audio notes on your iPhone is a great place to start.
An audio note on an iPhone is a short audio recording that can be created and shared using the built-in Voice Memos app.
While the iPhone has offered Apple’s Voice Memos App for free for over a decade, this app only records audio files and does not offer the option of transcription, which limits it to certain use cases.
There is a large range of third-party voice recording apps available on the Apple App Store, many of which we have taken the time to research and trial in order to determine how to take audio notes on iPhone for the best results.
In this article, we’ll take a deep dive into how to record audio notes on iPhone, what audio notes are used for, and which third-party apps are the best choice for those looking for the most comprehensive offerings in the voice-to-text field.
Why would users want to record and transcribe a voice note?
There are many reasons why you might want to record and transcribe a voice note.
Firstly, recording a voice note allows you to capture information or ideas quickly and easily, without having to stop what you're doing to take written notes. This can be particularly helpful in situations where you need to remember a lot of details, like during a lecture or business meeting.
Secondly, they allow you to review your recorded information in greater detail, allowing you to consolidate important points and ideas you may have otherwise missed. Voice notes also make it easier to share your information with others, as you can send them an audio file or written copy of the transcription, depending on which app you are using.
When utilizing an app that offers transcription capabilities, voice-to-text notes can be particularly useful for people with disabilities or those learning a new language.
Method 1: How to take audio notes on iPhone using Notta
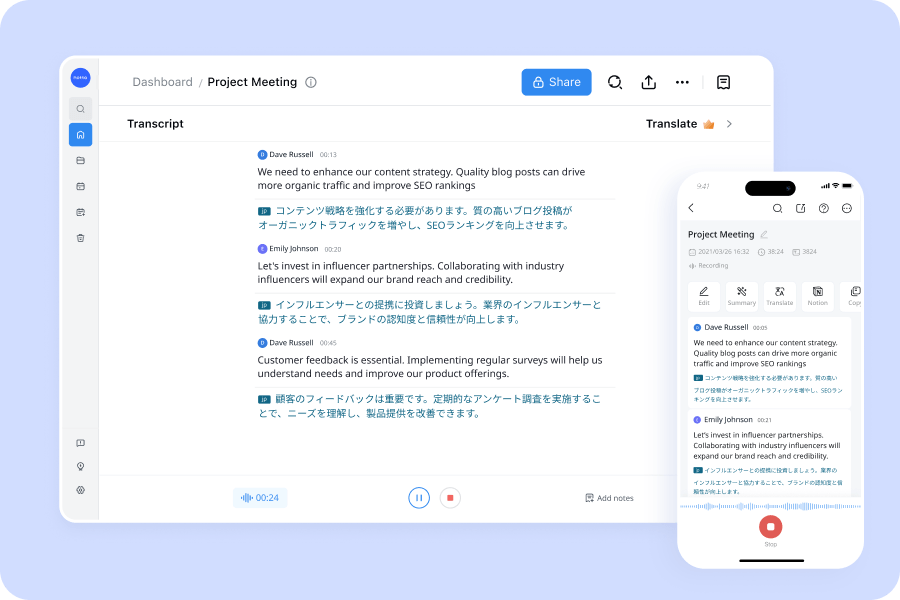
If you're looking for an easy and efficient way to take audio notes on your iPhone, then Notta is a great place to start. This transcription product has already won over 400K registered users in Japan, and for good reason.
With Notta, you can transcribe your conversations in 58 languages, playback at different speeds, add notes, and mark important sections. Plus, you can search for specific keywords, such as names, dates, or locations, to quickly find what you need.
One of the coolest features of Notta is its ability to translate your transcript into up to 43 different languages. This makes it perfect for international students or anyone who needs to communicate with people who speak a different language.
Notta also offers easy editing functionality. If you notice any mistakes in your transcription, Notta makes it easy to correct them. You can even export your transcripts in various formats, such as TXT, DOCX, SRT, and PDF to share them with your friends or co-workers.
Using Notta to record your voice on an iPhone is super easy, and Notta provides a free version of their app for those wanting to try it out.
Notta can convert your spoken interviews and conversations into text with 98.86% accuracy in minutes. Focus on conversations, not manual note-taking.
How to record your voice on an iPhone with Notta
Are you ready to start taking audio notes on your iPhone with Notta? Let’s get started
Firstly you’ll need to download the free Notta app from the App Store and open it on your iPhone.
Select your transcription language at the top of the screen (there are 58 to choose from).
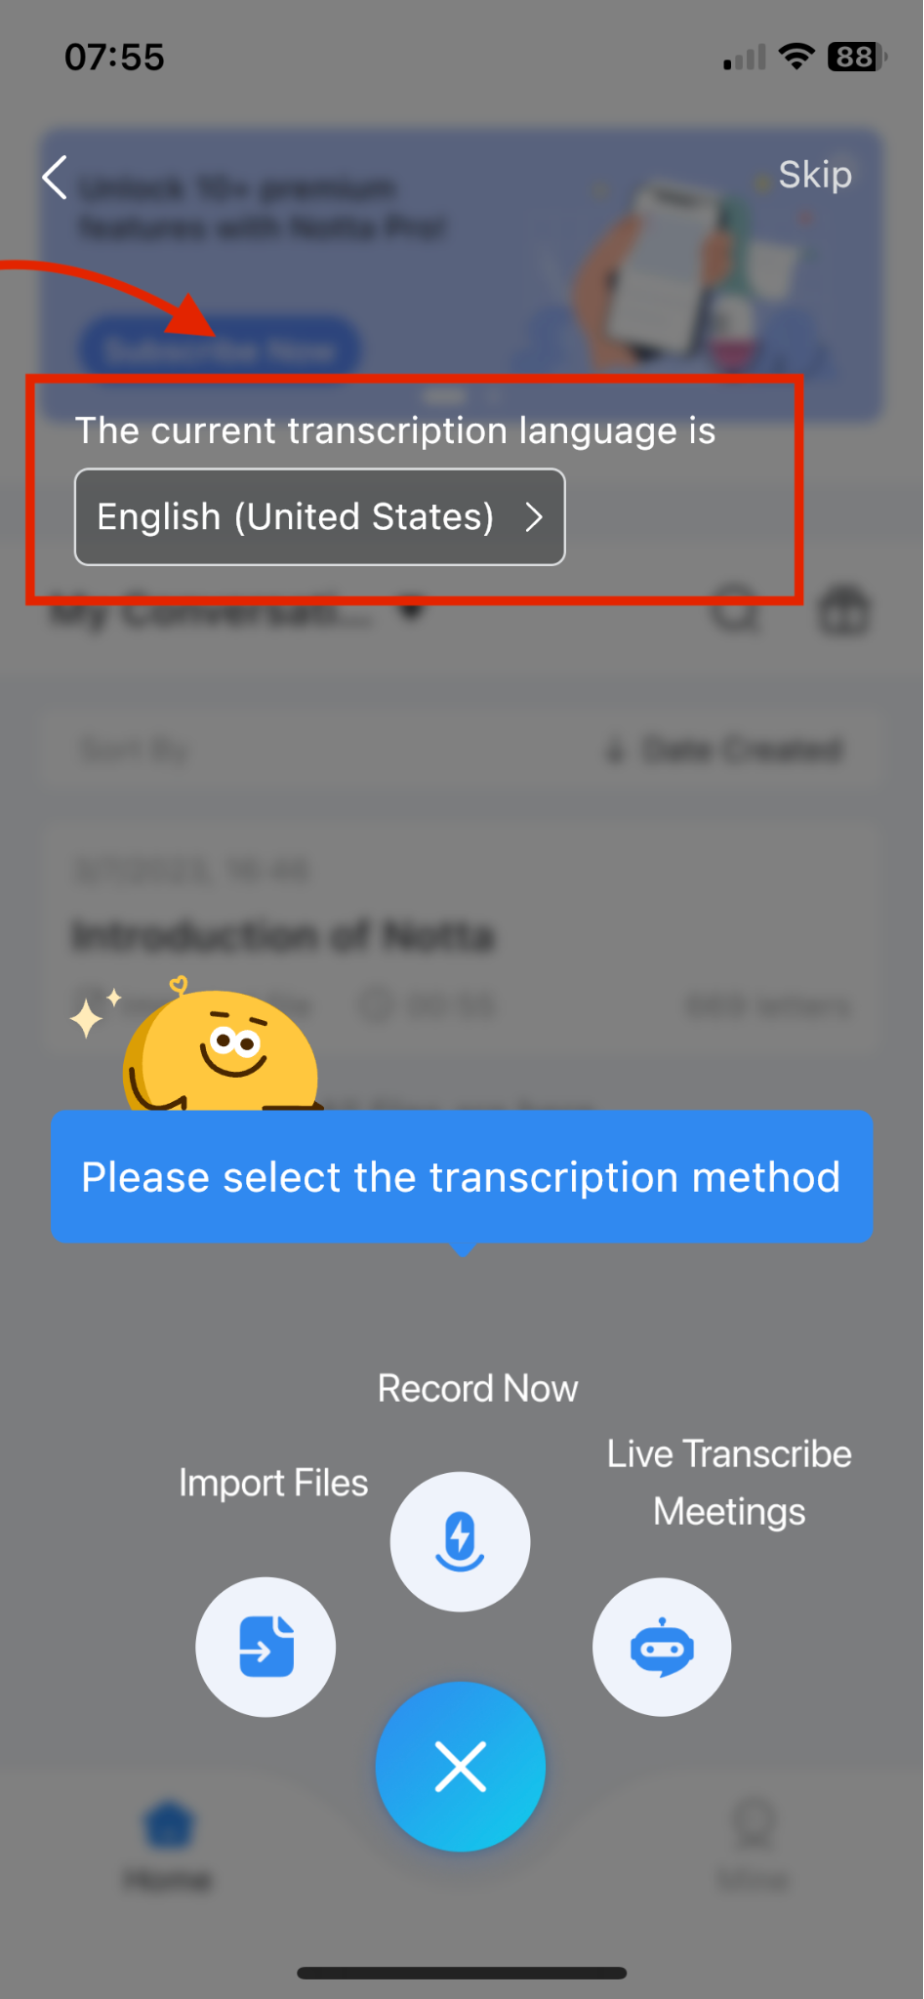
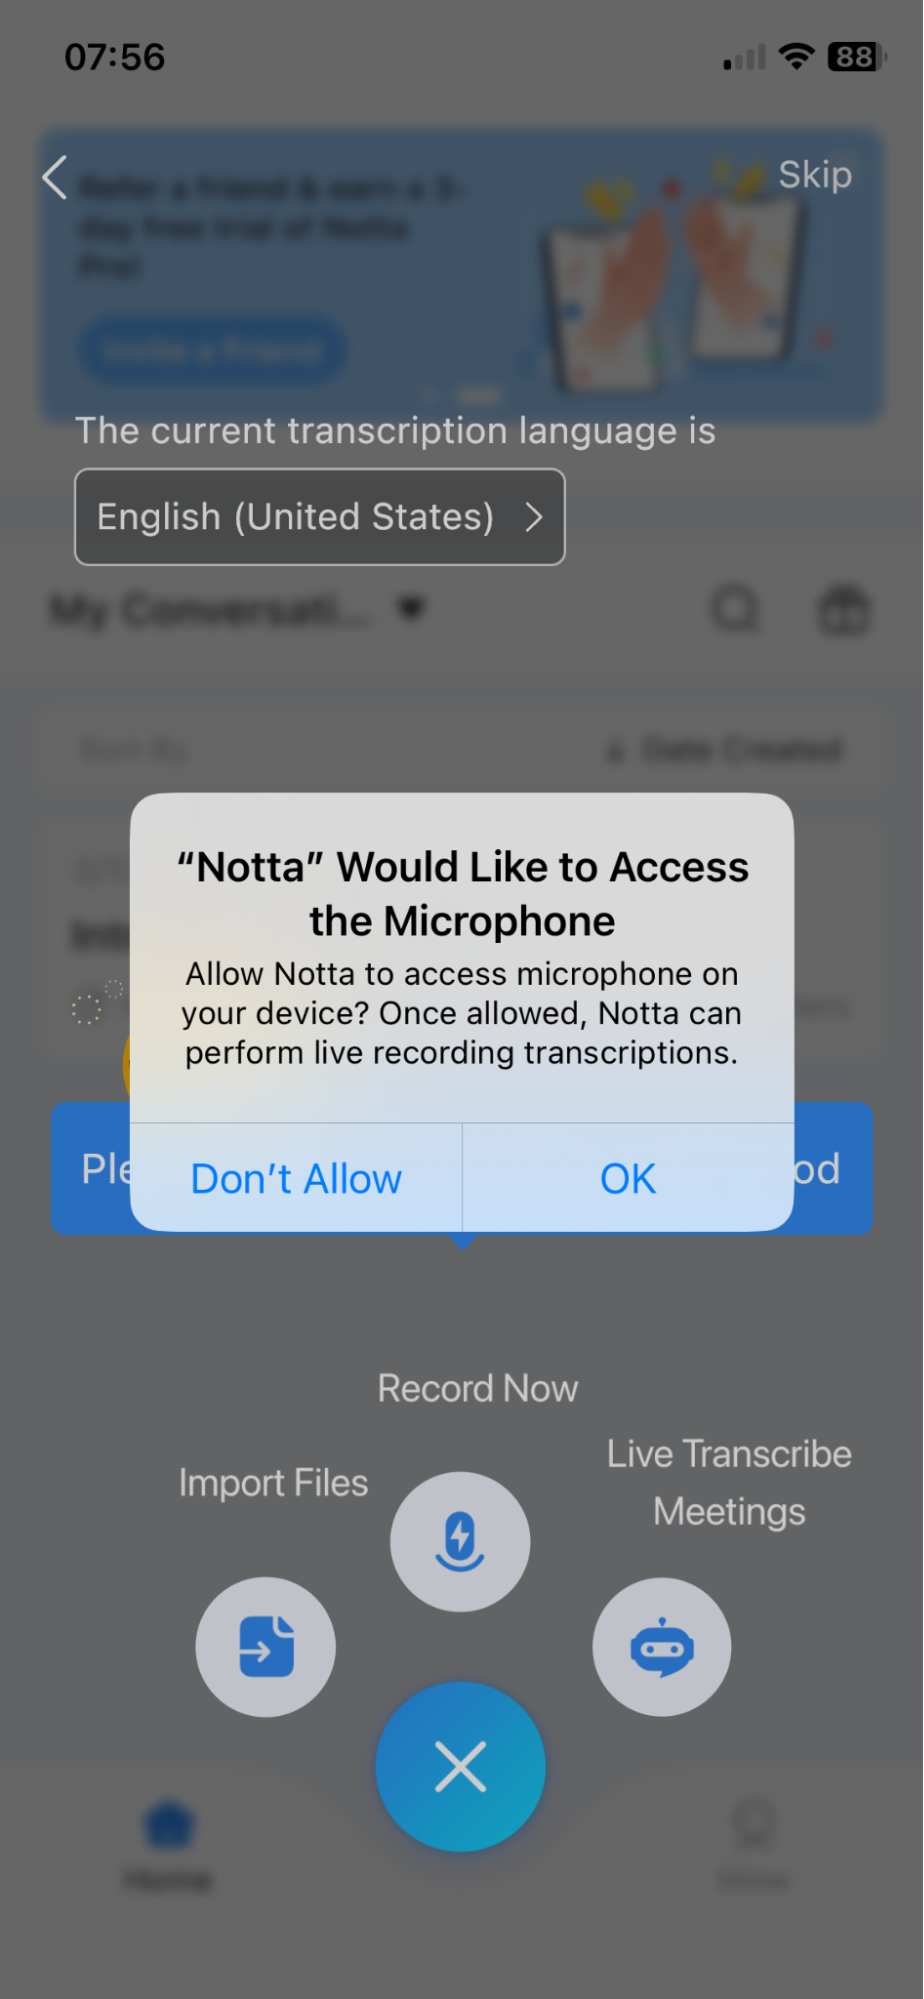
Click on the ‘Record Now’ button at the bottom center of the screen to start recording your voice. If you haven’t already done so in your settings, you will need to enable the use of microphone in the pop-up window.
Notta will begin transcribing your audio in real time. For the best results, speak clearly and directly into your iPhone's microphone and ensure there is minimal background noise.
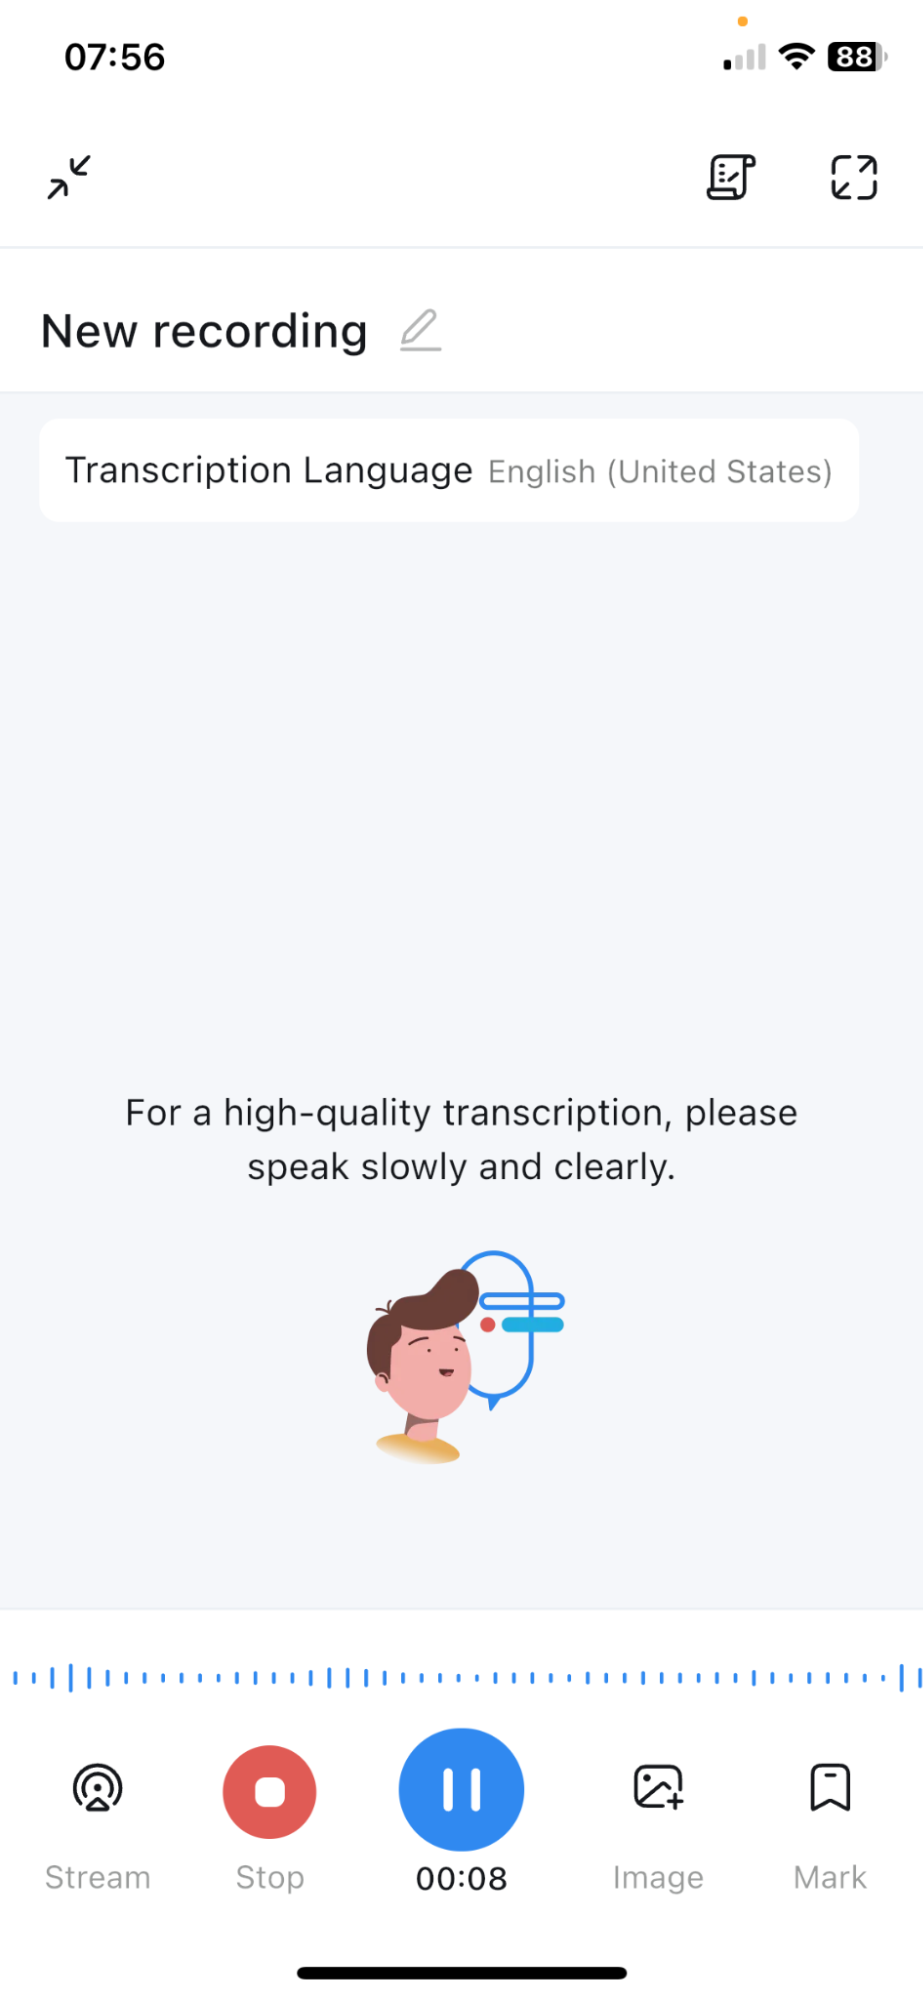
When you're done recording, click on the stop button to finish the recording. Rename your voice note and select ‘Done’.
Your transcript will be saved automatically in your dashboard under ‘My Conversations’, and you can listen to it again by clicking on the play button next to it.
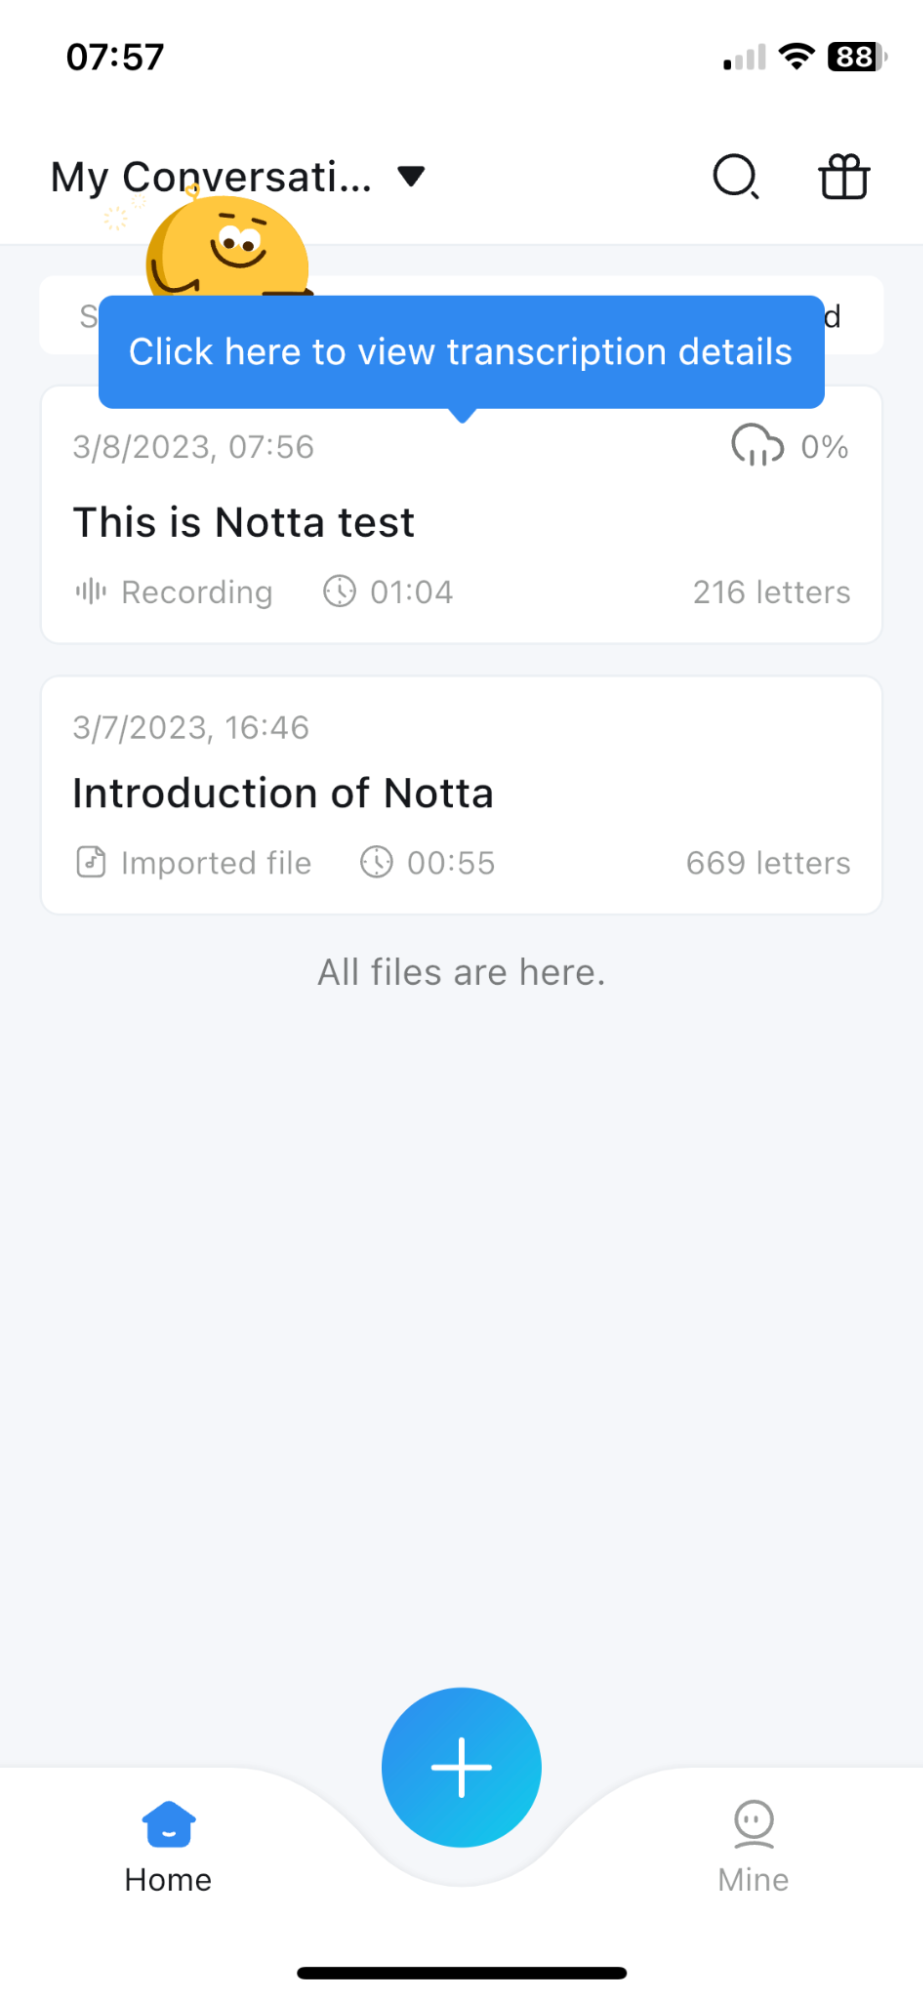
You can then edit the transcript by adding notes, highlighting important sections, or correcting any mistakes.
To organize your notes, create a new folder by clicking on the "New Folder" button and giving it a name. You can move your notes into this folder by clicking on the "Move" button next to the note and selecting the folder you want to move it to.
When you're ready to share your notes, you can export the transcript in various formats such as TXT, DOCX, SRT, or PDF. You can also share important clips with your friends or co-workers by sending them a link.
That's it! With Notta, taking audio notes on your iPhone has never been easier.
Method 2: Record a voice note on your iPhone with Voice Memo app
As mentioned above, the iOS app store is filled with third-party apps designed for users to record voice memos on their iPhones.
However, when you're looking to quickly record voice notes on the go, Voice Memos on iPhone offers a simple method to record via the built-in microphone, an external microphone, or a supported headset.
Here's how to get started with audio recordings on the Voice Memo app.
Step 1: Locate the Voice Memos app on your iPhone. The Voice Memo app is usually located in either your iPhone’s Extras or Utilities folder, however, If you have previously deleted the app, simply download it again from Apple’s app store. The app’s icon appears as a sound graph. Click on the app to open it.
Step 2: To start your recording, click the large red button at the bottom center of the screen. To adjust the recording level, you will need to move the microphone closer or further away from your mouth.
Step 3: When you have finished recording, press the button again (it will now appear as a large red square). The app will automatically save the voice note to your device. As far as recording audio on your iPhone, it’s pretty much as simple as that. However, there are a few extra features offered by this free app.
How to edit and export an audio file on Voice Memos
Here are the steps to edit and export an audio file on Voice Memos:
Open the Voice Memos app on your iPhone.
Find the audio recording you want to edit and tap on it to open it.
Tap on the ‘Edit' button at the bottom of the screen.
Use the waveform slider to select the portion of the recording you want to keep. You can also use the play button to preview the selection.
Once you have selected the portion you want to keep, tap on the ‘Trim' button to remove the unwanted sections of the recording.
If you want to add text notes to the recording, tap on the "Notes" button and type your notes.
To adjust the volume of the recording, drag the volume slider up or down.
When you're finished editing, tap on the ‘Done’ button to save your changes.
To export the edited recording, tap on the 'Share' button at the bottom left corner of the screen.
Choose the format in which you want to export the recording in, such as AAC or WAV.
Select the method you want to use to share the recording, such as email or AirDrop.
Follow the prompts to complete the export and sharing process.
Due to its simplicity, the Voice Memos app has some limitations when it comes to exporting audio files. For example, you can only export one recording at a time, and the app does not offer the ability to export recordings in high-quality formats like FLAC or AIFF.
Use Notta's AI transcription tool to quickly and easily transcribe audio and videos. We guarantee accuracy and ease of use.
How to edit, trim, or delete the audio on your iPhone
While Voice Memos can be a handy tool for recording information and reminders on the fly, the recordings can sometimes be quite rudimentary. Therefore, you may need to refine your recordings to make them more useful.
Whether you need to trim a memo, delete a section, or rename your audio recording, we’ve got you covered.
Here’s how to edit, trim, or delete the audio on your iPhone.
Open the Voice Memos app on your iPhone.
Find the recording you want to edit or trim and tap on it to open it.
To trim the audio, drag the waveform slider to the left or right to select the portion you want to keep. You can also use the play button to preview the selection. Once you have selected the portion you want to keep, tap on the "Trim" button at the bottom.
To delete a portion of the audio, use the same process as trimming to select the part you want to delete, and then tap on the "Delete" button.
If you want to edit the audio, tap on the "Edit" button at the bottom of the screen. This will open a new screen where you can adjust the volume, add text notes, or add a photo to the recording. You can also split the recording into two separate parts by tapping on the "Split" button.
Once you have finished editing, trimming, or deleting the audio, tap on the "Done" button at the top left corner of the screen to save your changes.
It may be important to note that the Voice Memos app on your iPhone has some constraints when it comes to editing audio. For example, it’s not possible to add or remove background music or sounds or apply effects such as echo or reverb. If you need more advanced audio editing features, you may need to use a third-party app, such as Adobe Audition or Twisted Wave.
FAQs
How do I activate my iPhone microphone?
To activate the microphone on your iPhone, follow these steps:
Launch the app you want to use for recording or making a call, such as Voice Memos, Camera, Phone, or Notta.
Check that the app has permission to access the microphone. You can do this by going to Settings > Privacy > Microphone and ensuring that the toggle for the app is turned on.
Make sure that the microphone isn't covered or obstructed.
Speak into the microphone to test if it's working.
If the microphone isn't working or you're experiencing other issues, try restarting your iPhone or checking for software updates. If the problem persists, you may need to contact Apple support for further assistance.
How long can the Voice memo app on iPhone record for?
The Voice Memo app itself can record for an unlimited amount of time. What limits the length of the recording is actually the available storage space on your device. However, most iPhones can record voice notes for several hours without any issues.
How do I share my voice notes?
To share a voice note from your iPhone, simply open the Voice Memos app, select the recording you want to share, and tap the share button. From there, you can choose to share the recording via email, message, airdrop, or any other app that supports sharing.
Can I edit my voice notes on my iPhone?
Yes, you can edit your voice notes on your iPhone using the Voice Memos app. To do so, select the recording you want to edit, tap the three dots in the bottom right corner, and select ‘Edit Recording’. From there, you can trim the recording, add fades, and adjust the volume.
How can I ensure the best sound quality when recording voice notes on my iPhone?
To ensure the best sound quality when recording voice notes on your iPhone, it's important to hold the phone near your mouth and speak clearly into the microphone.
Avoid holding the phone too far away or covering the microphone with your hand. Recording in a quiet room away from background noise may also help to improve the clarity of your recording.
Conclusion
Recording voice notes on your iPhone is a great way to capture important information, consolidate ideas, and share material with colleagues and collaborators.
While recording voice notes on an iPhone can be easily achieved with the built-in Voice Memos app, the app does have limitations and does not offer transcription functionality.
There are many third-party apps available that offer audio-to-text capabilities. Among the most efficient and user-friendly of these is Notta, which offers transcription in 58 languages, easy editing, keyword search, and translation into up to 43 languages.
With Notta, taking audio notes on your iPhone is simple and effective.
Get started today by downloading the free Notta app here.